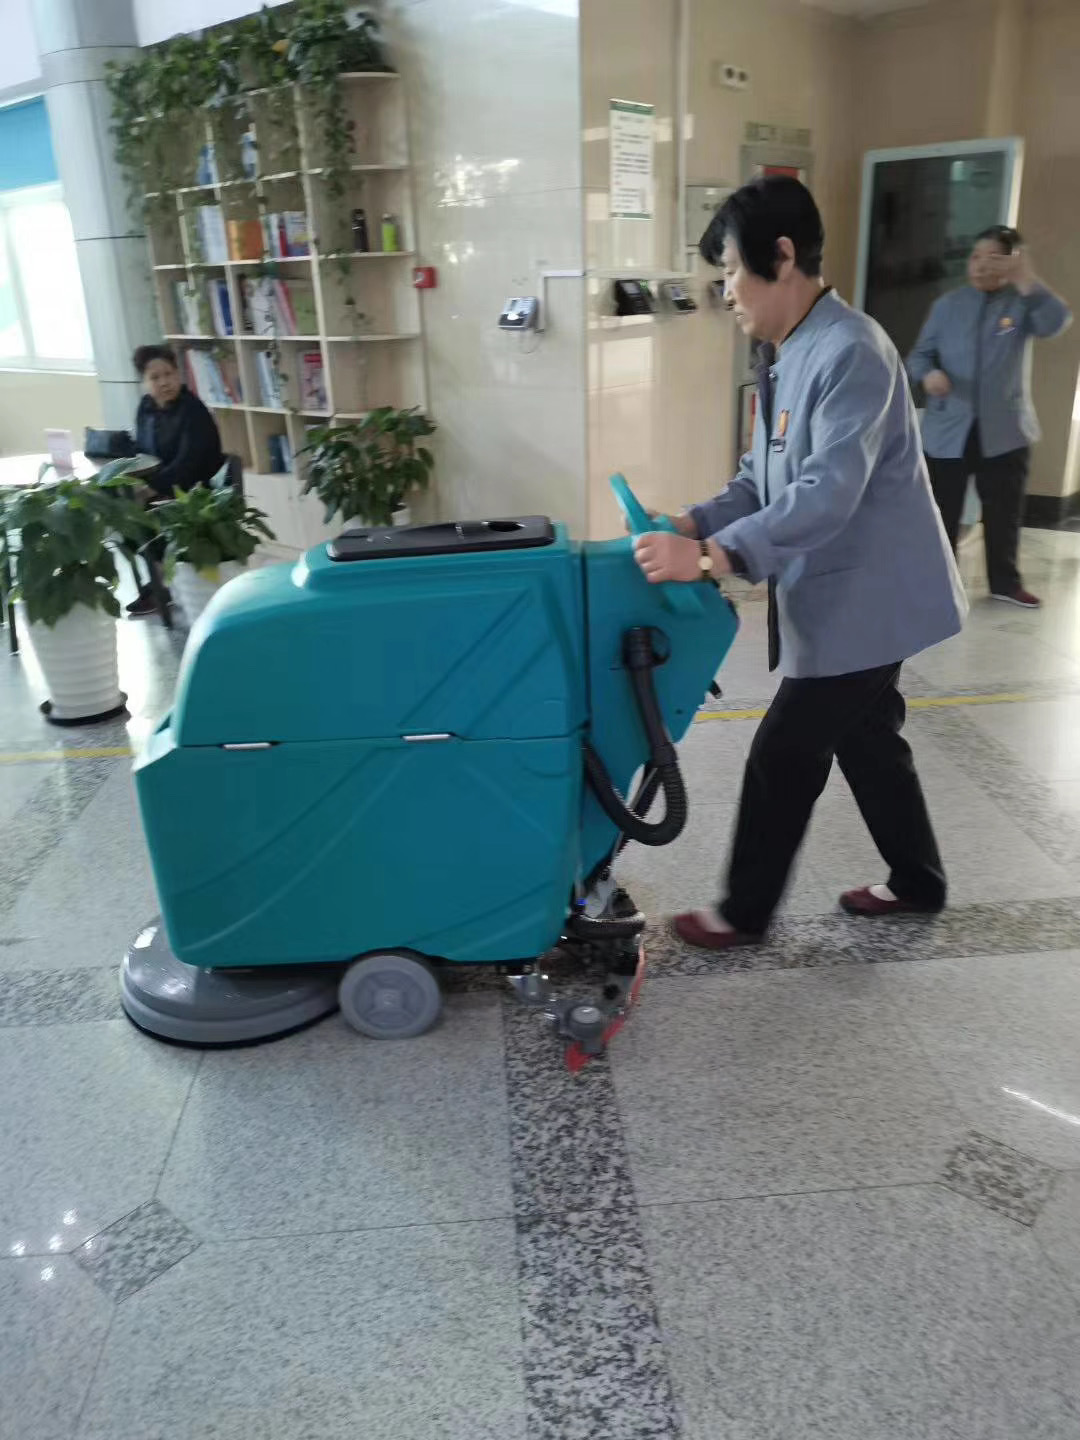
This manual provides step-by-step instructions for operating and maintaining the DC860 Rider Floor Scrubber.
Read this manual carefully before operating the machine. Following these instructions will ensure optimal cleaning performance and extend the service life of the equipment.
General Safety Rules
- This machine must be operated only by trained personnel.
- Do not carry passengers.
- Always remain seated while operating the machine.
Operating Environment
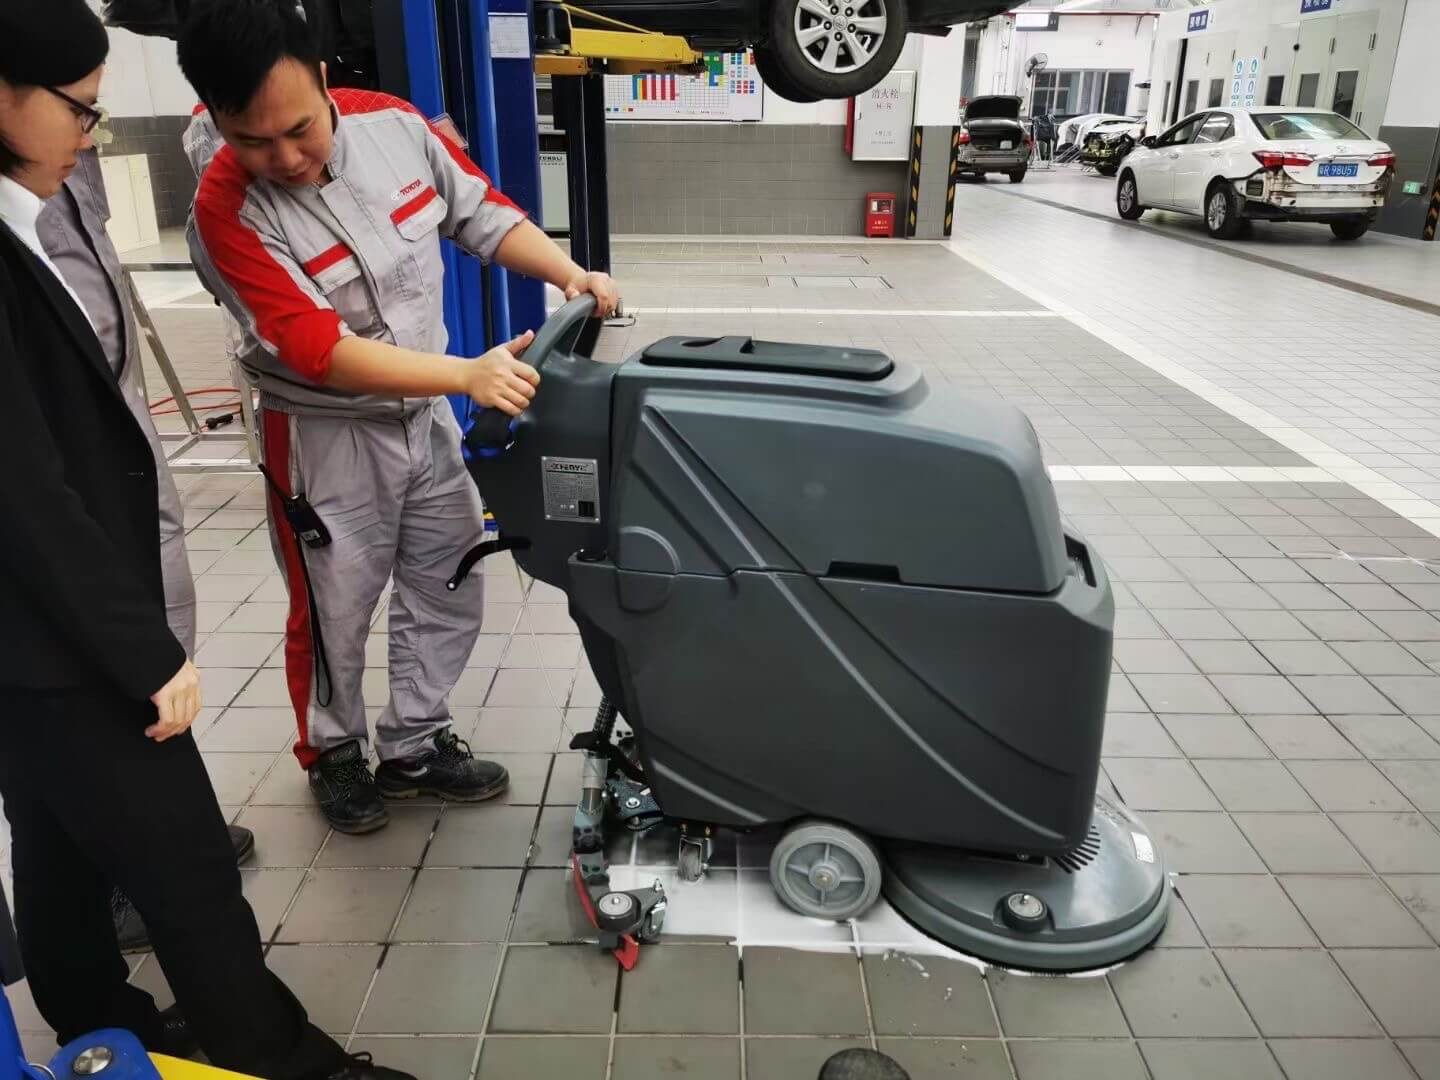
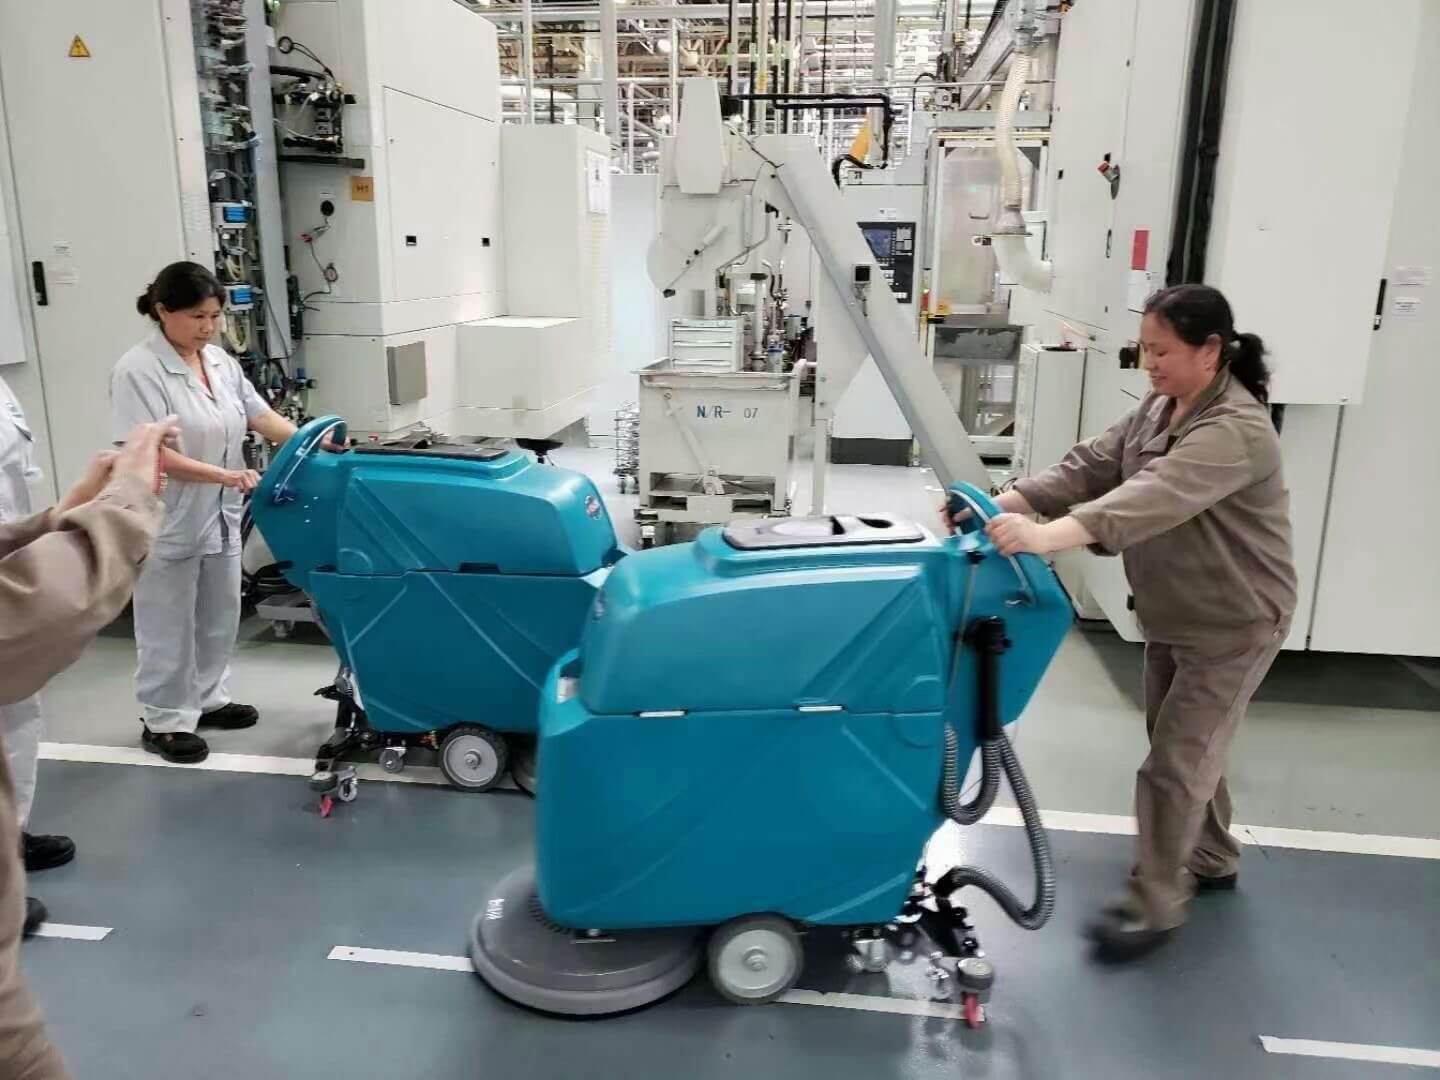
- For use on hard, level floor surfaces only.
- Do not operate in areas with loose debris, flammable liquids, or explosive dust.
- Do not operate on ramps or slopes exceeding the rated capacity of the machine.
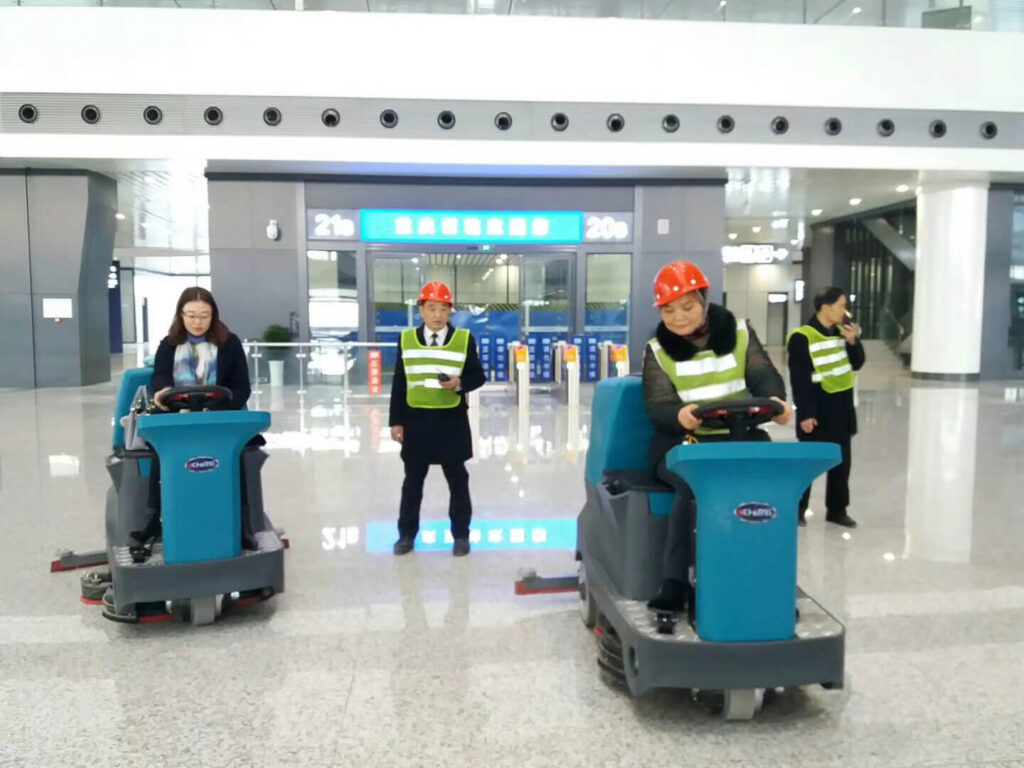
1. Overall Introduction
The DC 860 CY Rider Floor Scrubber is a battery-powered industrial/commercial cleaning machine designed to scrub, wash, and recover dirty water in a single operation.
The rider design improves efficiency and operator comfort during long cleaning tasks.
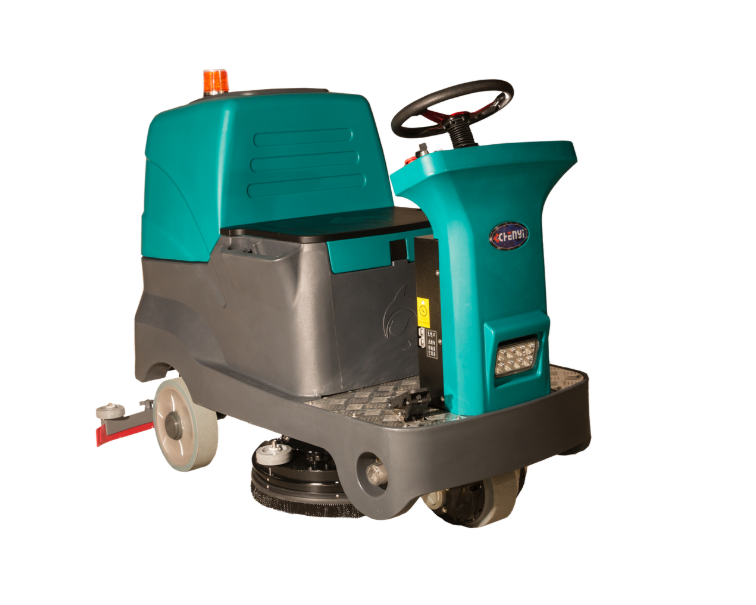
2. Machine Components Overview
2.1 Control and Drive Components
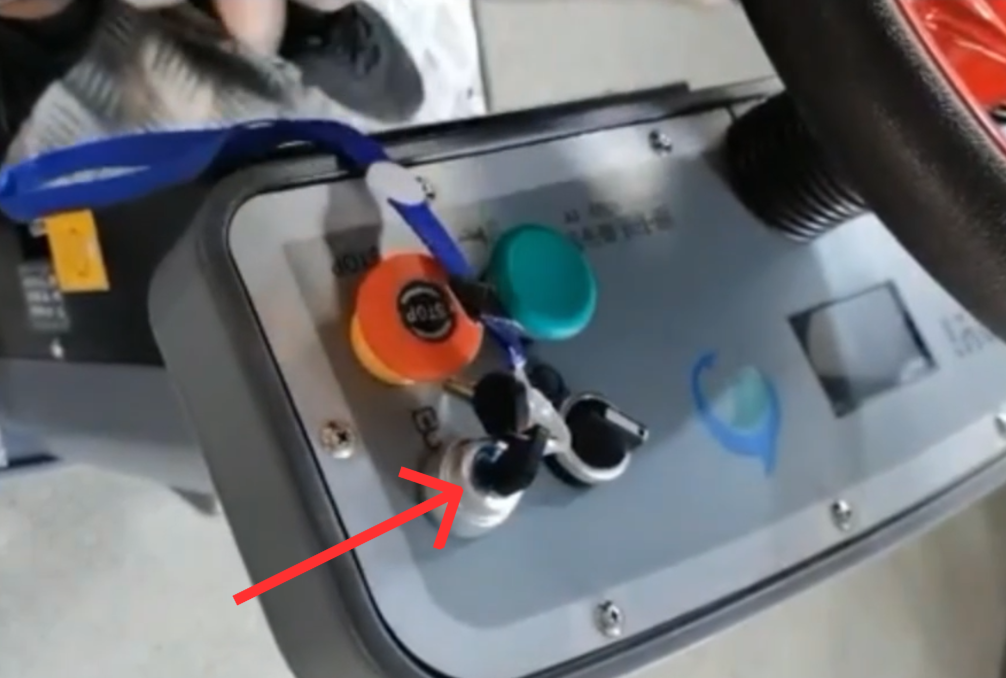
- Intelligent Control Panel – Displays machine status and allows function selection
- Stepless Accelerator Pedal – Controls driving speed smoothly
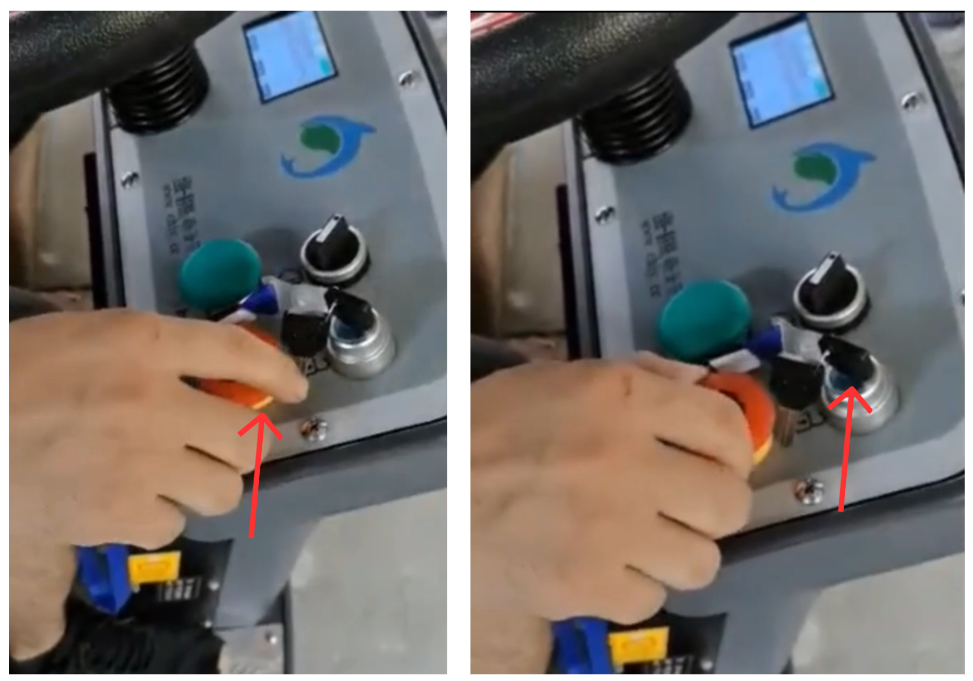
- Emergency Stop Button – Immediately stops the machine for safety
2.2 Water System Components
- Clean Water Inlet – Used to fill the solution tank
- Clean Water Level Pipe – Indicates the clean water level
- Clean Water Filter Valve – Filters debris from clean water
- Brass Clean Water Valve – Controls water flow
- Low-Temperature Resistant Sewage Pipe – Drains wastewater
2.3 Cleaning and Power Components
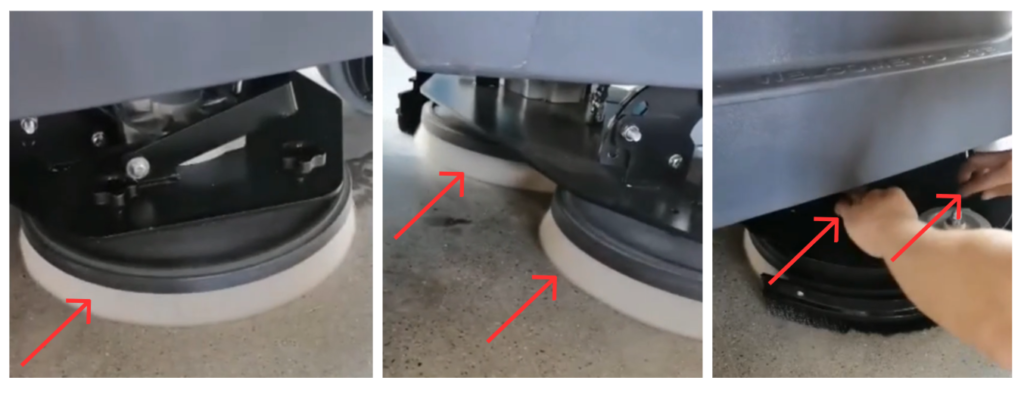
- 17-Inch Brush Plates (Double Brush) – Provide wide and efficient scrubbing
- Squeegee Assembly – Recovers dirty water
- Sewage Tank (Recovery Tank) – Collects wastewater
- Battery System – 100Ah × 4 qualified batteries
3. Prepare Before Use
3.1 Pre-Operation Checklist
- Check battery charge level.
- Inspect squeegee blades for damage.
- Ensure brushes or pads are properly installed.
- Verify the solution tank is filled.
- Filling the Clean Water Tank
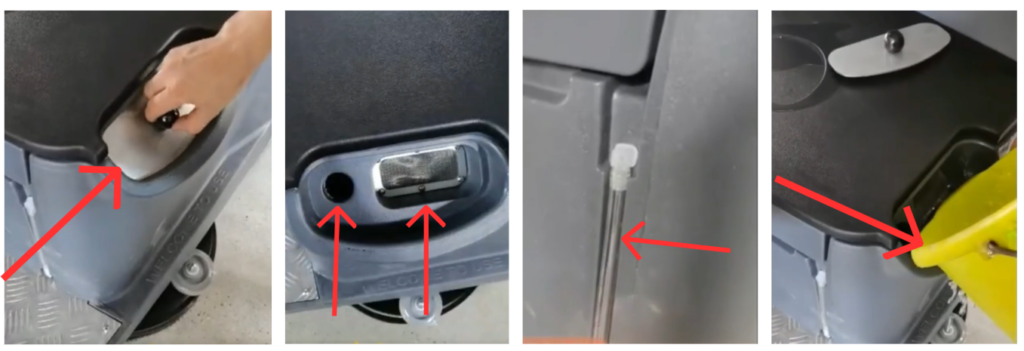
- Open the clean water inlet.
- Add clean water to the solution tank.
- Monitor the clean water level pipe to avoid overfilling.
- Close the inlet securely.
3.2 Powering On the Machine
- Sit in the operator seat.
- Turn the key switch / power switch ON.
- Check that the control panel lights up normally.
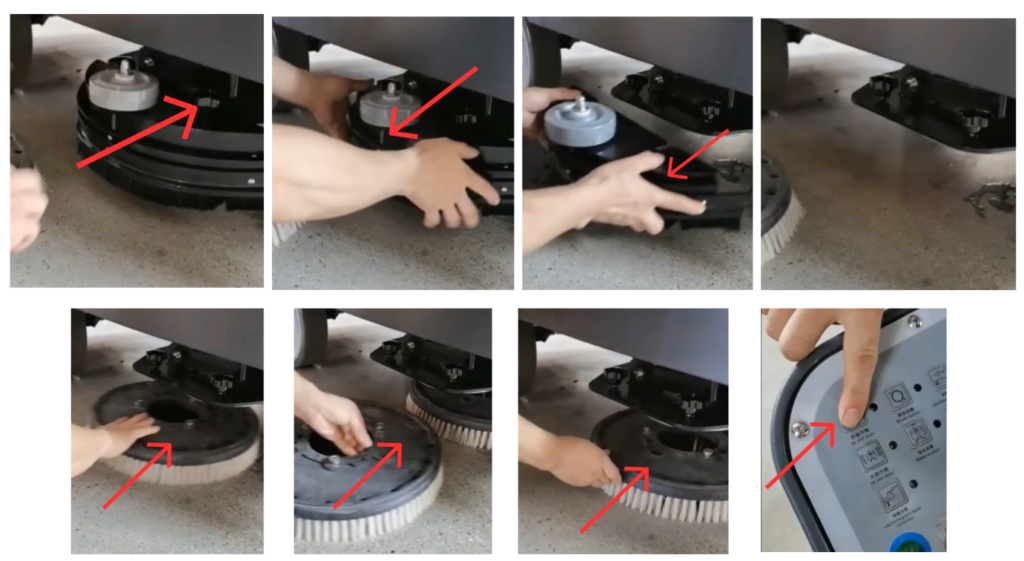
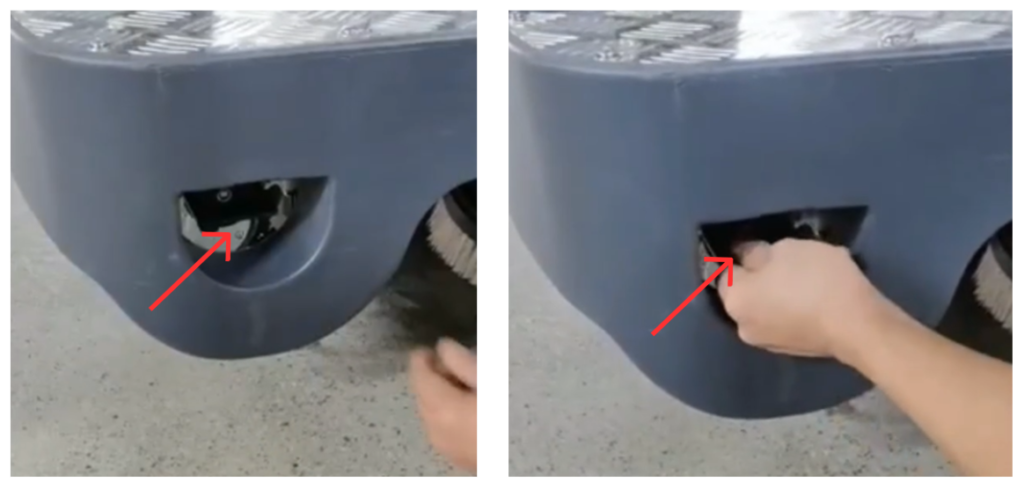
4. Installing the Cleaning Brushes
- Make sure the machine is powered ON and stationary.
- Position the cleaning brushes under the brush plates.
- Lower the brush trays.
- Press the brush button.
- The brushes will rotate and automatically install.
- Confirm the display indicates that the brushes are installed.
5. Adjusting Water Output
- Locate the water output adjustment control.
- Adjust the volume of water according to the floor condition.
- Low water for light cleaning
- Higher water for heavy dirt
6. Starting the Cleaning Operation
Cleaning Procedure
- Start the machine using the power switch.
- Select the desired direction of travel.
- Lower the scrub deck and squeegee.
- Activate solution and vacuum systems.
- Drive forward at a controlled speed.
- Overlap cleaning paths slightly for best results.
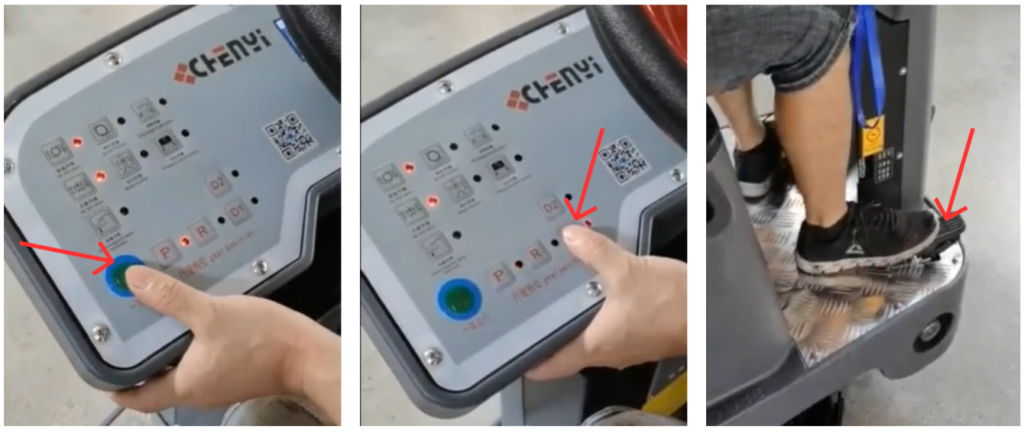
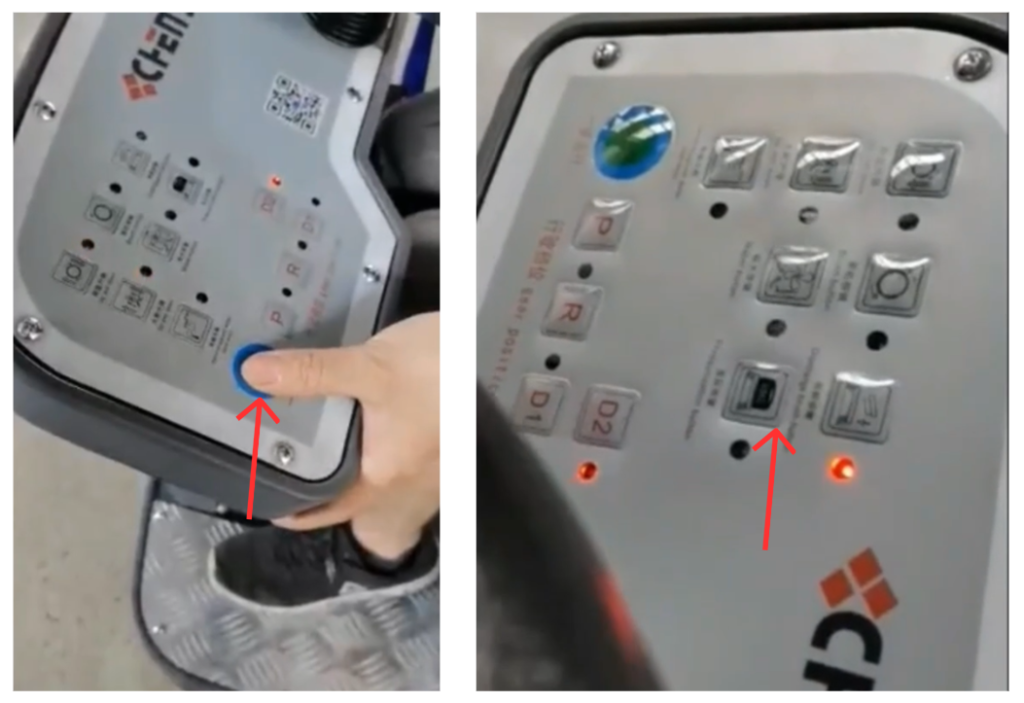
6.1 Starting the System
- Press the One Key Start button.
- The brush plates and squeegee will automatically lower to the floor.
6.2 Driving Forward and Cleaning
- Press the D (Drive) button to select forward movement. (D1 is slow speed, D2 is fast speed.)
- Slowly press the accelerator pedal.
- The machine will move forward and begin cleaning the floor.
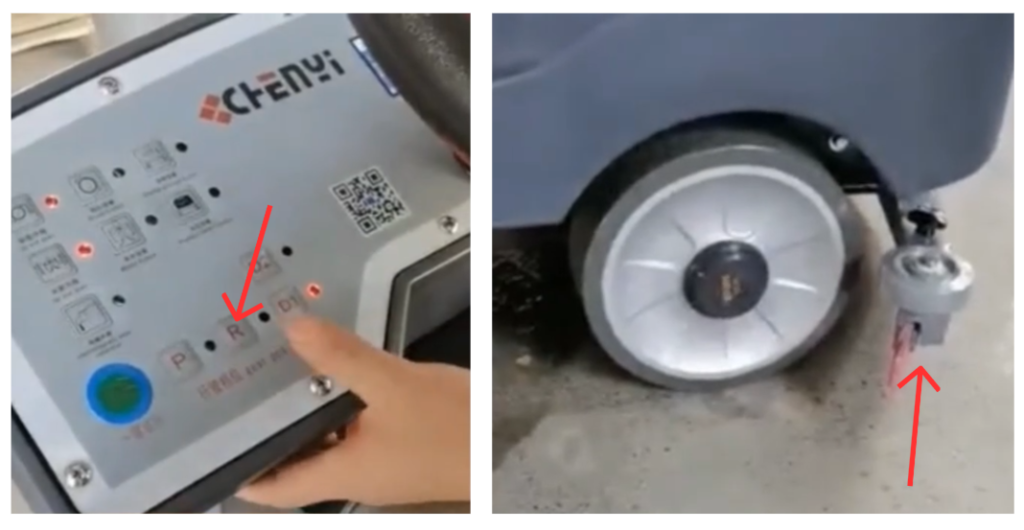
6.3 Driving Backward
- Press the R (Reverse) button.
- The machine will move backward.
- The squeegee and brush trays will automatically raise.
⚠ IMPORTANT
When the machine is moving backward, the squeegee must be raised to prevent damage.
6.4 Resuming Forward Cleaning
- Press the D button again.
- The squeegee and suction system will automatically lower.
- Continue cleaning by pressing the accelerator pedal.
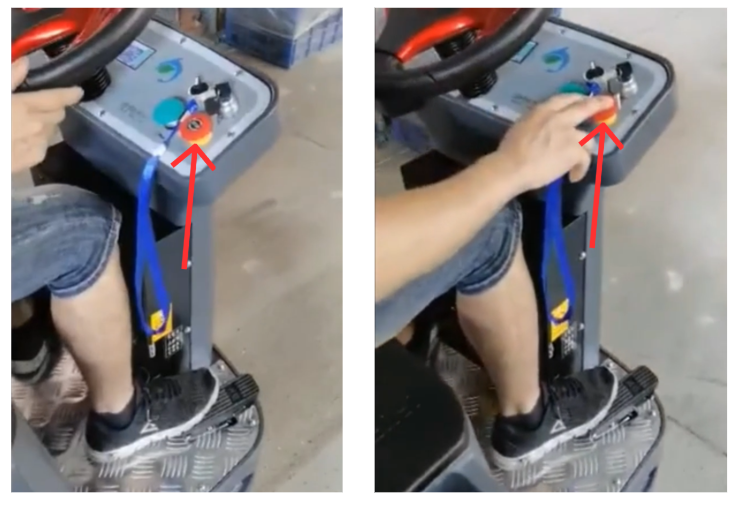
7. Emergency Stop Function
7.1 Emergency Stop Operation
- Press the Emergency Stop Button immediately in an emergency.
- All machine functions will stop instantly.
This design prevents accidental acceleration during emergency situations.
7.2 Resetting After Emergency Stop
⚠ WARNING
- After an emergency stop, the system will be locked for safety reasons.
- Manually rotate the emergency stop button to release it.
- Restart the machine before resuming operation.
8. Ending the Cleaning Operation
- After finishing cleaning, press the One Key Start button to stop the machine.
- The suction cup and squeegee will automatically raise.
- Press the brush button to uninstall the brushes.
9. Draining and Cleaning After Use
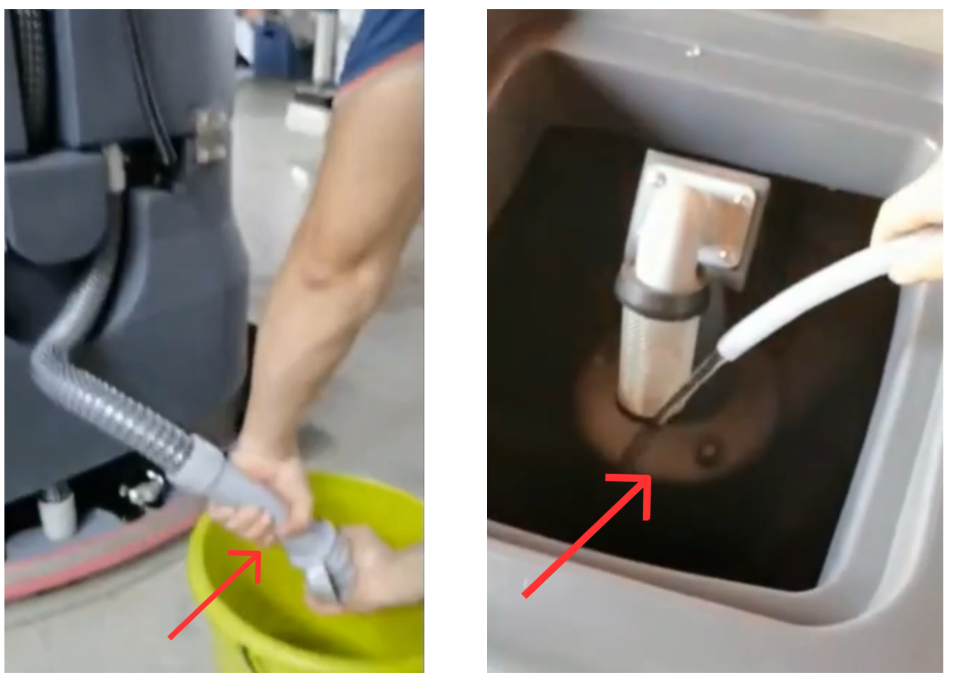
9.1 Draining the Sewage Tank
- Turn the machine OFF.
- Open the sewage pipe cover.
- Drain all wastewater completely.
9.2 Cleaning the Sewage Tank
- Flush the waste tank with clean water.
- Remove dirt and residue thoroughly.
9.3 Cleaning the Squeegee
- Remove the squeegee assembly.
- Clean the squeegee blades with clean water.
- Reinstall after cleaning if required.

10. Powering Off and Charging
10.1 Powering Off
- Turn the key switch OFF.
- Ensure the machine is completely shut down.
10.2 Charging the Battery
⚠ WARNING
Always turn the machine OFF before charging.
- Connect the charger to the machine charging port.
- Plug the charger into a grounded power outlet.
- Allow the batteries to charge fully.
- When the charging indicator light turns green, charging is complete.
- Disconnect the charger before the next use.

11. Routine Maintenance
11.1 Daily
- Empty and rinse recovery tank
- Clean squeegee and brushes
11.2 Weekly
- Check solution filter
- Inspect hoses and fittings
11.3 Monthly
- Inspect electrical connections
- Check fasteners and moving parts
11.4 Battery Maintenance
- Only use batteries approved by the manufacturer.
- Charge batteries in a well-ventilated area.
- Never operate the machine with damaged battery cables.
- Disconnect batteries before servicing.
- Recharge batteries after each shift
- Do not allow batteries to fully discharge regularly
- Keep battery terminals clean and dry
This machine is equipped with optional sealed lead-acid batteries featuring maintenance-free operation, no routine servicing, and automatic pressure-relief protection.
General Charging Principles
- Charge after each use. Recharge the battery as soon as the machine finishes operating.
- Do not deep discharge frequently. Avoid running the battery down to its minimum protection voltage.
- Use as you charge, charge as you use. Frequent partial charging is recommended to maximize battery life.
1. What Is a Short Circuit and How Does It Affect Battery Performance?
A short circuit occurs when the positive and negative terminals are directly connected, either externally or internally within the battery, causing a high current flow.
Effects of a Short Circuit:
- During charging, battery voltage rises very slowly and remains at a low level
- Electrolyte temperature increases rapidly and excessively
- Electrolyte density increases slowly or shows little to no change
- During discharge, terminal voltage drops quickly
Short circuits can cause severe damage, overheating, and permanent loss of battery capacity.
2. What Is Over-Discharge and How Does It Affect Battery Performance?
Over-discharge occurs when the battery continues discharging after reaching its minimum operating voltage.
Effects of Over-Discharge:
- Battery voltage drops sharply in a short time
- Internal chemical reactions become unstable
- Repeated over-discharge causes the positive plates to lose activity
- Battery service life is significantly reduced
- Operating time decreases and charging time increases
To protect battery life, avoid repeated deep or over-discharge conditions.
3. How Should the Battery Be Stored After Use?
Batteries are sensitive components. If the machine will not be used for an extended period:
- Remove the battery from the machine
- Store it in a dry, well-ventilated location at room temperature
- Avoid leaving the battery installed, as connected electrical components and circuit boards may cause continuous micro-discharge, even when the machine is powered off
Proper storage helps prevent capacity loss and premature aging.
4. Why Does Battery Life Become Shortened?
Common causes of reduced battery life include:
- Insufficient charging over long periods
- Leaving the battery uncharged for extended periods after discharge
- Frequent over-discharge during operation
- Using a non-standard or non-approved charger, leading to over-charging
- Voltage imbalance between batteries within a battery pack
- Long-term operation under low-voltage conditions
To ensure optimal performance and service life, always use the specified charger and follow the recommended charging and usage practices.
12. Storage and Long-Term Shutdown
- Fully charge batteries before storage.
- Drain solution and recovery tanks.
- Store the machine indoors in a dry environment.
- Recharge batteries every 30 days during long-term storage.
13. Troubleshooting Guide
| Issue | Possible Cause | Corrective Action |
|---|---|---|
| Machine does not move | Parking brake engaged | Release brake |
| Poor water pickup | Squeegee worn or dirty | Clean or replace |
| Short runtime | Batteries not fully charged | Recharge batteries |
| Streaking on floor | Incorrect blade angle | Adjust or replace blade |
14. Parts Replacement Guidelines
Use only original or manufacturer-approved replacement parts, including:
- Brushes and pad drivers
- Squeegee blades
- Filters and hoses
Unauthorized parts may affect performance and warranty coverage.
15. Important Safety and Maintenance Notes
- Always raise the squeegee when reversing.
- Never bypass the emergency stop function.
- Drain and clean tanks after each use.
- Proper operation and maintenance ensure best performance and long service life.