IMPORTANT SAFETY INFORMATION
Read this manual carefully before operating the machine. Keep this manual for future reference. Improper use may result in injury, damage to the machine, or reduced performance.
This machine is designed for industrial and commercial floor cleaning only. It is not intended for residential use.
1. Introduction
Thank you for choosing our Large Rider Sweeper. This machine is engineered for high-efficiency sweeping of large indoor and outdoor areas such as warehouses, factories, logistics centers, parking garages, and shopping malls, combining main brushes, side brushes, and vacuum functions to efficiently remove dust and debris
With proper operation and maintenance, this sweeper will provide reliable performance, excellent dust control, and long service life.
2. Machine Overview
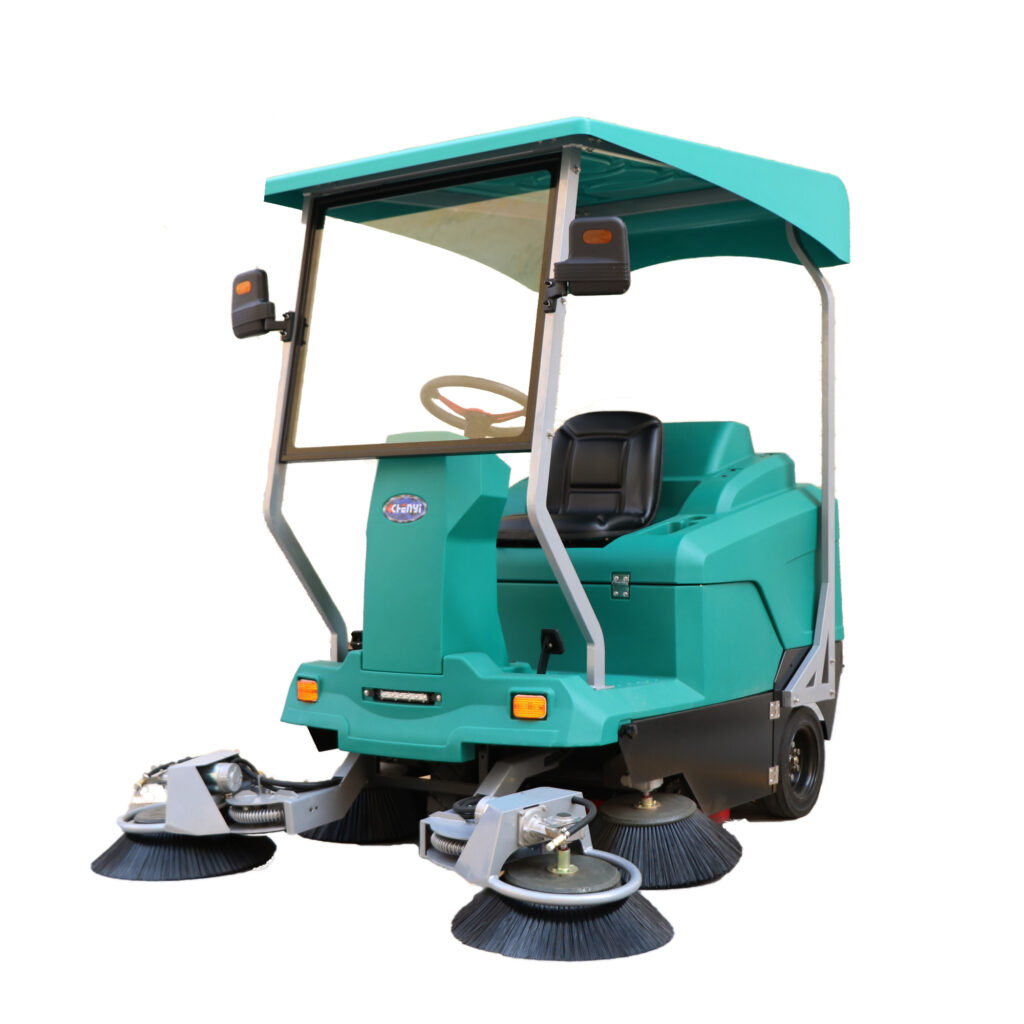
The CY-175 is a rider sweeper with the following features:
- Main and side brushes for sweeping
- Vacuum function for debris collection
- Water spray for dust suppression
- Headlights and turn signals for safe operation
- Easy-to-use gear and pedal control
Suitable surfaces include:
- Concrete
- Epoxy floors
- Asphalt
- Tile
⚠️ Do not use the machine to collect liquids, hazardous materials, flammable substances, or burning objects.
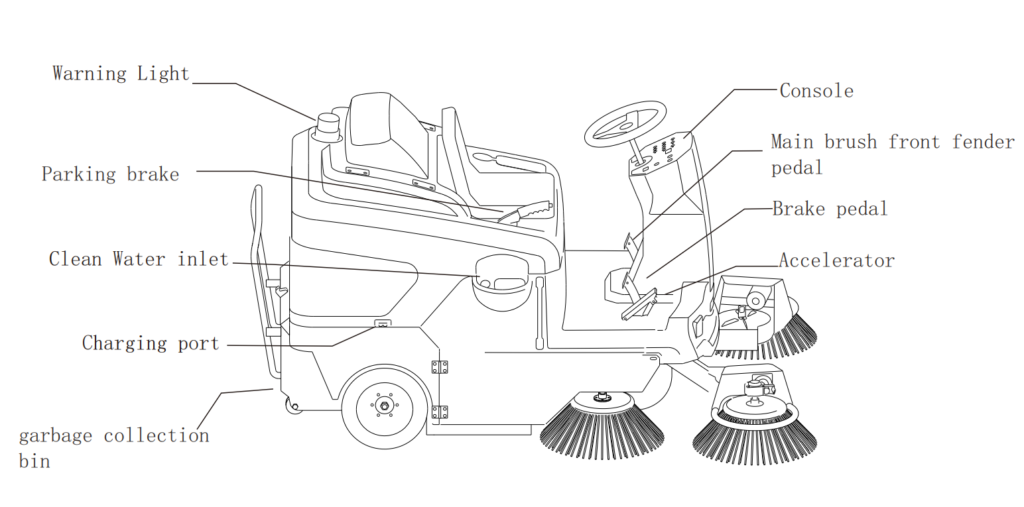
3. Main Components
Model: CYS175
4. Safety Instructions
4.1 General Safety Rules
- Only trained and authorized personnel may operate the machine.
- Do not operate the machine under the influence of alcohol, drugs, or medication that may impair judgment.
- Never carry passengers.
- Do not modify the machine without the manufacturer’s approval.
4.2 Operating Safety
- Inspect the machine before each use.
- Do not operate on slopes exceeding the rated incline.
- Reduce speed when turning or operating on uneven surfaces.
- Keep hands, feet, and loose clothing away from moving parts.
- Do not leave the machine unattended while powered on.
4.3 Battery Safety
Battery-powered models:
- Use only approved chargers.
- Charge in a well-ventilated area.
- Do not expose batteries to sparks or open flames.
5. Pre-Operation Inspection
Before each use, check:
- Battery charge level
- Tire condition and pressure
- Side and main broom condition
- Debris hopper empty and properly installed
- Filters clean and correctly mounted
Do not operate the machine if any abnormal condition is found.
6. Sweeping Operation
6.1. Sit in the operator seat and adjust it for comfort.
6.2. Ensure the parking brake is engaged.
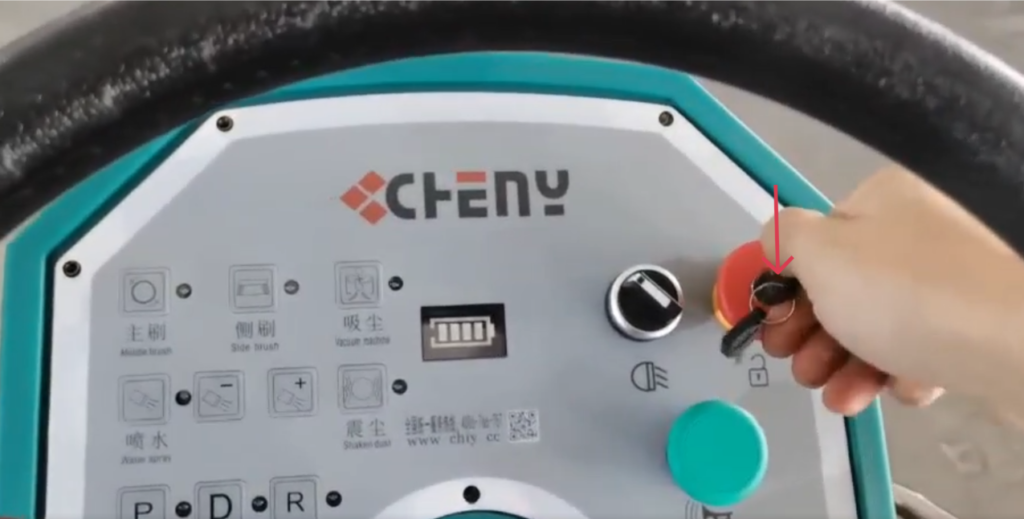
6.3. Turn on the Key Switch
Insert the key and turn on the machine.
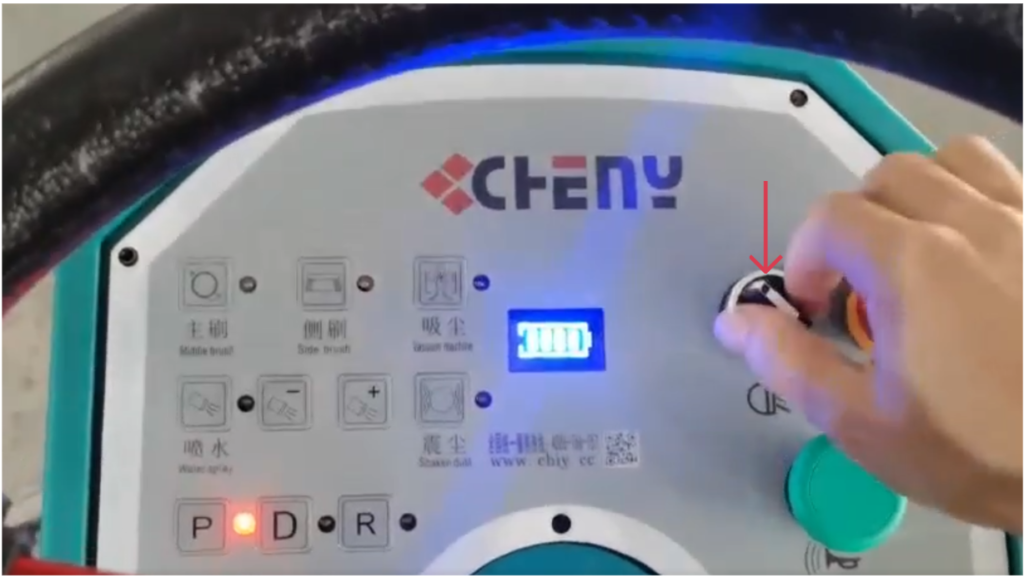
6.4. Turn on the Headlights (Optional)
Rotate the black rotary switch to turn the LED front lights on or off.
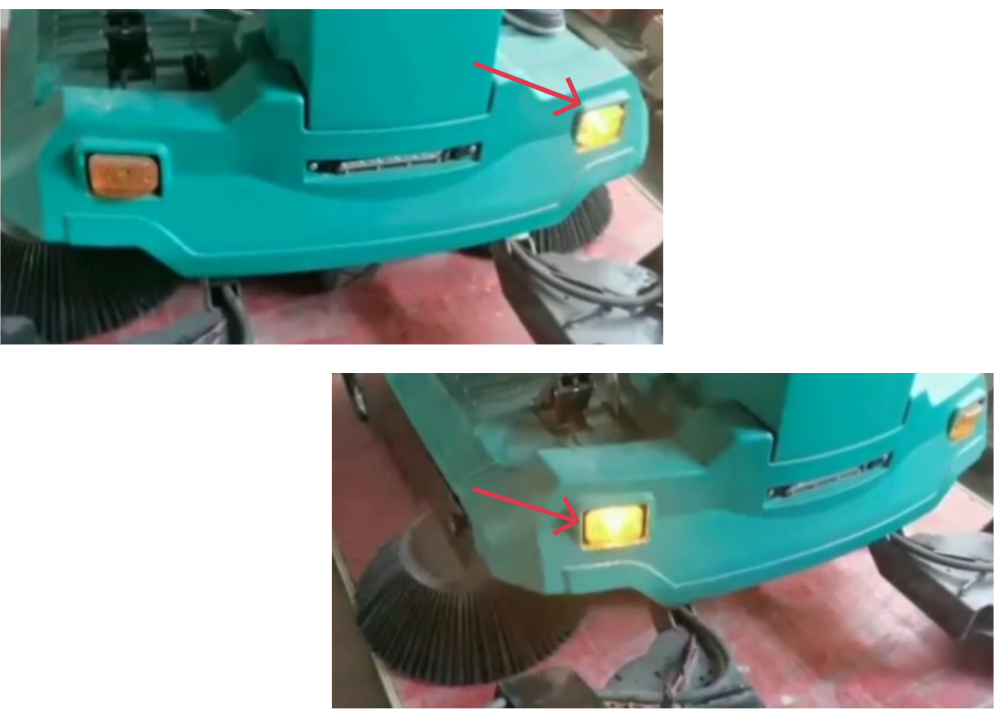
6.5. Check Turn Signals and Horn
Press the turn signals to test it.
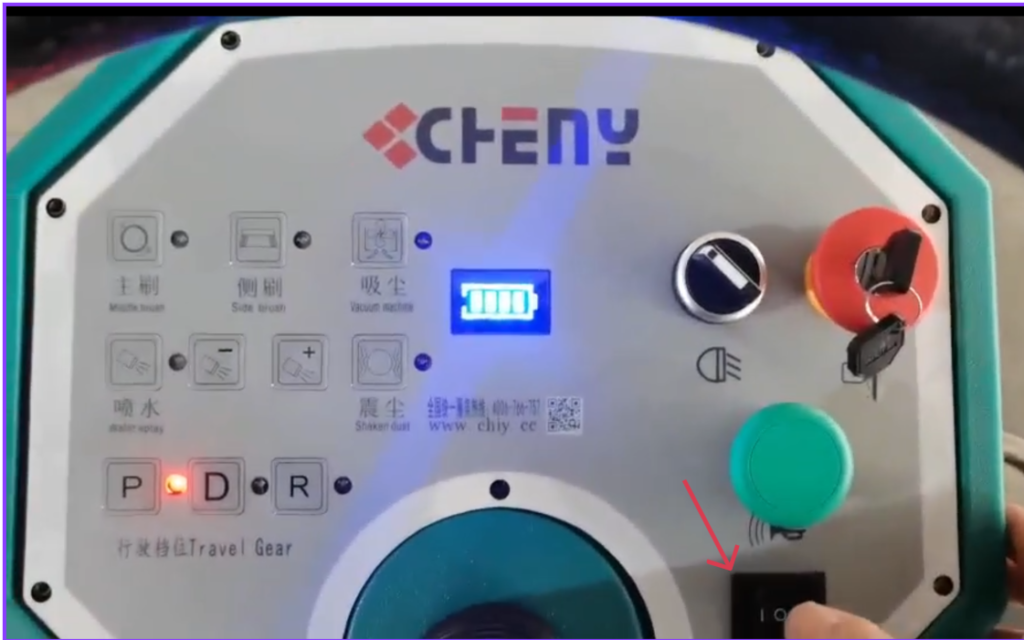
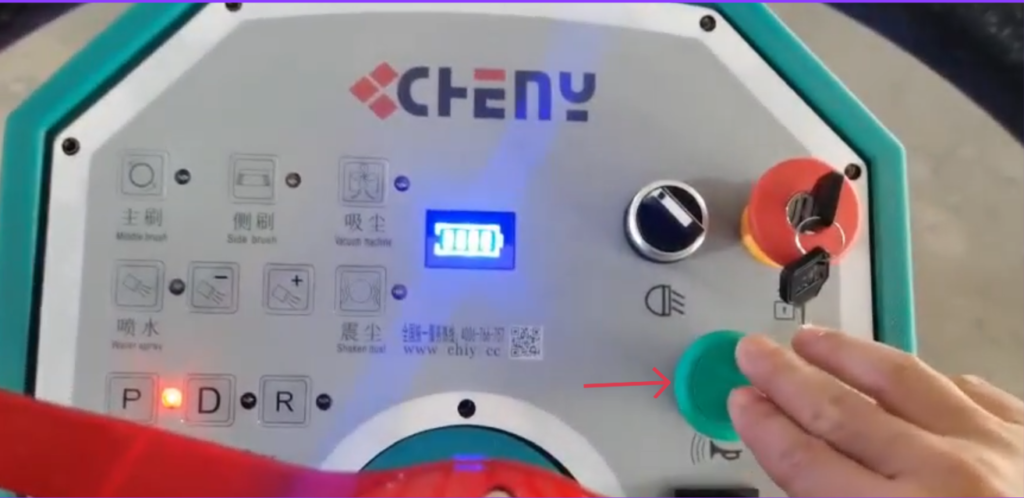
6.6 Press the green button to test the horn.
6.7. Release the parking brake.

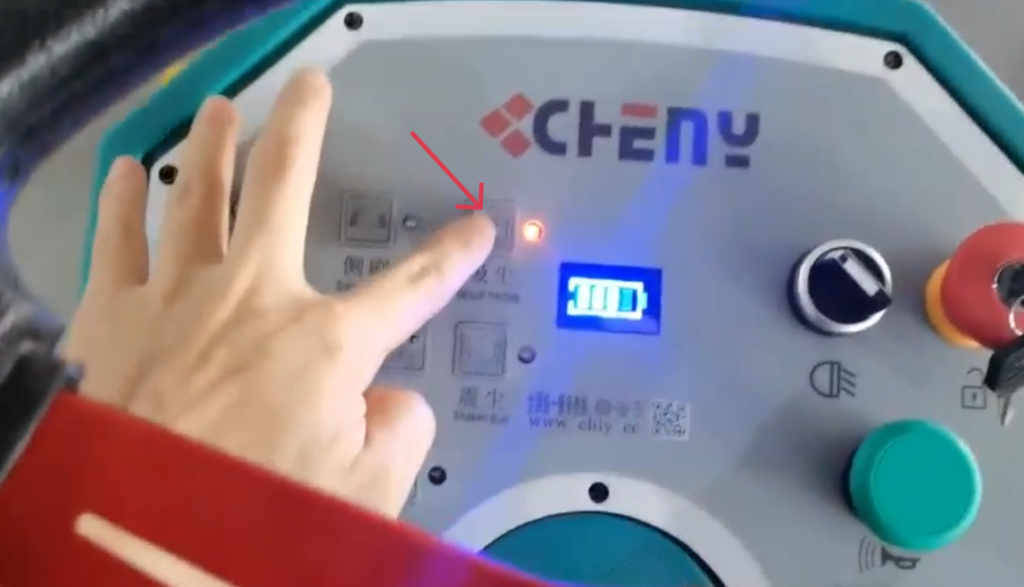
6.8. Activate Brushes and Vacuum
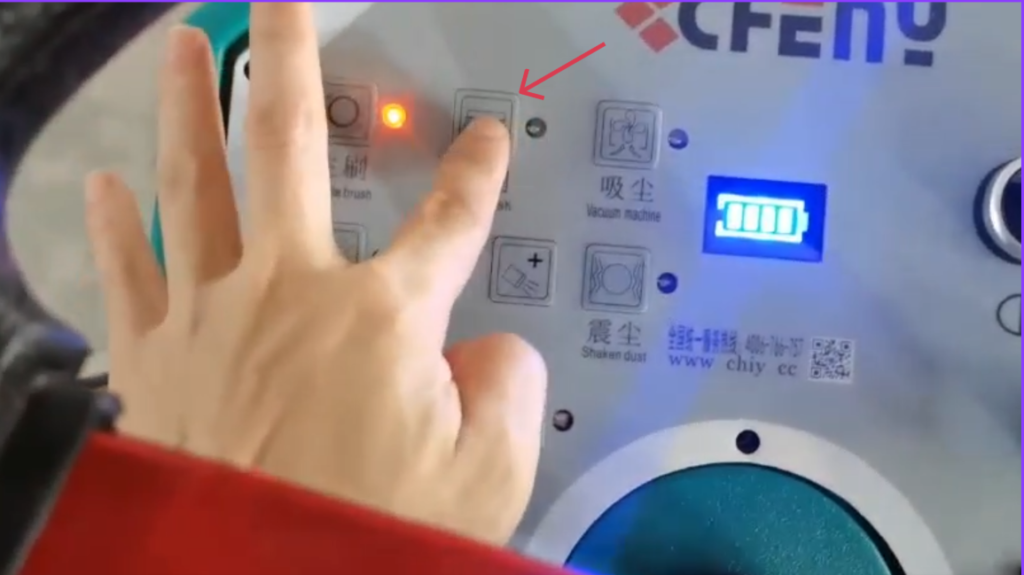
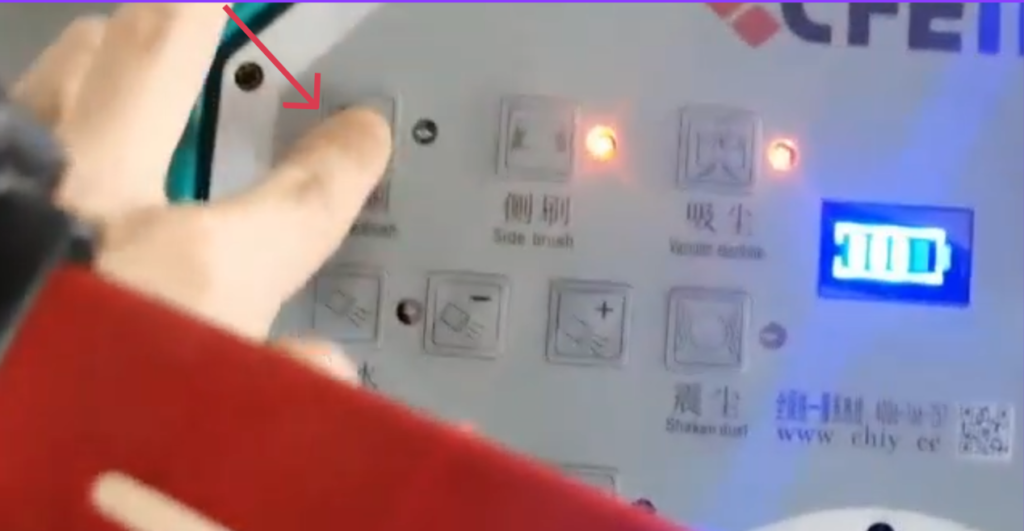
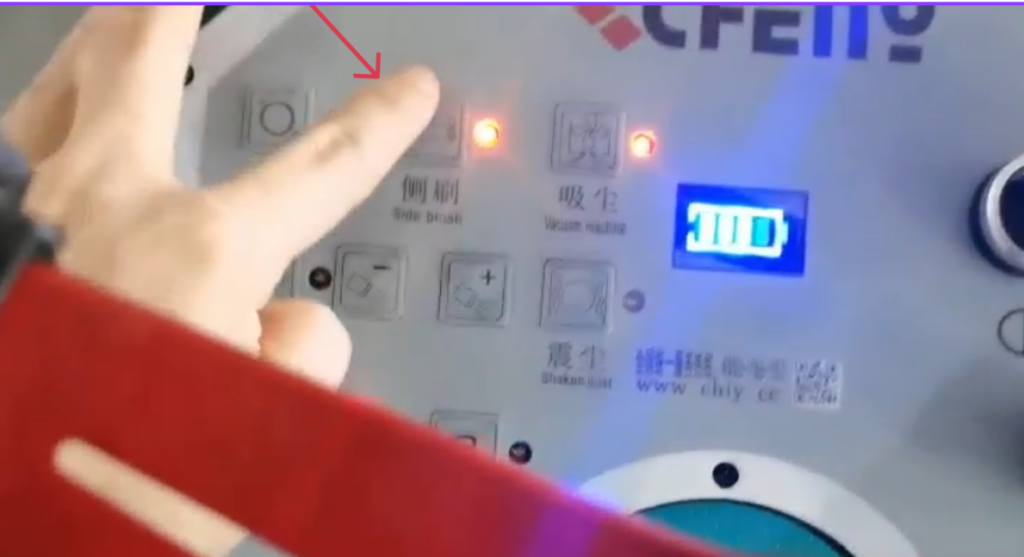
Press the Main Brush, Side Brush, and Vacuum switches in sequence.
This starts the main brush, side brushes, and vacuum system.
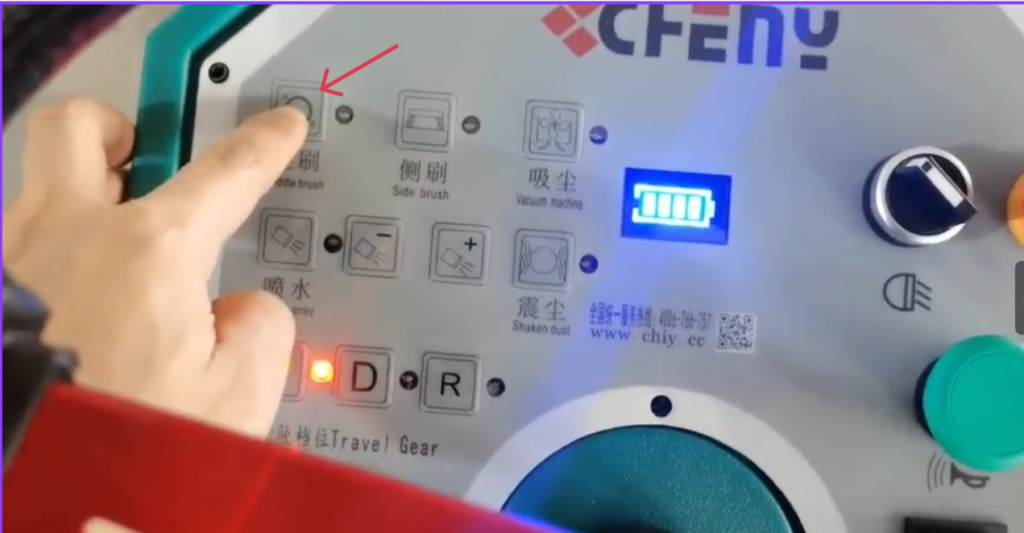
Lower the side brooms and the main broom.
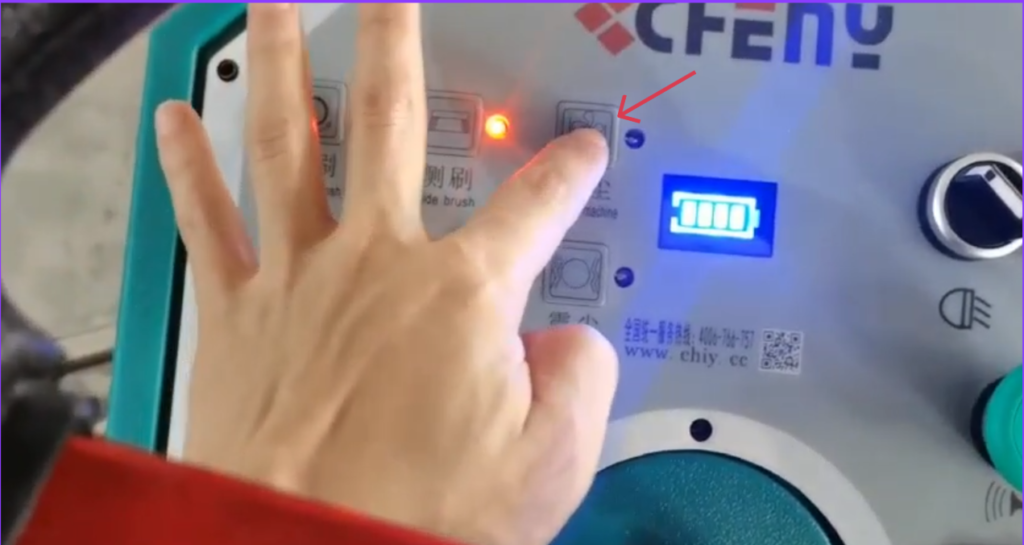
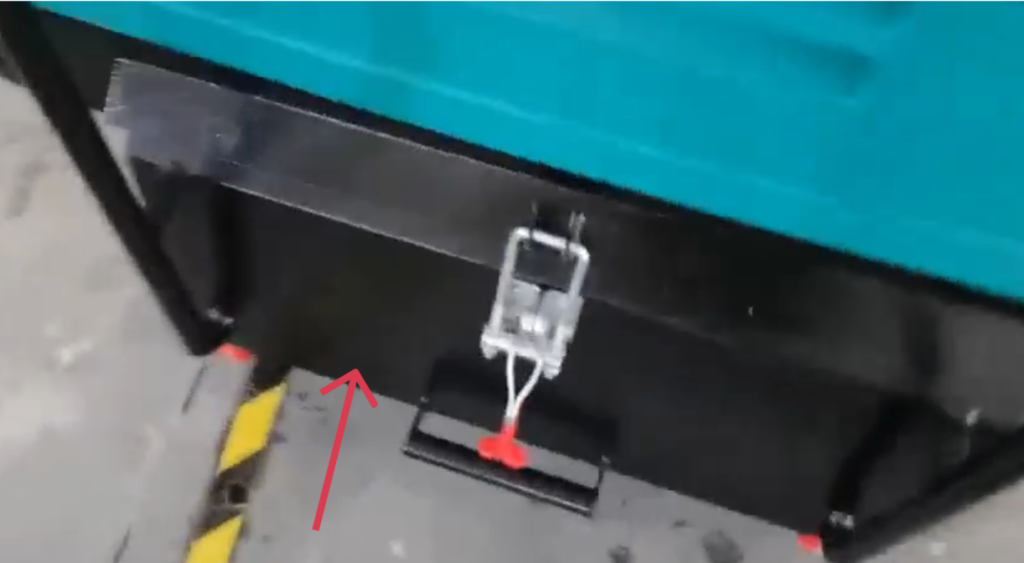
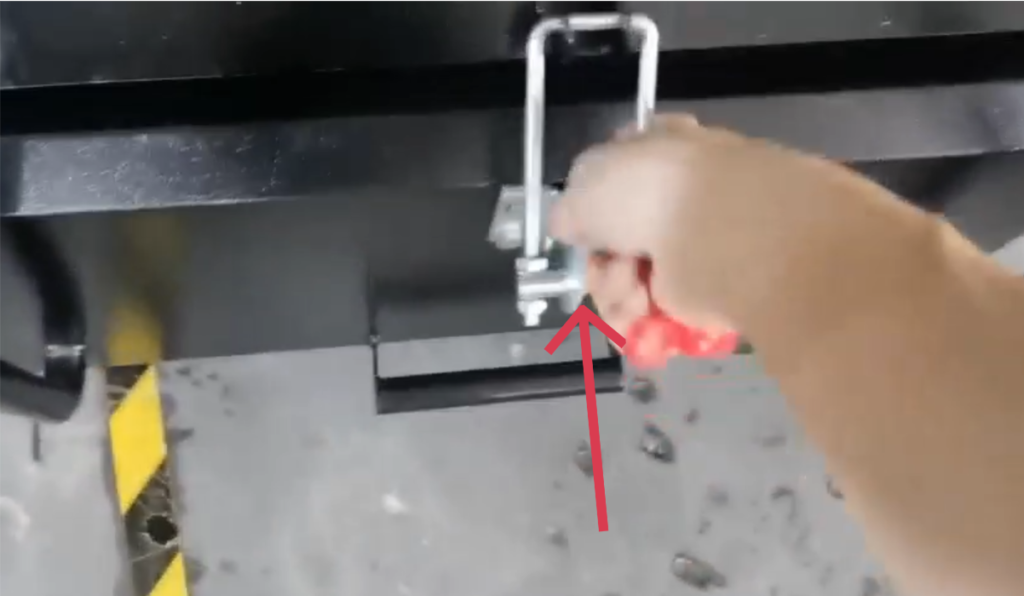
6.9. Set Water Spray (Optional)
- Turn on the water spray switch if desired.
- Adjust water volume with the +/- control according to road conditions.
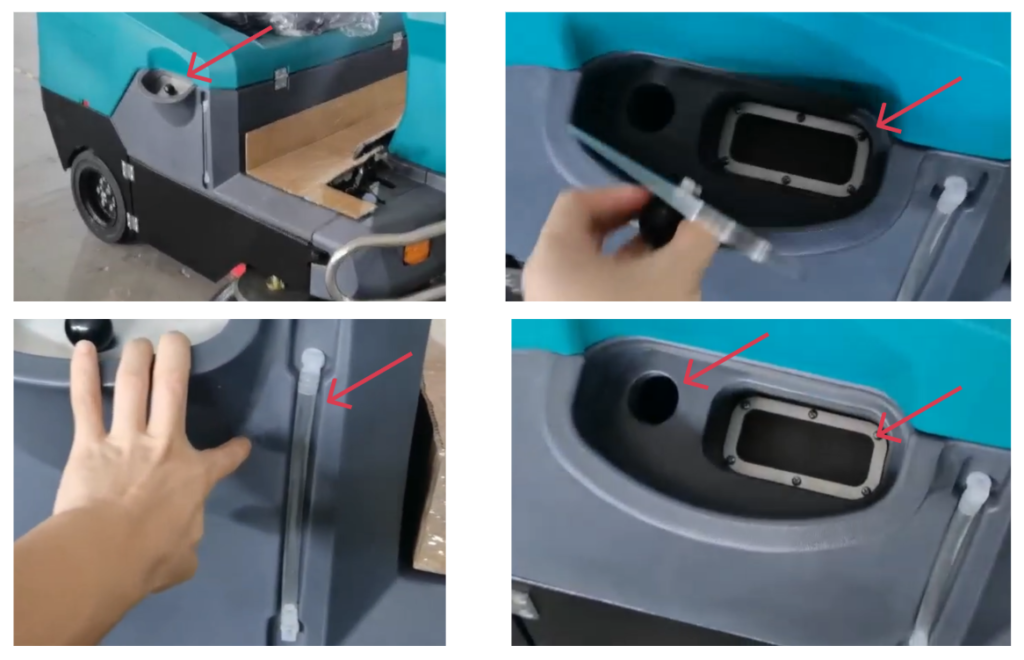
The water filling port for the water spray. It has a visible water level pipe.
7. Starting the Machine
Release the parking brake.
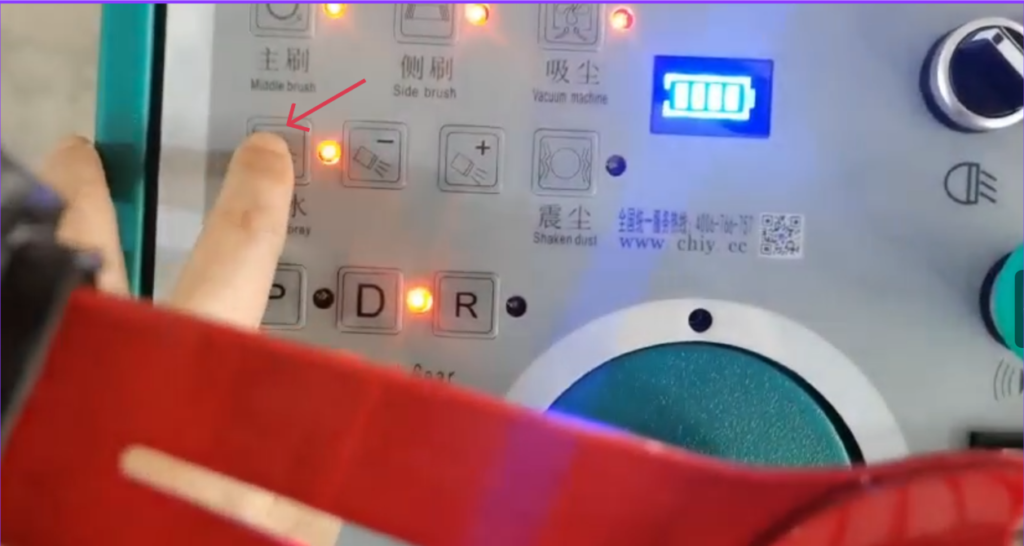
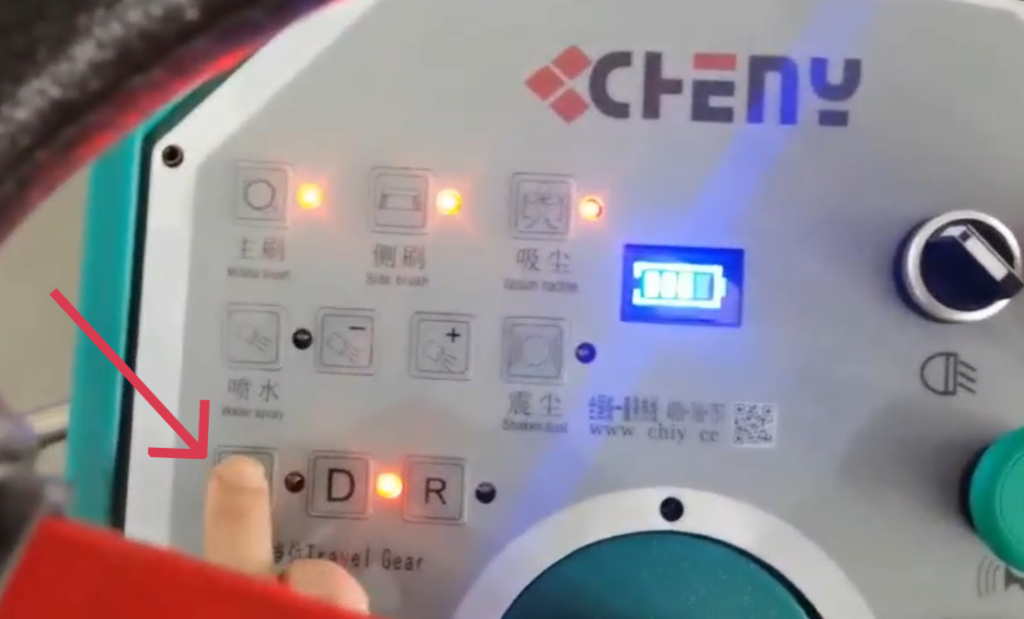
Select Gear
- P = Park
- D = Forward
- R = Reverse
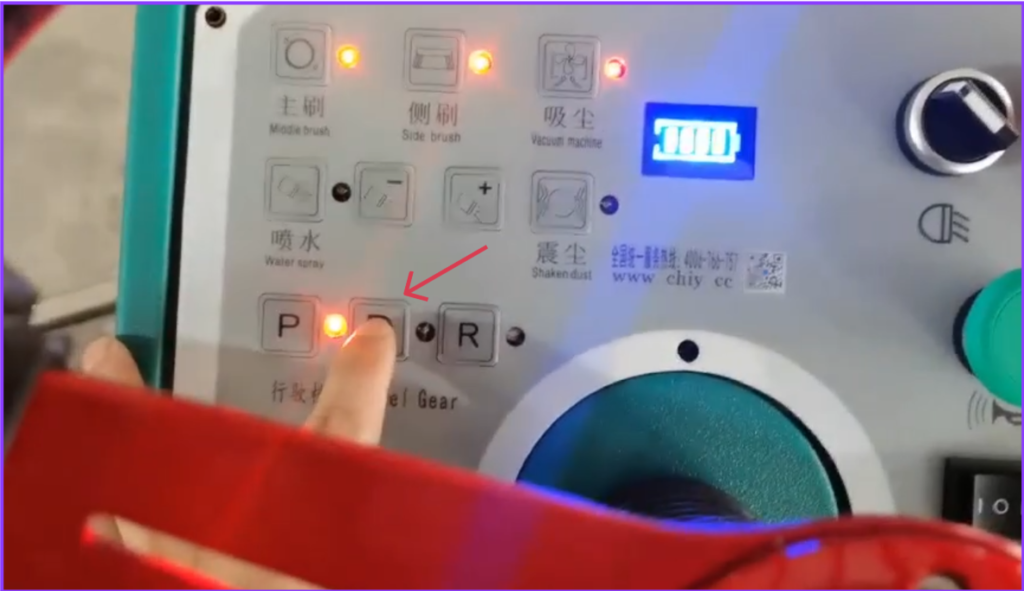
After setting D or R, press the brake pedal to start moving forward or backward.
Adjust driving speed according to debris level and floor condition.
For corners and edges, ensure side brooms are engaged.
💡 Best Practice: Sweep slowly for heavy debris
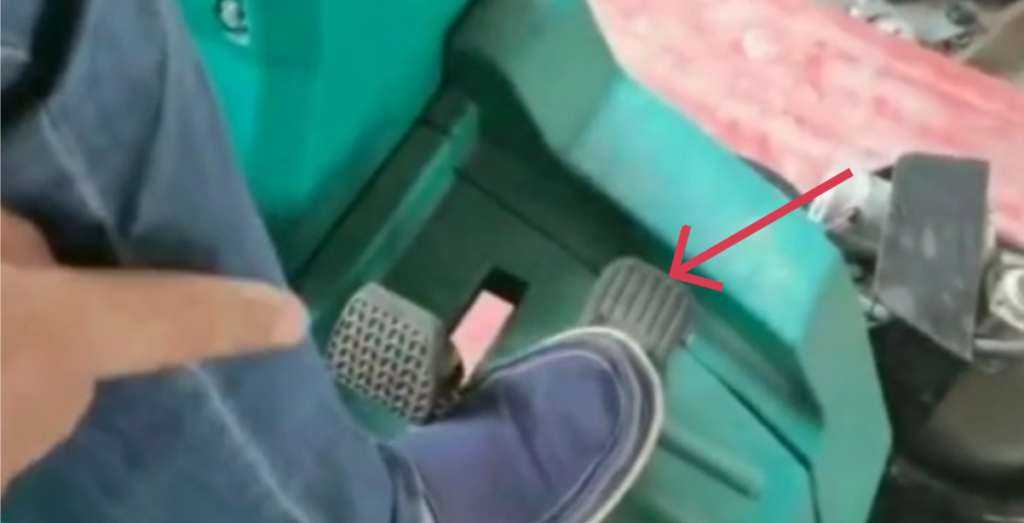
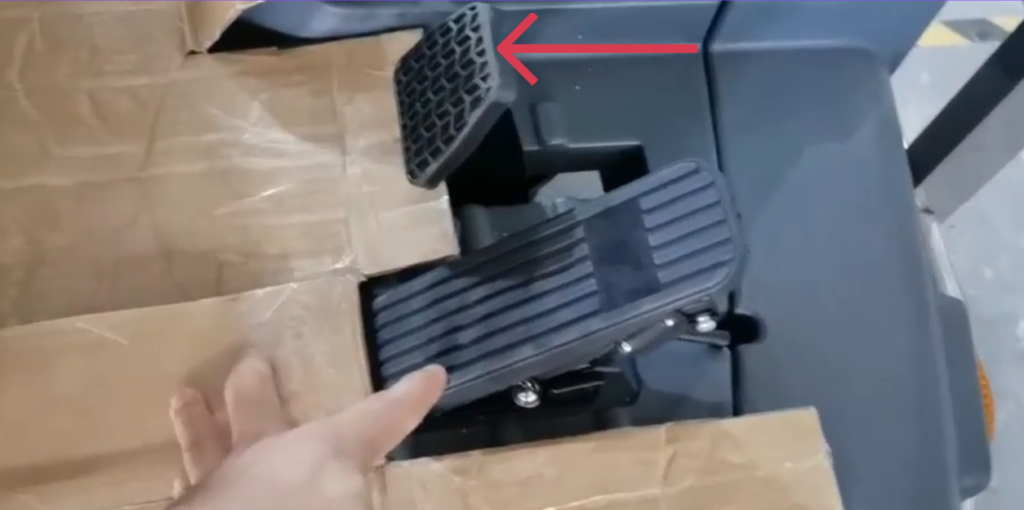
Press the accelerator pedal gently.
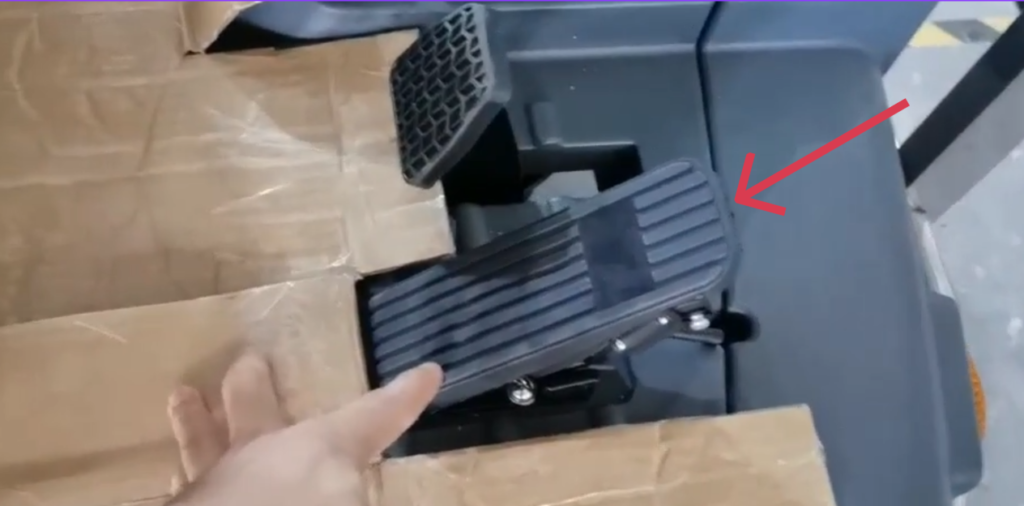
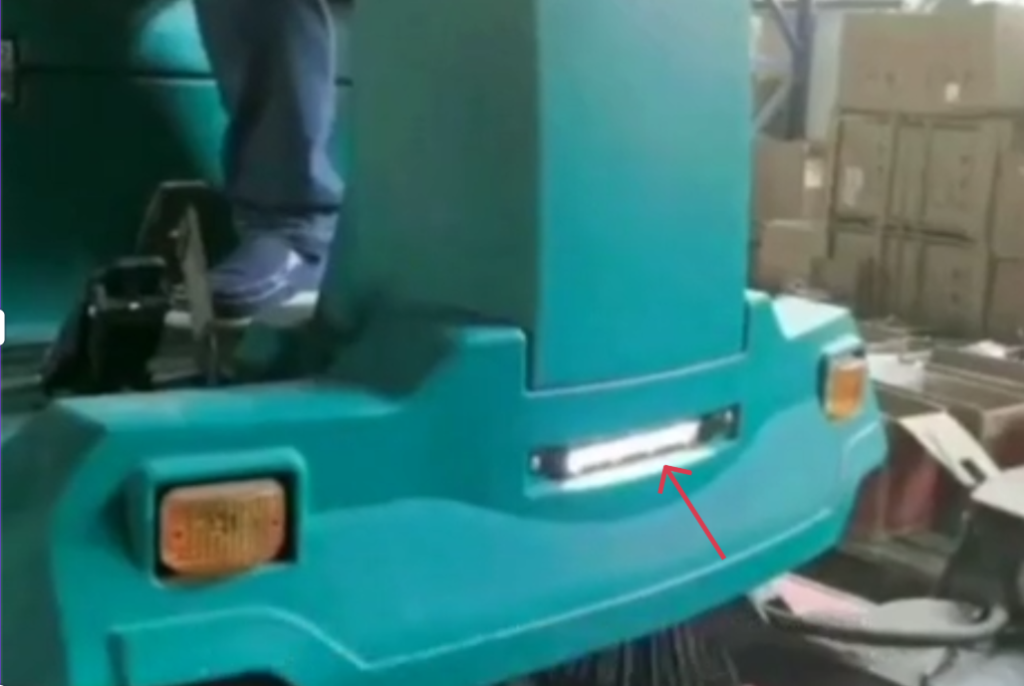
Bumper pedal:
When there are large pieces of trash, such as large bricks or obstacles, step on it to make the large pieces of trash go into the trash can.
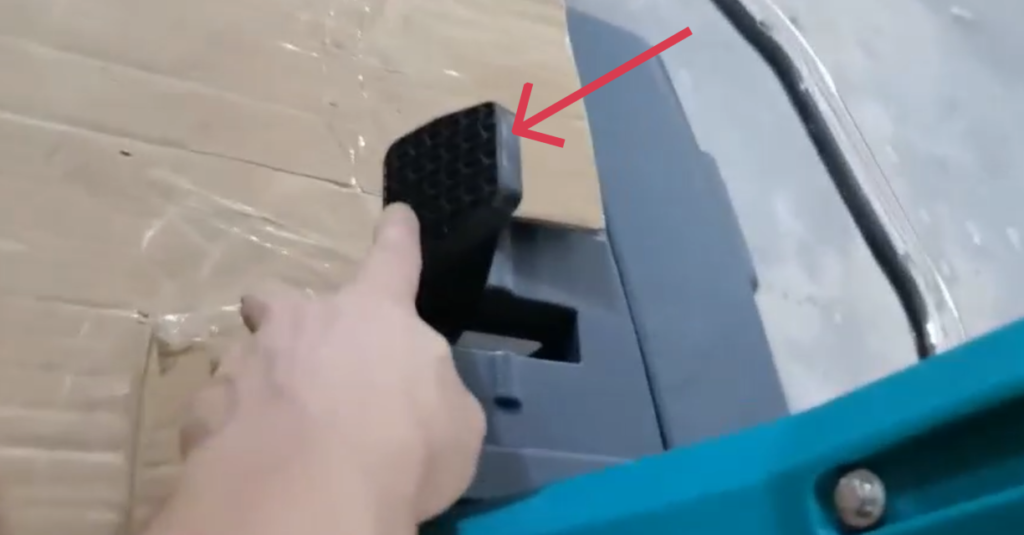
Braking device:
8. Clean Floors
- Drive over the area to be cleaned, letting the brushes and vacuum collect debris.
- Use side brushes to reach corners and edges.

9. Hopper Emptying
Drive to the designated dumping area.
9.1 Stop the machine and engage the parking brake.
9.1.1 Release the accelerator pedal.
9.1.2 Engage the parking brake.
9.1.3 Select Gear P button
P = Park
9.1.4 Turn off brooms.
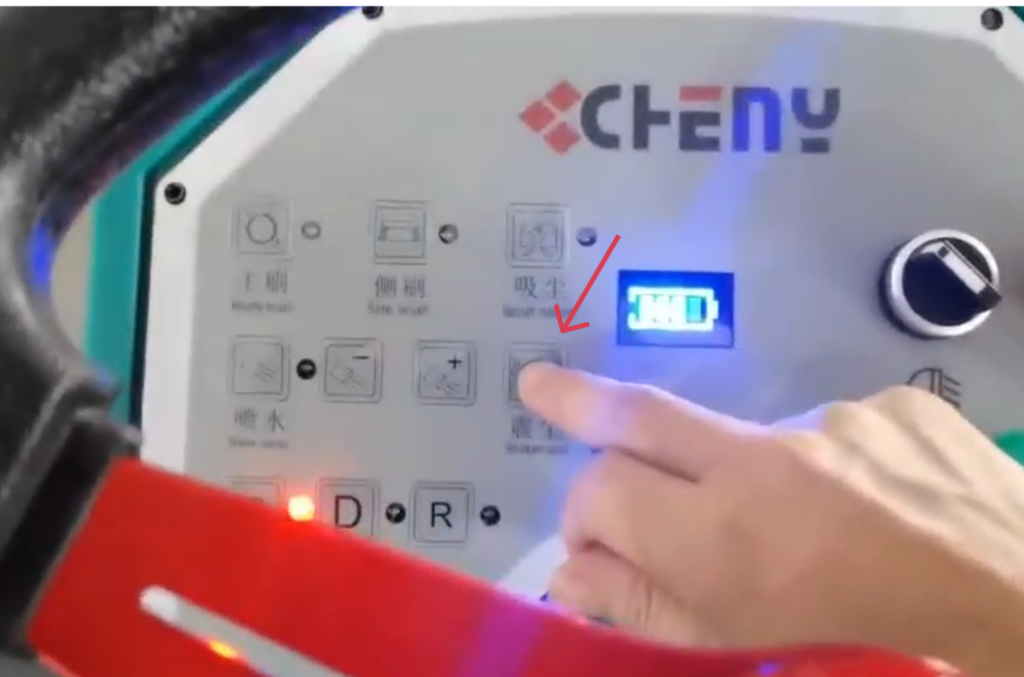
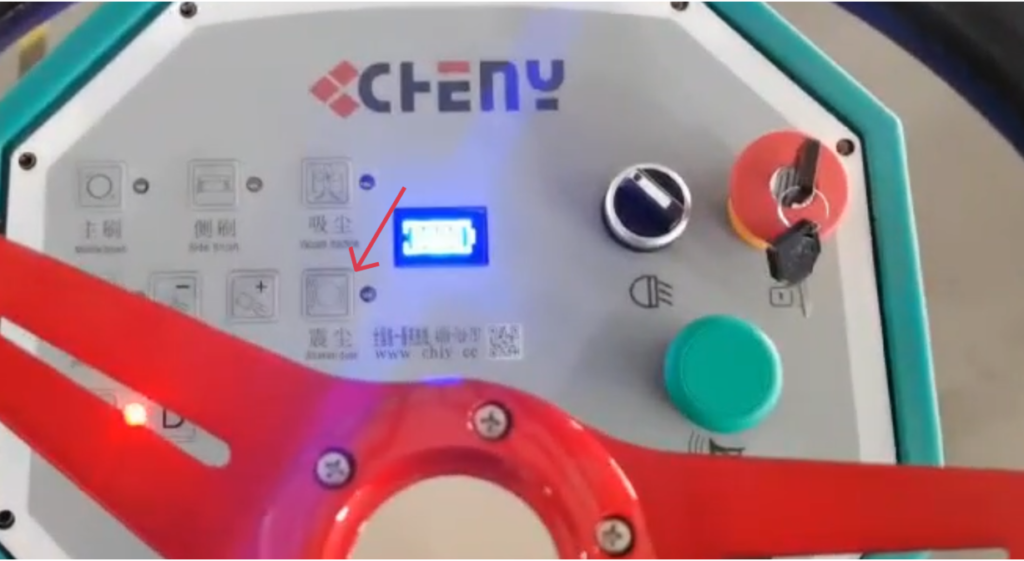
10. Complete Cleaning
- Press the Dust Shake Button to remove dust from brushes.
- The dust shake will automatically shut off upon completion.
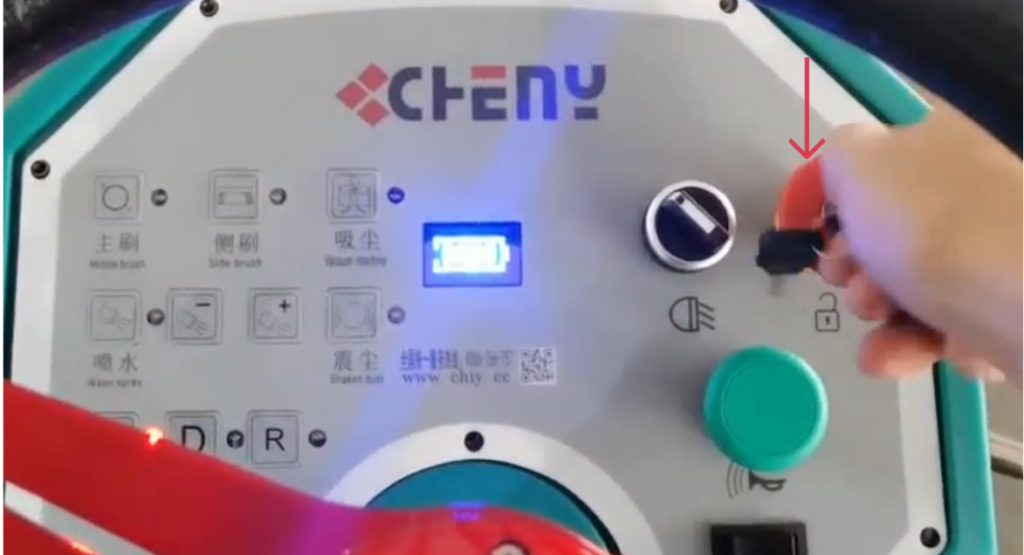
11. Turn Off the Sweeper
Turn the key switch to OFF.
12. Dump the debris completely.
13.Operating Functions and Protection Features
13.1. Low Voltage Protection
This machine is equipped with a two-level low voltage protection system designed to protect the battery from damage and ensure safe operation.
Level 2 Protection (Battery voltage below 41V):
- Driving (travel) function remains available
- All sweeping and scrubbing functions are automatically disabled
- Return the machine to the charging area immediately
- Recharge the battery as soon as possible
Level 1 Protection (Battery voltage below 40V):
- All machine functions are automatically shut down
- This protection prevents excessive battery discharge and permanent damage
- Recharge the battery immediately before resuming operation
Frequent operation below the protection voltage may significantly reduce battery service life.
13.2. Hill Start Assist Function
The machine is equipped with a hill start assist function to improve safety and ease of operation on inclines.
- When the machine stops on an uphill slope, the brake does not need to be applied
- The system allows the machine to roll backward slowly and in a controlled manner
- Press the accelerator to move forward normally
Important:
- Do not turn off the power while the hill start assist function is active, as this may disable the function and affect safety
13.3. Adjustable Water Flow Function
The machine features water flow adjustment controls.
- Water flow can be increased or decreased using the designated buttons
- Allows adjustment of dust suppression or cleaning water volume
- Suitable for different operating environments and surface conditions
- Helps improve cleaning efficiency while reducing water consumption
13.4. Front Side Brush Anti-Collision Protection
Both front side brushes are designed with forward and backward swinging arms.
- Brushes automatically deflect when contacting obstacles
- Improves cleaning performance along edges and corners
- Protects the brush system and machine body from impact damage
- Extends the service life of the brush components
14. After Use Maintenance
- Check brushes for wear and debris.
- Empty the vacuum collection bin.
- Clean side brushes and main brush if needed.
- Check water spray system for clogs.
- Store the machine in a safe, dry area.
15. Regular Maintenance
⚠️ Always turn off the machine and remove the key before maintenance.
15.1 Daily Maintenance
- Empty debris hopper
- Clean dust filters (use filter shaker)
- Inspect brooms for wear
15.2 Weekly Maintenance
- Check battery water level (lead-acid batteries)
- Inspect belts and chains
- Clean machine exterior
15.3 Monthly Maintenance
- Check electrical connections
- Inspect hydraulic components
- Replace worn brooms if necessary
Use only original or approved replacement parts.
16. Battery Maintenance
This machine is equipped with optional sealed lead-acid batteries featuring maintenance-free operation, no routine servicing, and automatic pressure-relief protection.
General Charging Principles
- Charge after each use. Recharge the battery as soon as the machine finishes operating.
- Do not deep discharge frequently. Avoid running the battery down to its minimum protection voltage.
- Use as you charge, charge as you use. Frequent partial charging is recommended to maximize battery life.
1. What Is a Short Circuit and How Does It Affect Battery Performance?
A short circuit occurs when the positive and negative terminals are directly connected, either externally or internally within the battery, causing a high current flow.
Effects of a Short Circuit:
- During charging, battery voltage rises very slowly and remains at a low level
- Electrolyte temperature increases rapidly and excessively
- Electrolyte density increases slowly or shows little to no change
- During discharge, terminal voltage drops quickly
Short circuits can cause severe damage, overheating, and permanent loss of battery capacity.
2. What Is Over-Discharge and How Does It Affect Battery Performance?
Over-discharge occurs when the battery continues discharging after reaching its minimum operating voltage.
Effects of Over-Discharge:
- Battery voltage drops sharply in a short time
- Internal chemical reactions become unstable
- Repeated over-discharge causes the positive plates to lose activity
- Battery service life is significantly reduced
- Operating time decreases and charging time increases
To protect battery life, avoid repeated deep or over-discharge conditions.
3. How Should the Battery Be Stored After Use?
Batteries are sensitive components. If the machine will not be used for an extended period:
- Remove the battery from the machine
- Store it in a dry, well-ventilated location at room temperature
- Avoid leaving the battery installed, as connected electrical components and circuit boards may cause continuous micro-discharge, even when the machine is powered off
Proper storage helps prevent capacity loss and premature aging.
4. Why Does Battery Life Become Shortened?
Common causes of reduced battery life include:
- Insufficient charging over long periods
- Leaving the battery uncharged for extended periods after discharge
- Frequent over-discharge during operation
- Using a non-standard or non-approved charger, leading to over-charging
- Voltage imbalance between batteries within a battery pack
- Long-term operation under low-voltage conditions
To ensure optimal performance and service life, always use the specified charger and follow the recommended charging and usage practices.
17. Troubleshooting
| Problem | Possible Cause | Solution |
|---|---|---|
| Poor sweeping performance | Worn brooms | Replace brooms |
| Excessive dust | Clogged filter | Clean or replace filter |
| Machine will not move | Low battery | Recharge |
18. Storage
- Clean the machine thoroughly before storage.
- Store indoors in a dry, well-ventilated area.
- Fully charge batteries before long-term storage.
- Disconnect battery (if applicable).
Proper use and maintenance will ensure safe operation and long-lasting performance.
19. Safety Notes
- Always test the horn and lights before operation.
- Do not operate on slopes exceeding the manufacturer’s limits.
- Avoid pressing individual function buttons after starting the sweeper unless necessary.
- Make sure no debris is obstructing brushes or water spray before starting.