This manual explains how to operate and maintain the battery-powered walk-behind floor scrubber.
(Operation & Maintenance)-Model: DC510 & & DC50B & DC520
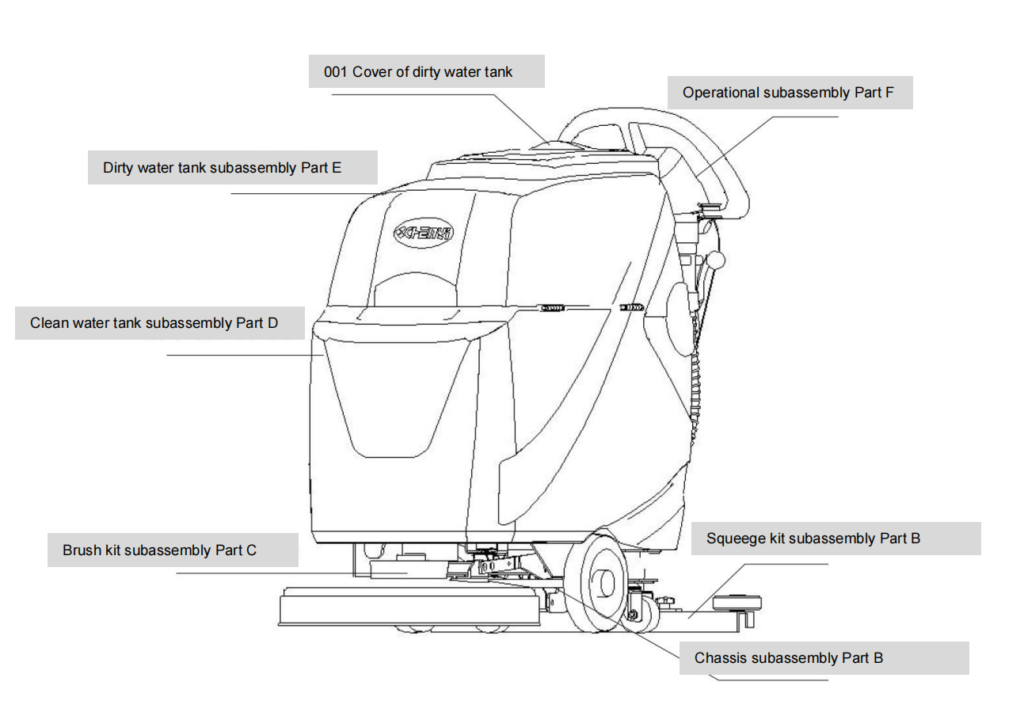
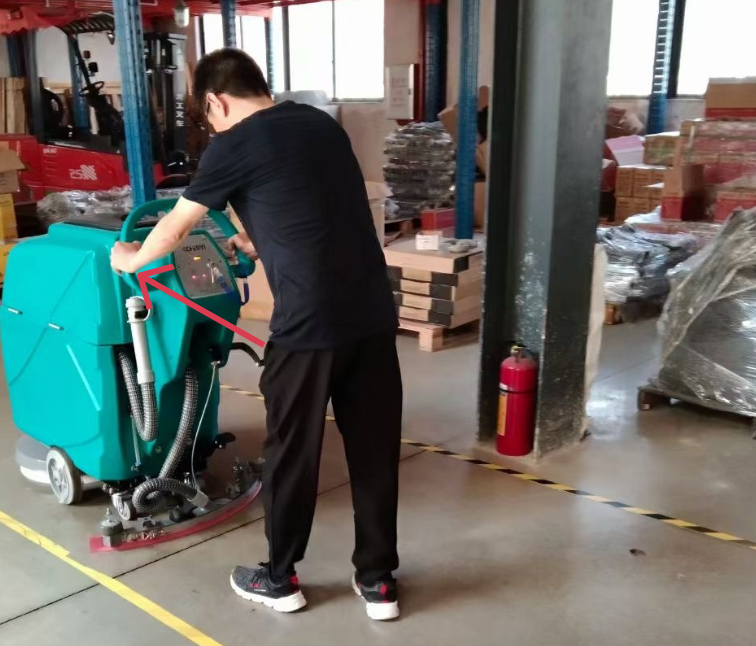
1. Machine Overview
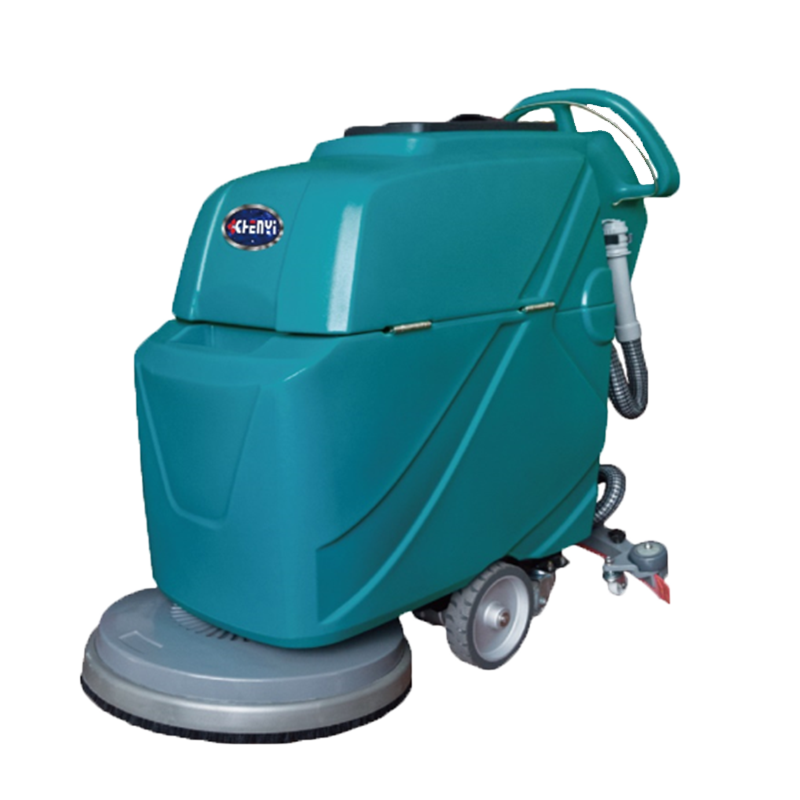
The machine consists of the following main parts:
- Handle with operating levers
- Control panel (power switch, solution control)
- Solution tank (clean water tank)
- Recovery tank (dirty water tank)
- Scrub brush or pad holder
- Squeegee assembly
- Vacuum hose
- Battery compartment and charger
2. Safety Precautions
⚠ WARNING
- Read this manual before operating the machine.
- Do not operate the machine on ramps or slopes.
- Keep hands and feet away from moving parts.
- Turn the machine OFF before filling, charging, or servicing.
- Do not operate the machine while charging.
- Do not disassemble or modify this device yourself.
- Do not attempt to adjust or modify the circuit board yourself.
- When installing or replacing the battery, ensure the battery terminals are securely tightened to prevent the battery and wiring from overheating, melting, or cracking. (Use standard battery terminal locking parts; we recommend using our factory’s standard parts.)
- Never wash the charger or circuit board with water.
- Keep the operating environment below 50 degrees Celsius. High temperatures may affect circuit stability and the lifespan of the motor and plastic materials.
- Do not add strong acids or alkalis to the water tank.
1. Preparation Before Use
Before operating the machine, perform the following checks carefully.
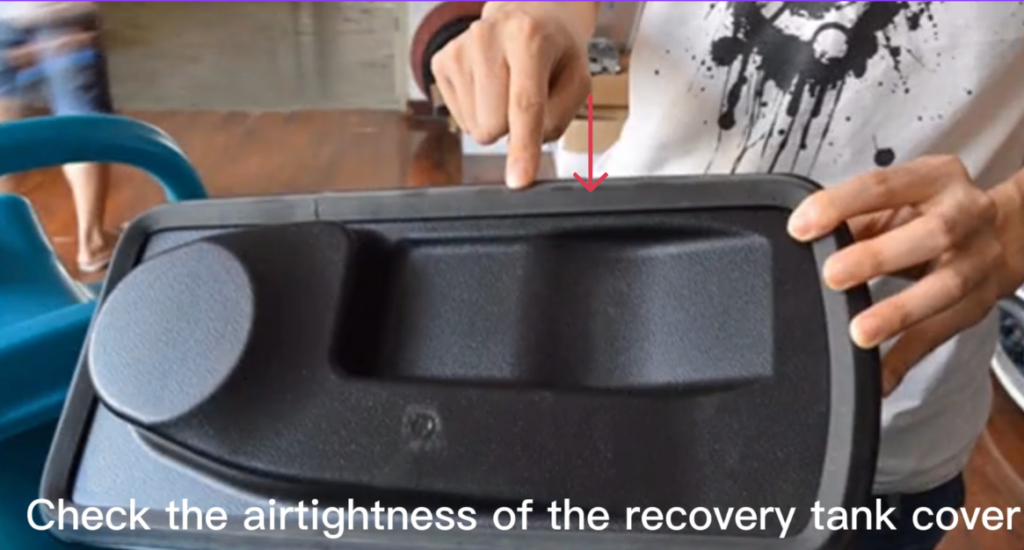
1.1 Recovery Tank and Hose Inspection
- Check that the recovery tank cover is properly installed and airtight.
- Check that the suction hose is securely connected.
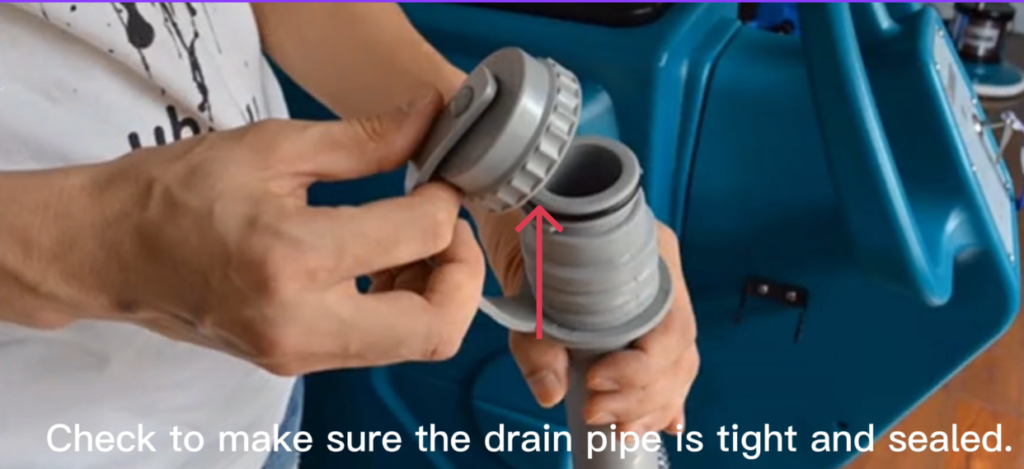
- Check that the drain hose is fully inserted, sealed, and closed.
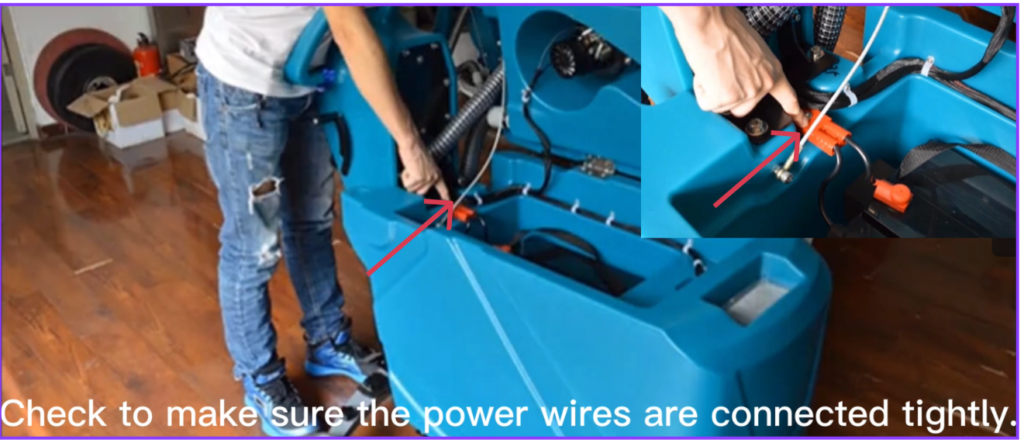
- Make sure all power wires and connectors are connected tightly.

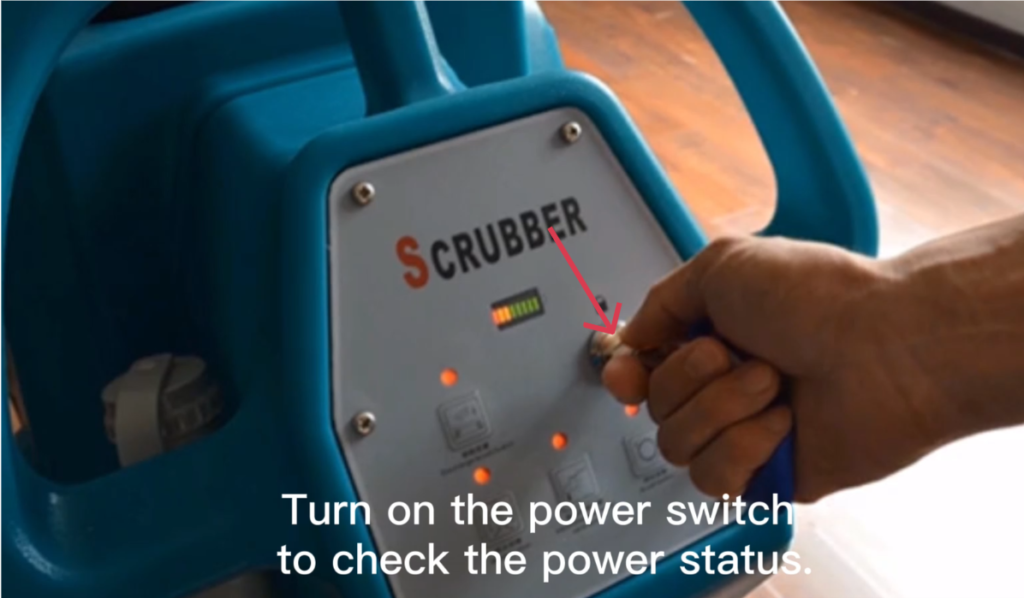
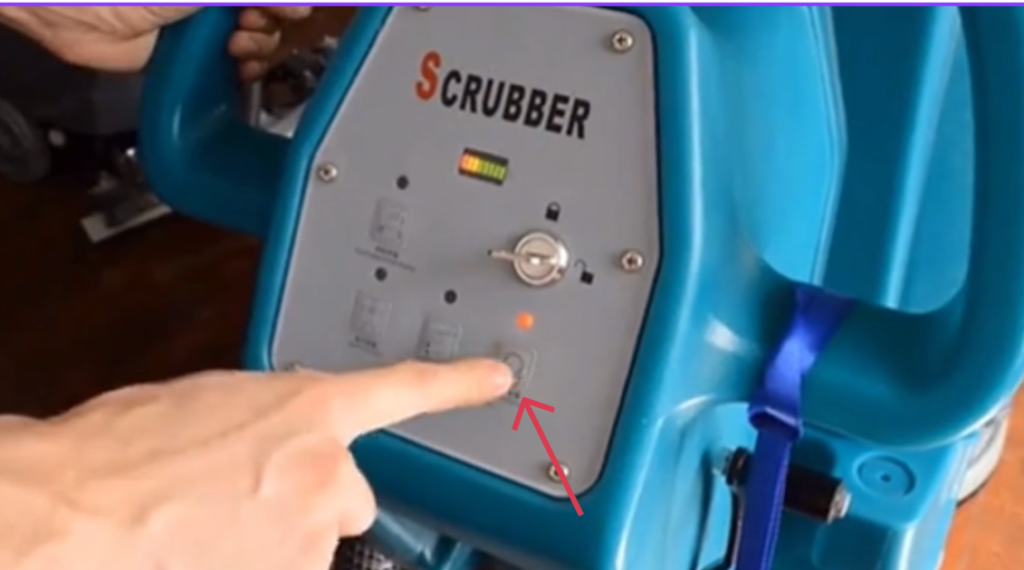
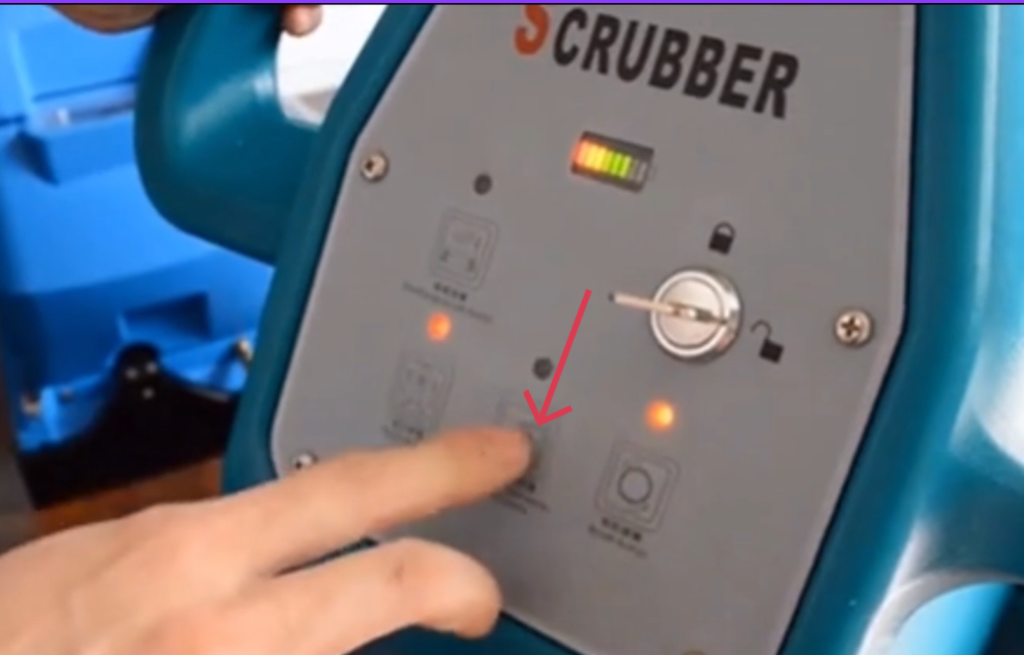
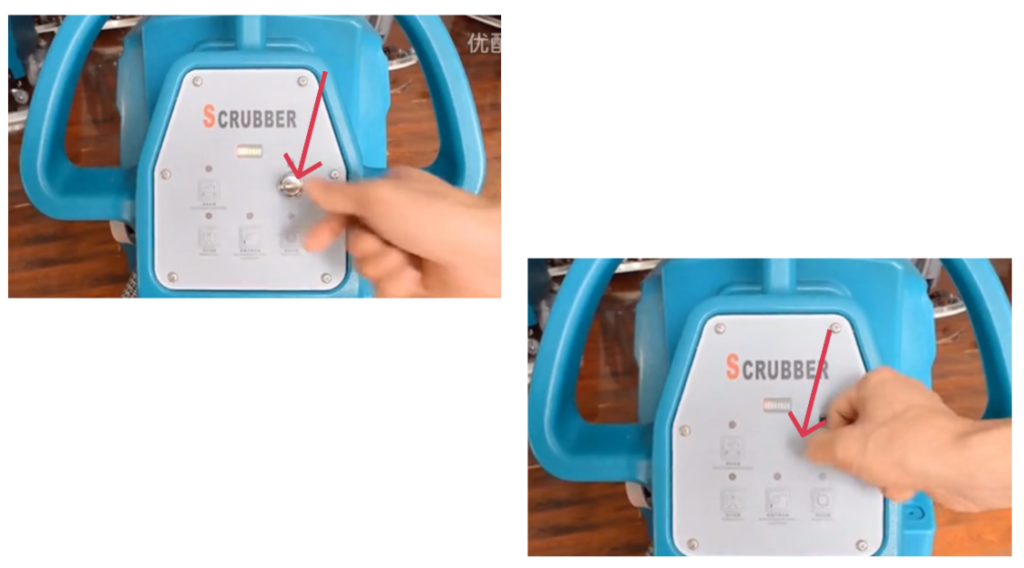
1.2 Power Check
- Turn the power switch ON.
- Check the battery power indicator to confirm sufficient charge.
- Turn the power switch OFF after checking.
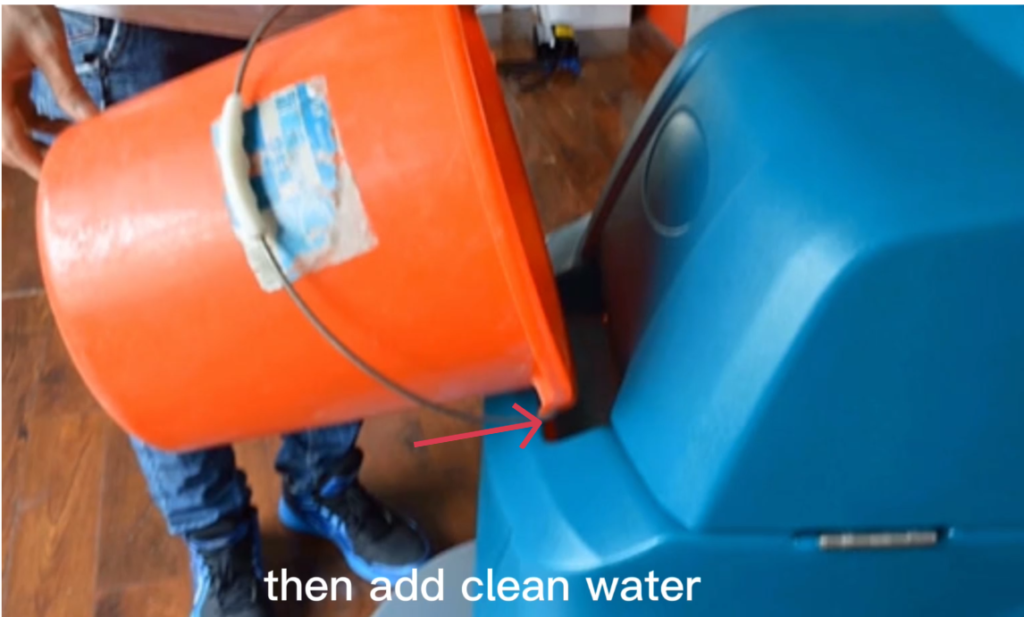
1.3 Filling the Solution Tank (Clean Water).
- Ensure the machine is turned OFF.
- Open the clean water tank cap.
- Add clean water to the solution tank.
- Do not exceed the maximum fill level.
- Add approved low-foaming detergent when neccessary.
- Close the tank cap securely.
⚠ NOTICE
Only use detergents designed for automatic floor scrubbers
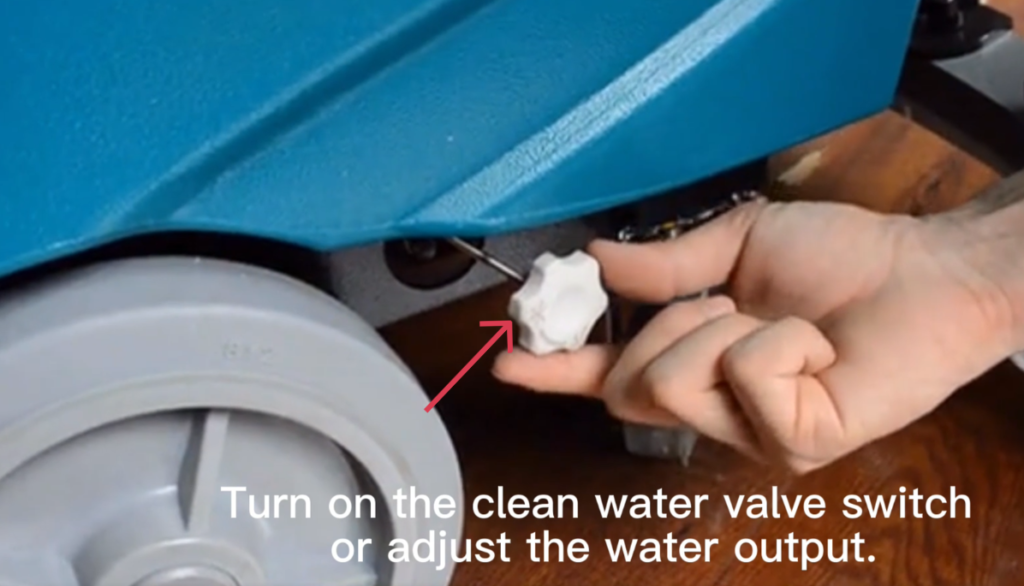
1.4 Water Flow Adjustment
- Turn on the clean water valve.
- Adjust the water output level as required for the cleaning task.
Before starting, make sure:
- Battery is fully charged
- Solution tank is filled
- Recovery tank is empty
- Scrub brush is installed correctly
- Squeegee is installed and connected
2. Selecting the Cleaning Tool
According to the floor condition and cleaning requirements, select one of the following:
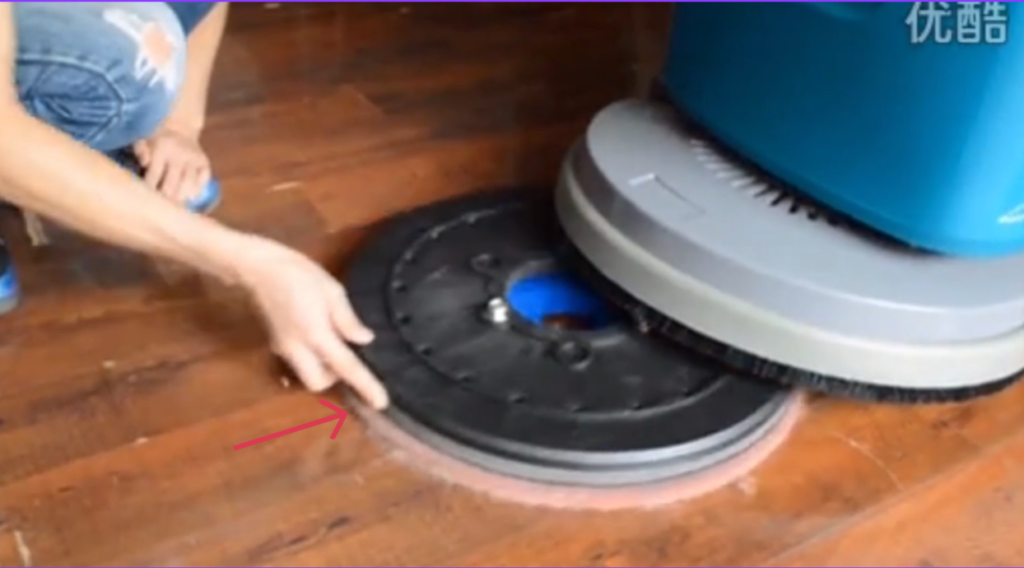
2.1. Installing and Removing the Scrub Brush or Pad Holder
Manual Install – Installing the Scrub Brush Manually
- Turn the machine OFF.
- Step on or operate the brush lift mechanism to raise the scrub deck.
- Tilt the machine slightly backward using the handle.
- Position the scrub brush under the brush motor hub.
- Align the brush center with the drive hub.
- Push the brush upward and rotate until it locks into place.
- Gently pull the brush downward to confirm it is secure.
NOTE:
Always make sure the scrub brush is properly installed and securely locked before operating the machine.
Manual Uninstall – Removing the Scrub Brush Manually
- Turn the machine OFF and remove the key, if equipped.
- Disconnect the power source (battery connector).
- Park the machine on a level surface.
- Raise the scrub deck to its highest position to allow access to the scrub brush.
- Locate the scrub brush under the scrub deck.
- Hold the scrub brush firmly and rotate the locking mechanism counterclockwise to release it from the drive plate.
- Pull the scrub brush straight down and remove it from the machine.
- Inspect the brush and drive plate for wear, damage, or debris before installing a new brush.
Auto Install – Installing the Scrub Brush Automatically
Some models support an automatic brush installation and removal function, allowing the operator to install or remove the scrub brush without tilting the machine or using tools.
Follow the steps below carefully.
- Make sure the machine is turned OFF.
- Raise the scrub deck using the brush lift control.
- Place the scrub brush flat on the floor, directly under the brush drive hub.
- Center the brush so that the drive hub is aligned with the brush coupling.
- Turn the machine ON.
- Lower the scrub deck slowly.
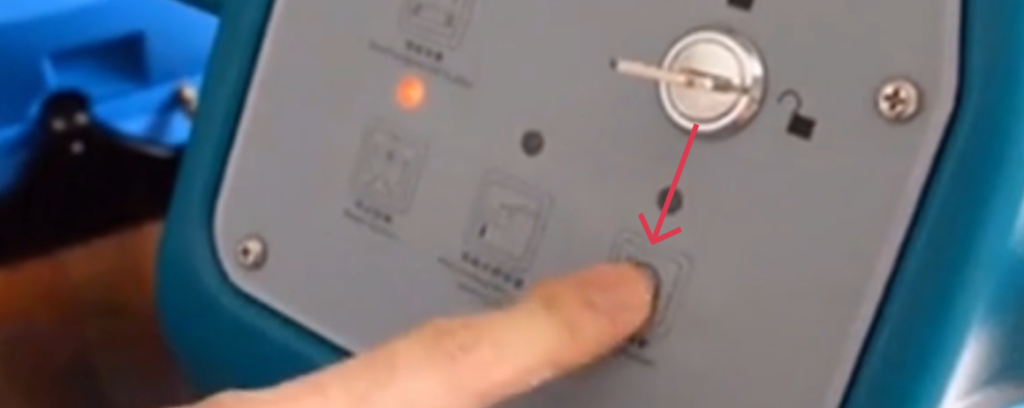
- Briefly press the brush start control.
- The brush will automatically rotate and lock into place.
- Raise the scrub deck slightly.
- Check that the brush is securely installed by gently pulling it downward.
NOTE:
Always make sure the scrub brush is properly installed and securely locked before operating the machine.
Auto Uninstall – Removing the Scrub Brush Automatically
- Turn the machine OFF.
- Move the machine to a flat surface.
- Turn the machine ON.
- Lower the scrub deck until the brush touches the floor.
- Activate the brush release / auto uninstall function.
- The brush will automatically rotate and disengage from the drive hub.
- Raise the scrub deck.
- Turn the machine OFF.
- Remove the brush from under the machine.
Important Notes
- Keep hands and feet away from the brush during operation.
- Ensure the brush is centered correctly before auto installation.
- If the brush does not install or release properly, turn the machine OFF and install/remove the brush manually.
3. Operation Guide
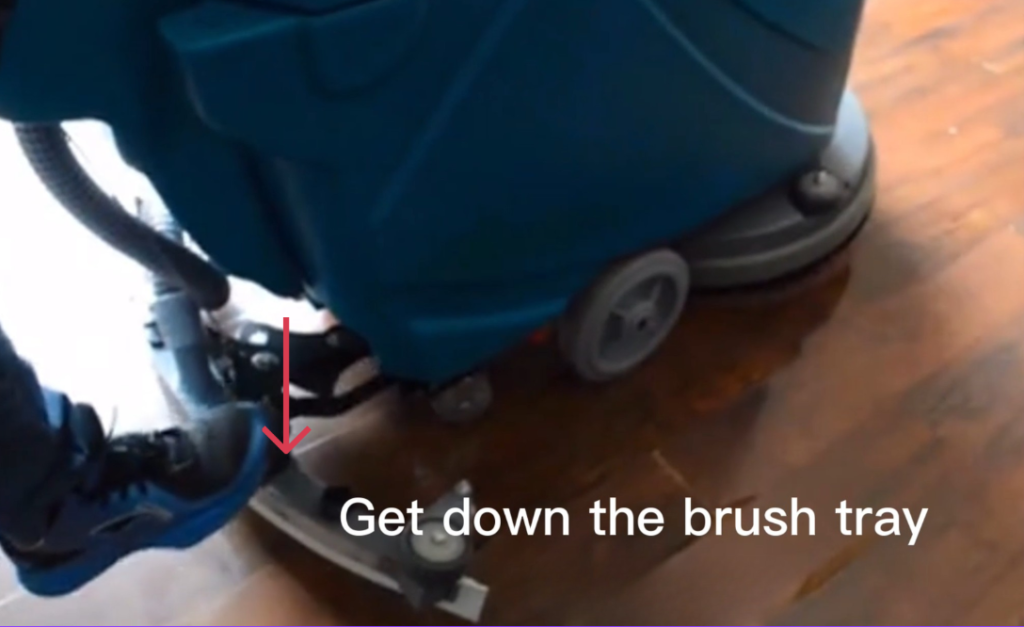
3.1 Lowering the Scrub Deck
3.3 Activating the Scrub Brush
- Press the brush button to activate the brush motor.
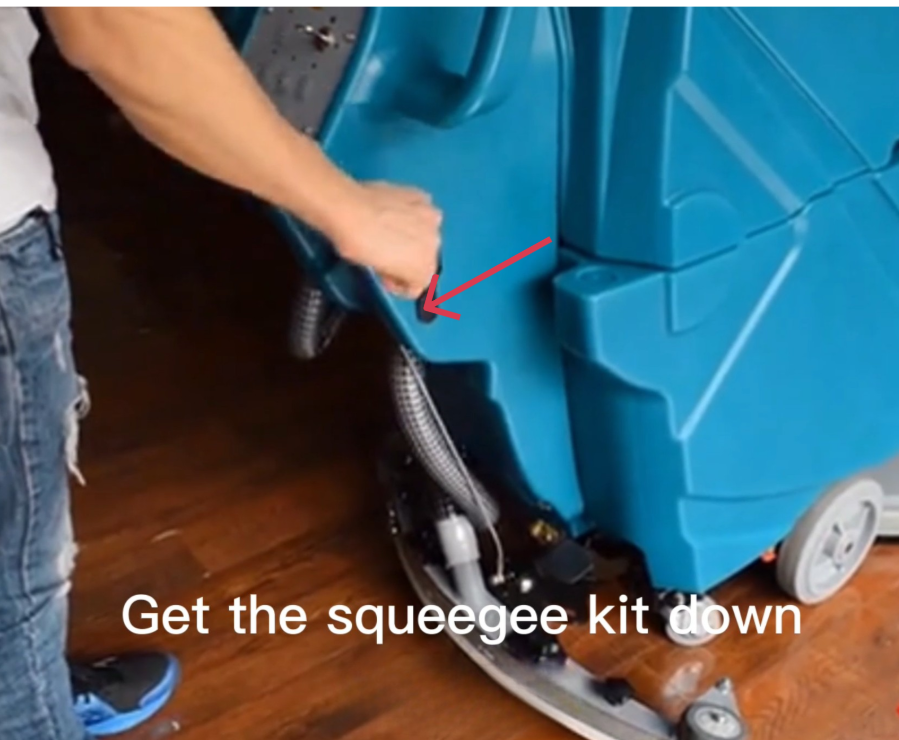
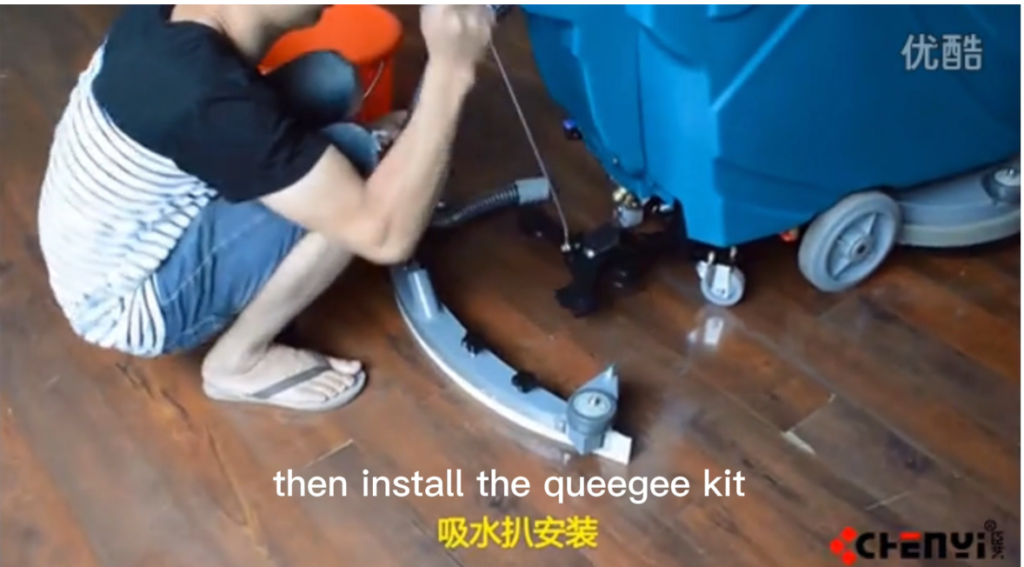
3.4 Lowering the Squeegee Assembly
- Lower the squeegee kit to the floor.
- Ensure the squeegee blades contact the floor evenly.
3.5 Starting Floor Cleaning
Follow this exact sequence:
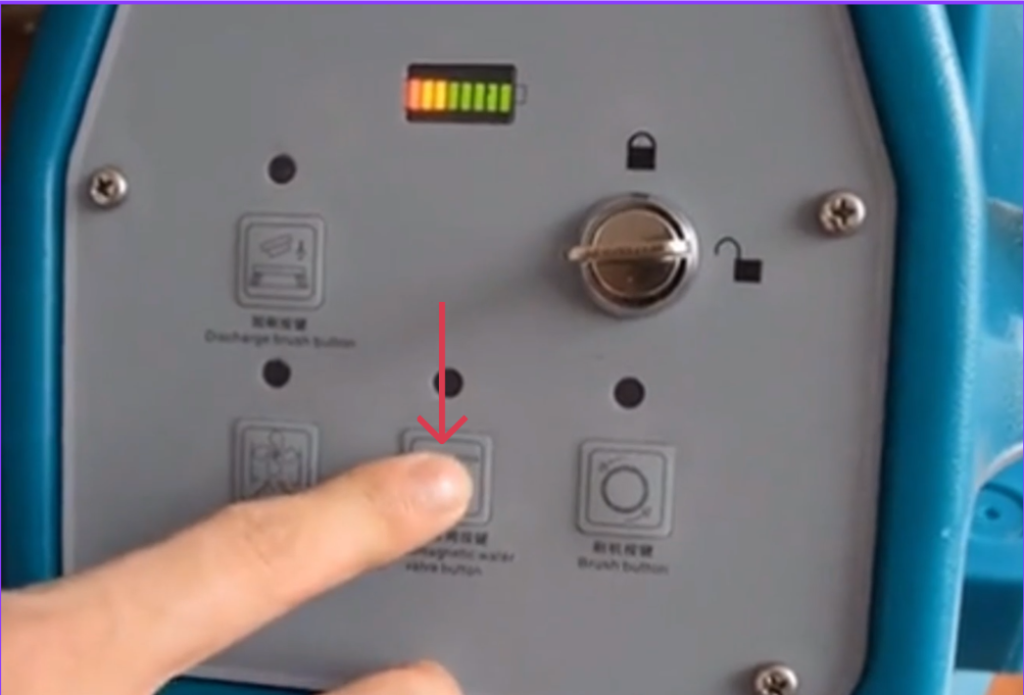
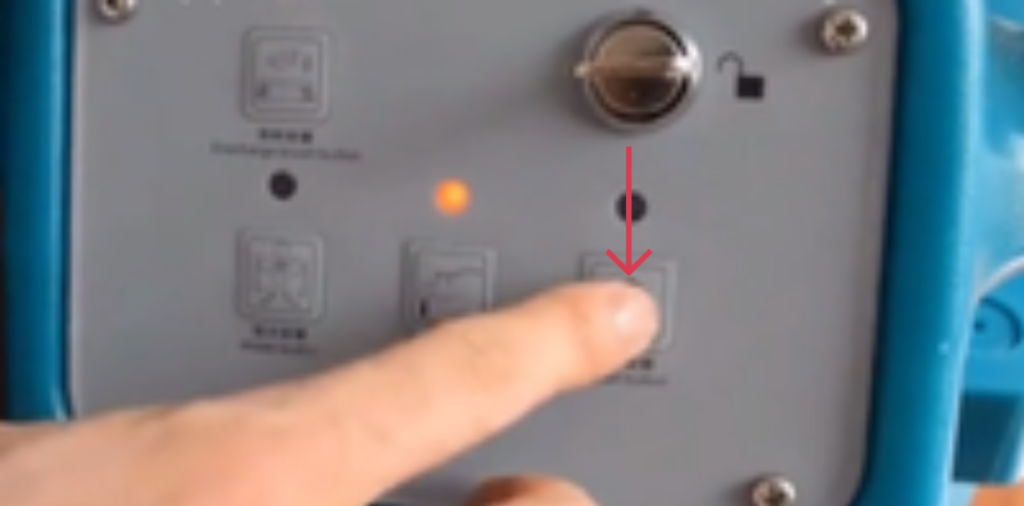
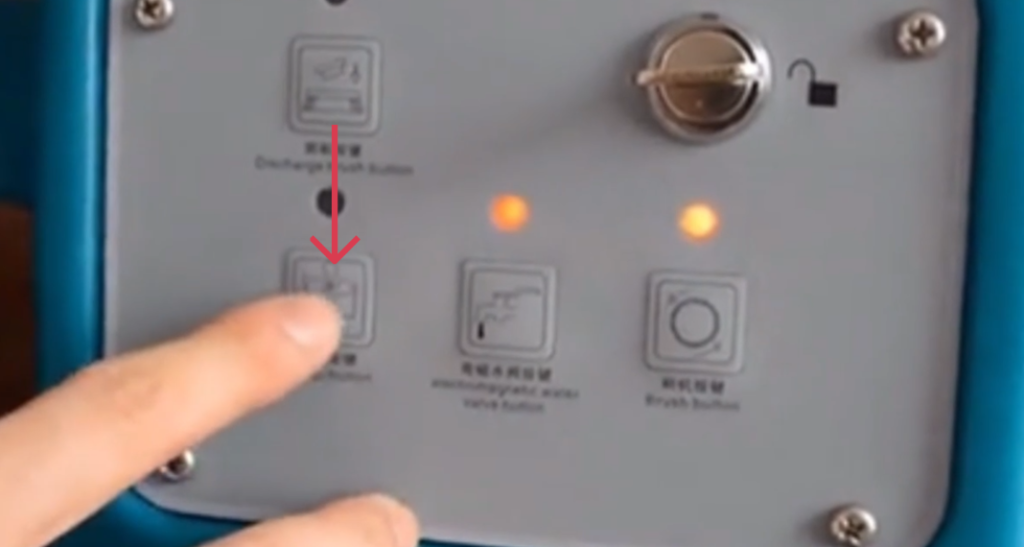
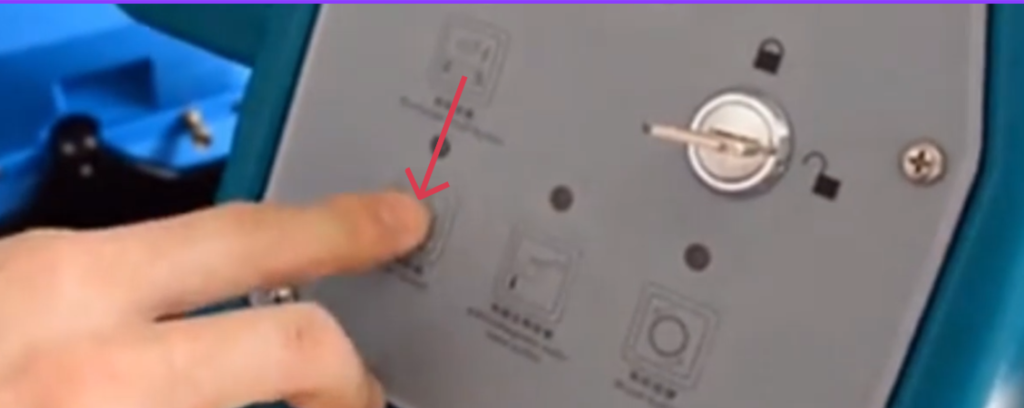
- Press the water outlet button to start solution flow.
- Press the cleaning brush button.
- Press the water suction button.
- Slowly push the machine forward to begin floor cleaning.
4. Stopping the Cleaning Operation
After cleaning is completed, follow the steps below:
- Press the water control button to stop water flow.
- Continue moving the machine forward for a short distance to collect remaining water.
- Press the cleaning brush button to stop the brush.
- Press the water suction button to stop suction.
4.1 Raising the Scrub Deck and Squeegee
- Raise the brush tray.
- Raise the squeegee assembly.

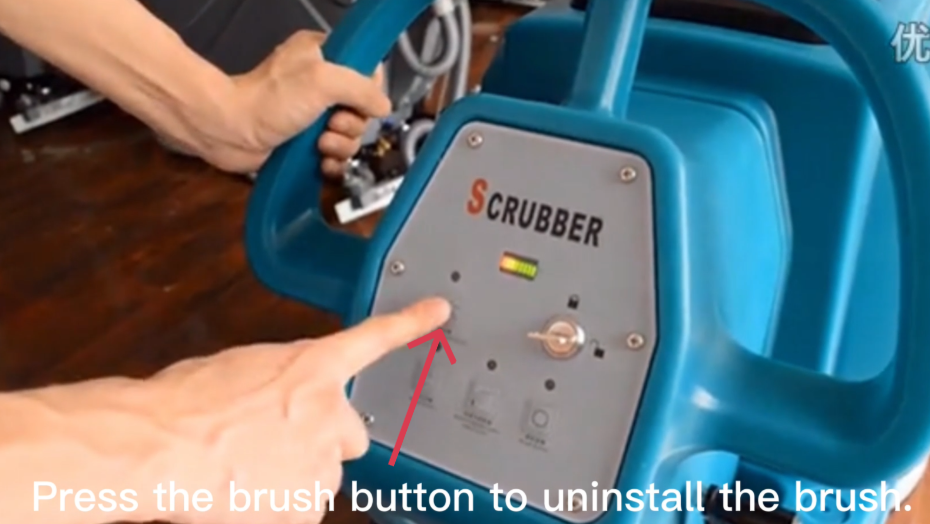
4.2 Turning Off the Brush
Press the brush button to ensure the brush motor is turned OFF.

5. Maintenance After Use
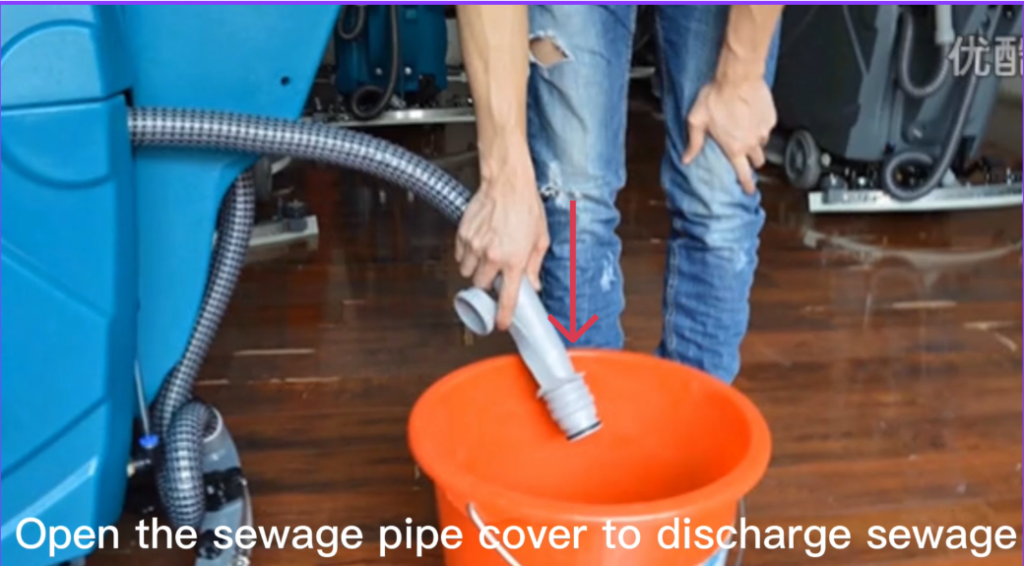
5.1 Draining the Recovery Tank
- Turn the machine OFF.
- Open the sewage drain hose cover.
- Drain all dirty water completely.
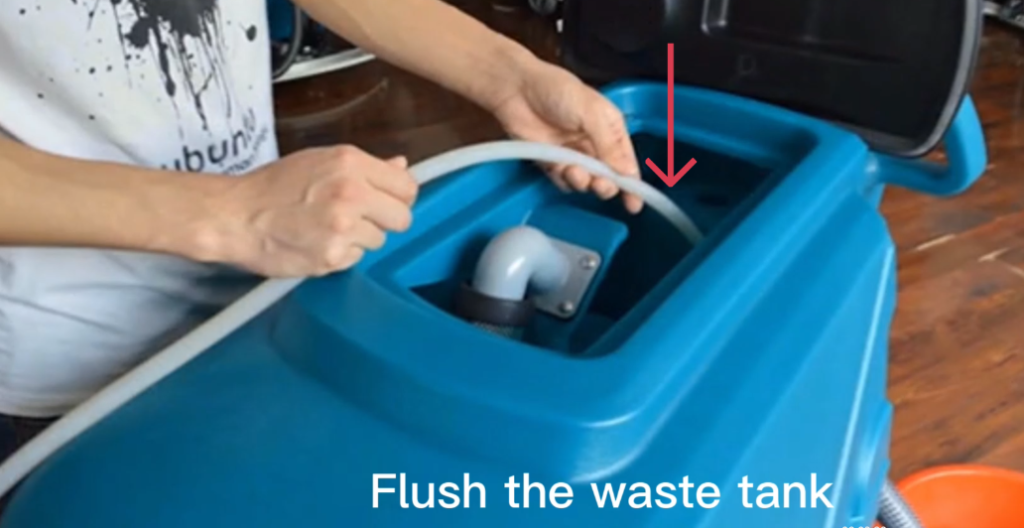
5.2 Cleaning the Recovery Tank
- Flush the waste water tank with clean water.
- Rinse thoroughly to remove residue.
- Close the drain hose securely after cleaning.
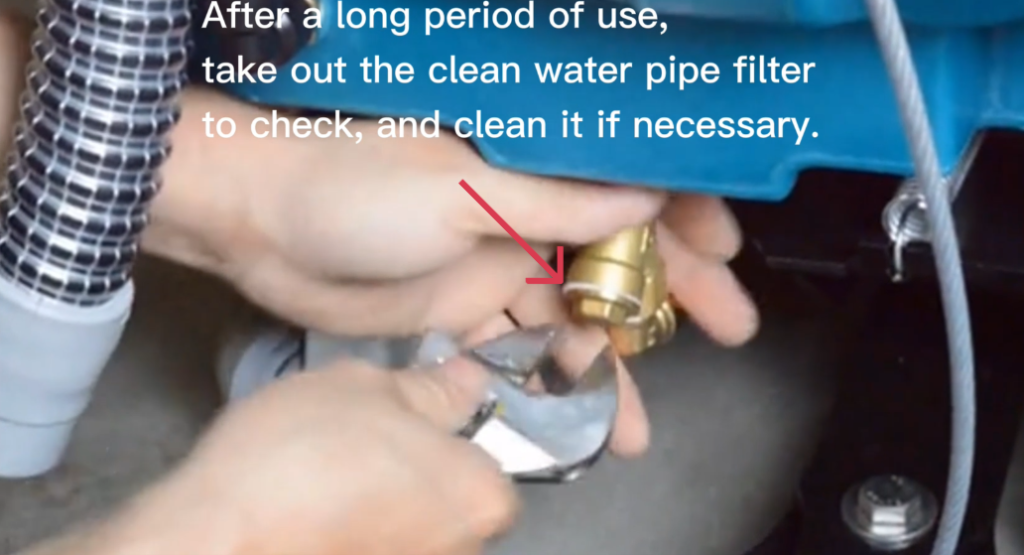
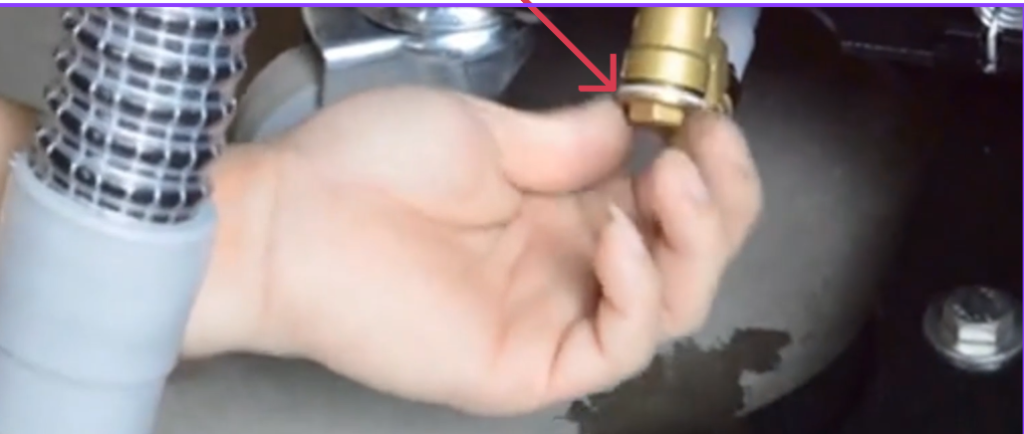
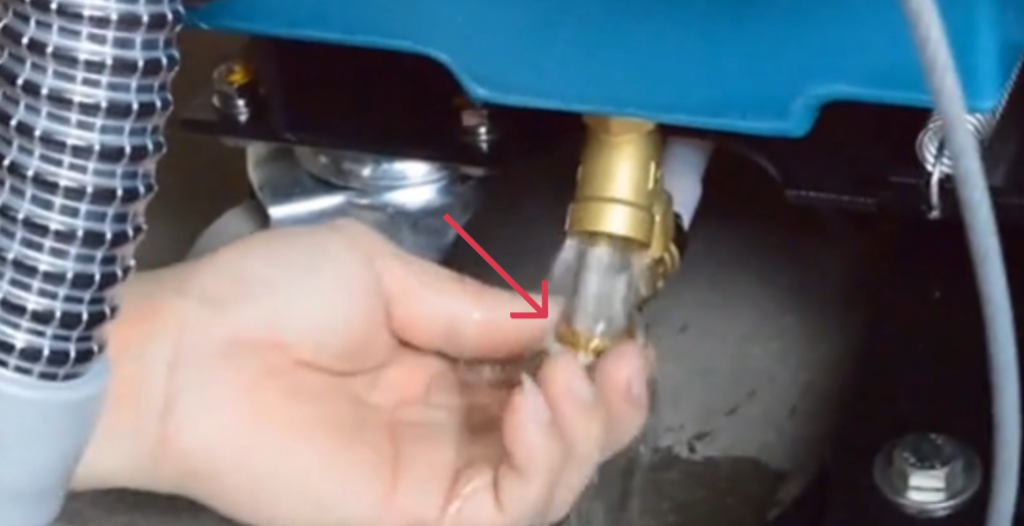
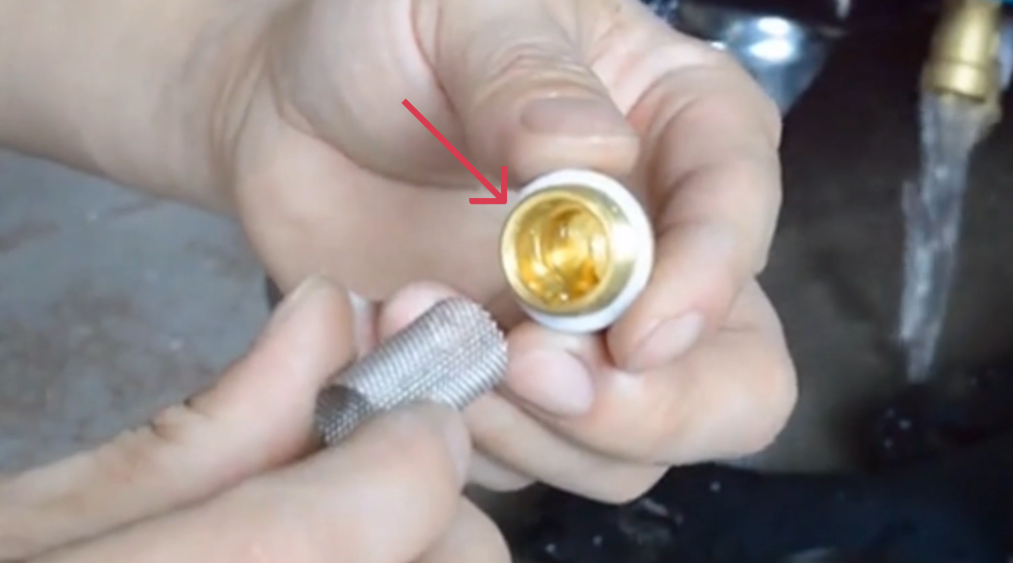
5.3 Cleaning the Solution Water Filter
- After extended use, remove the clean water pipe filter.
- Inspect the filter for debris.
- Clean the filter with clean water if necessary.
- Reinstall the filter securely.
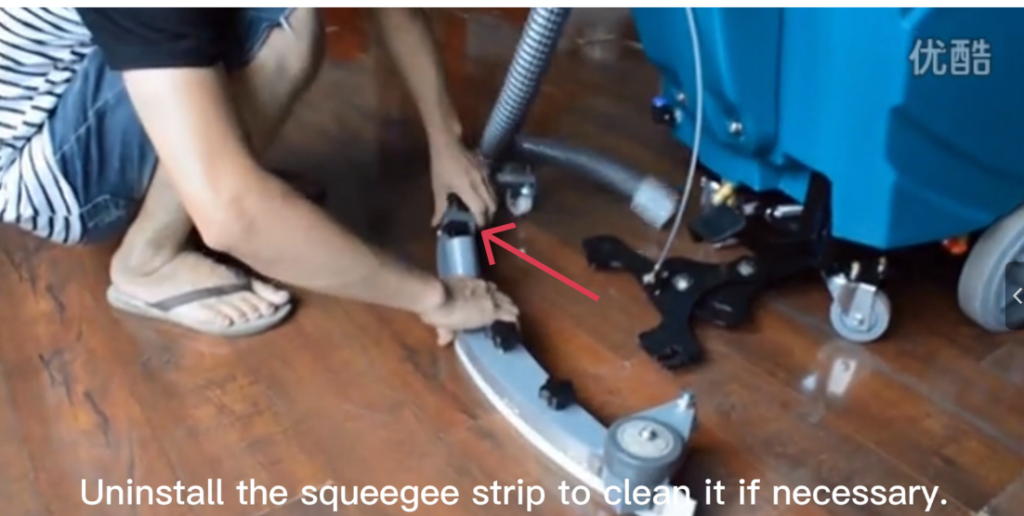
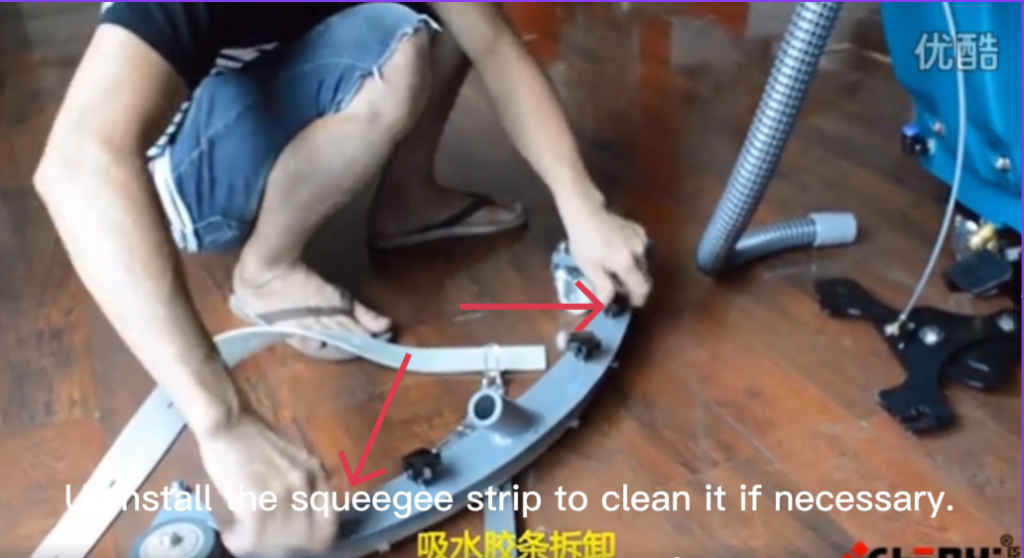
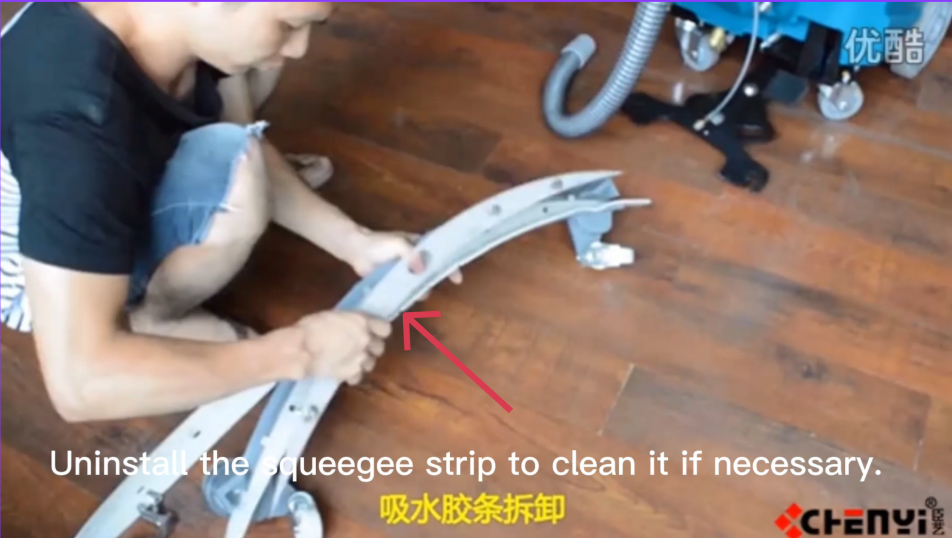
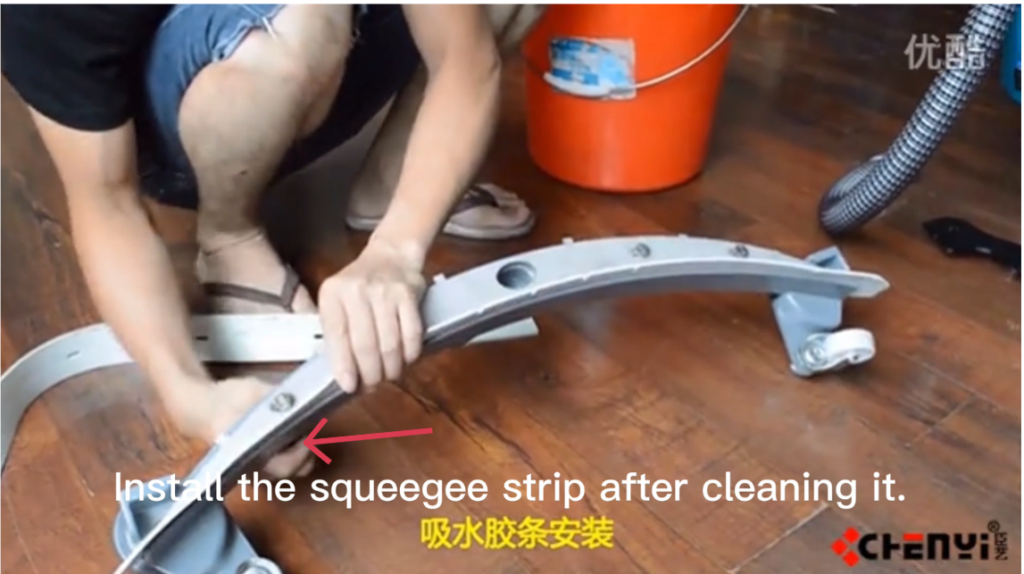
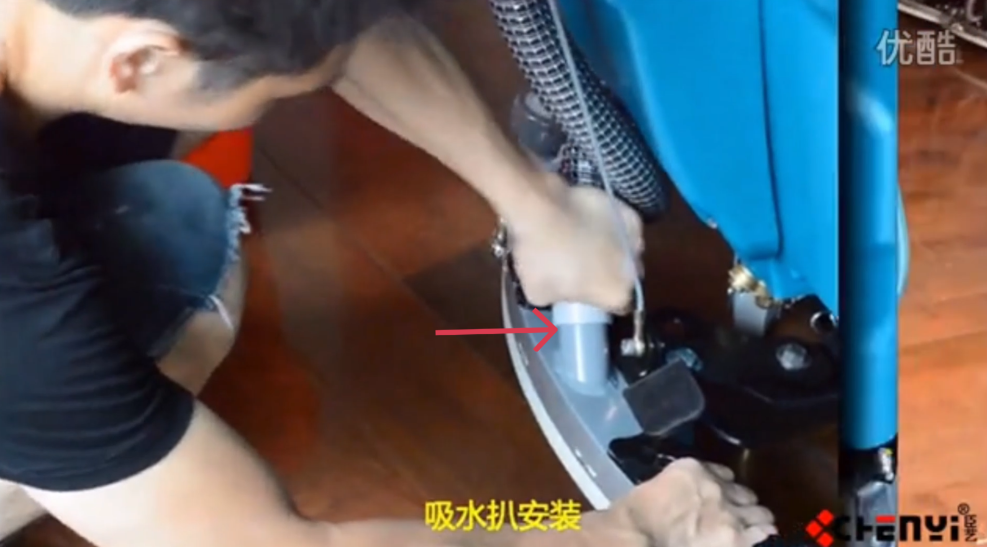
6. Squeegee Maintenance – Disassembling the Squeegee (Replacing Blades)
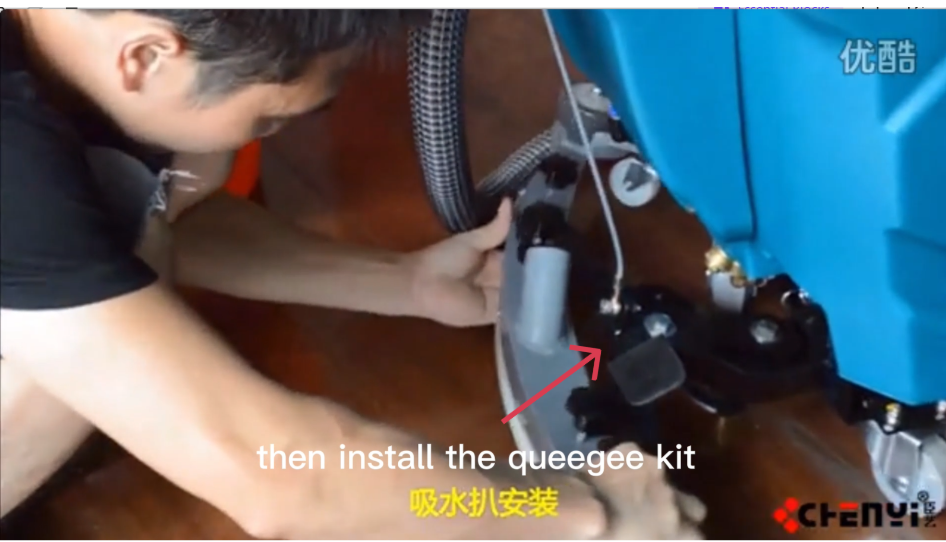
6.1. Removing the Squeegee Assembly from the Machine
- Locate the squeegee assembly at the rear of the machine.
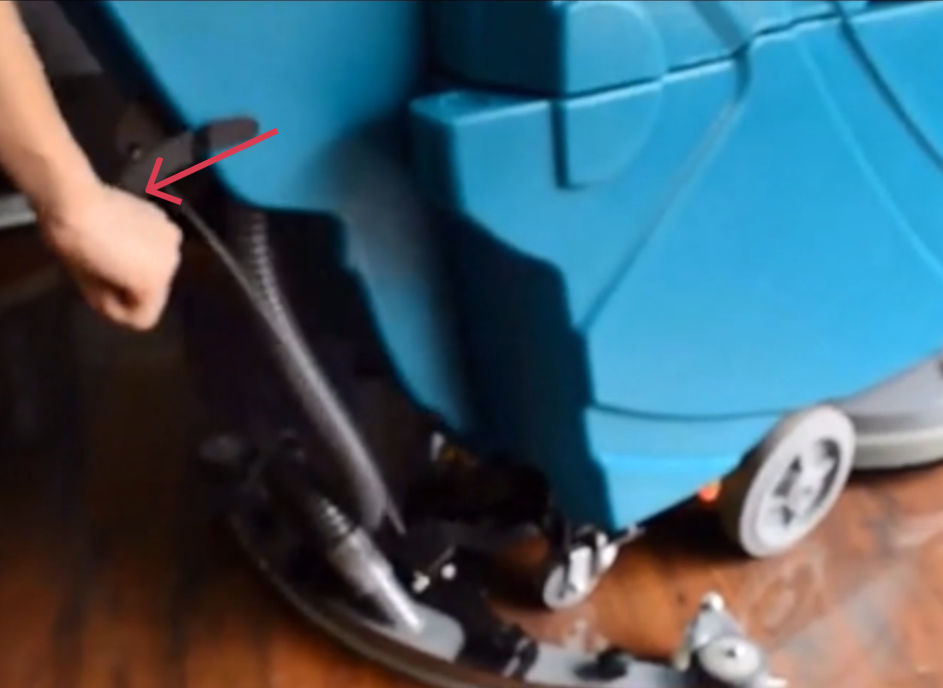
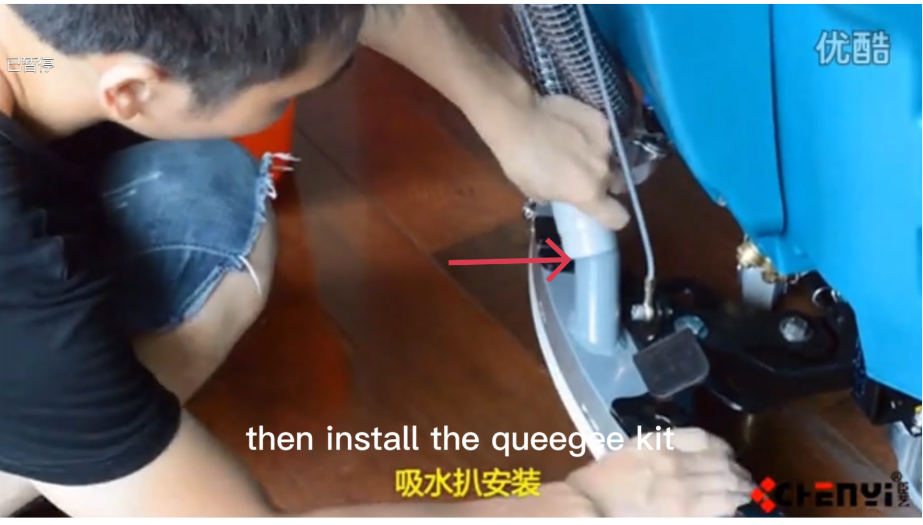
- Find the vacuum hose connected to the top or center of the squeegee.
- Hold the hose firmly and pull it straight off the squeegee inlet.
- Do not twist excessively.
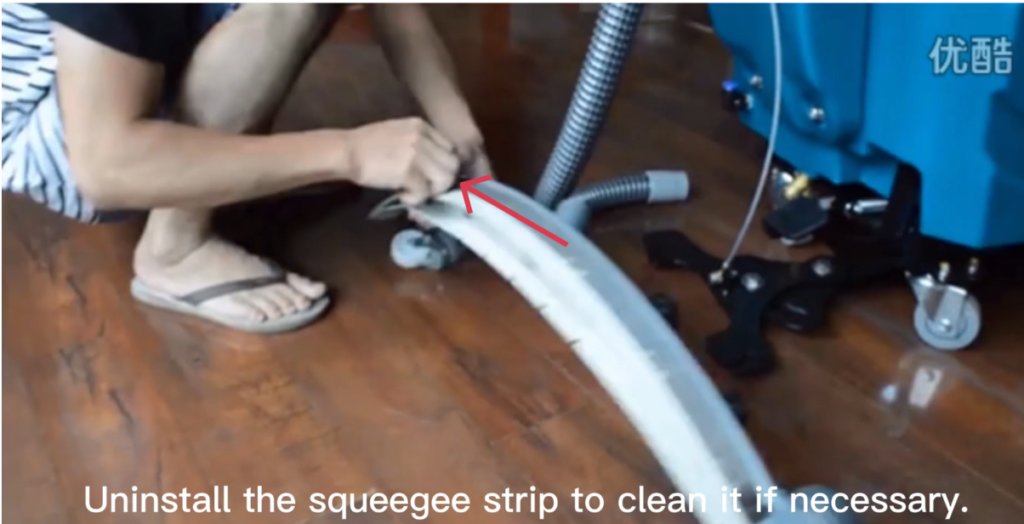
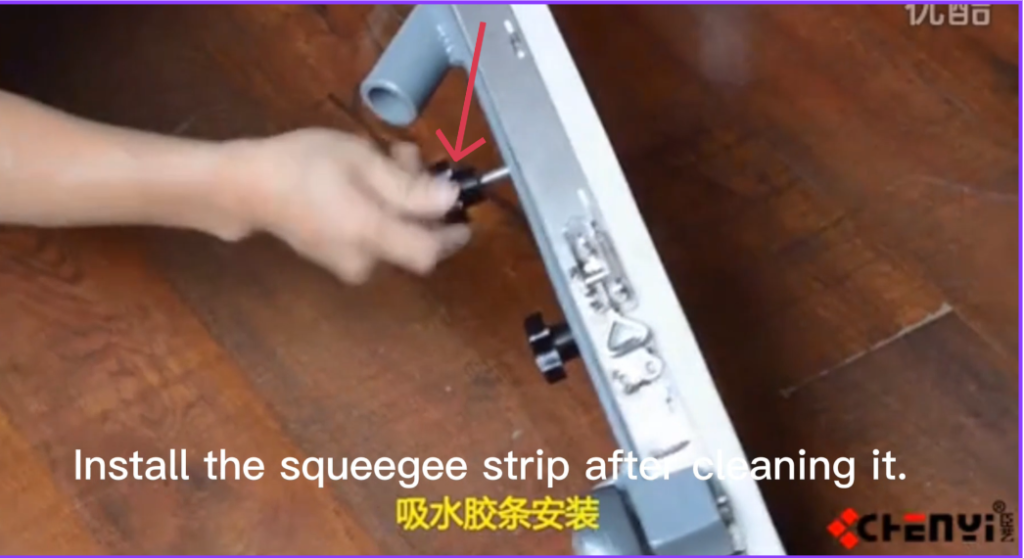
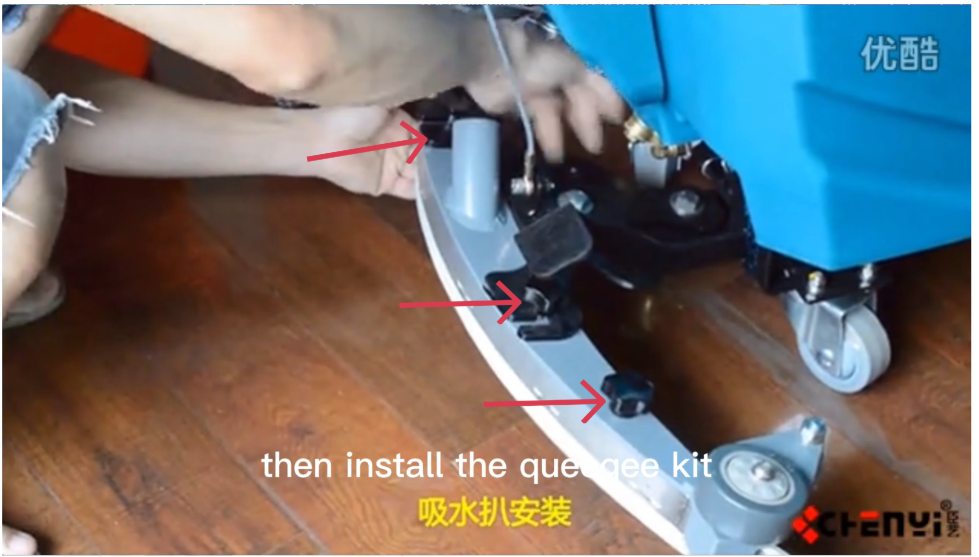
- Locate the two mounting knobs / hand knobs on the left and right sides.
- Turn both knobs counterclockwise until they are fully loosened.
- Carefully lower and remove the squeegee assembly from the mounting bracket.
- Place the squeegee on a clean work surface.

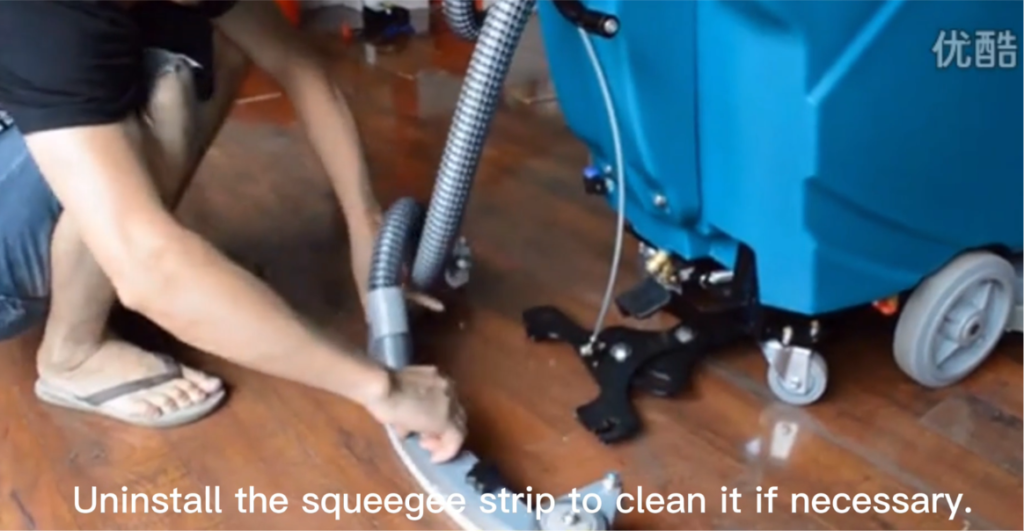
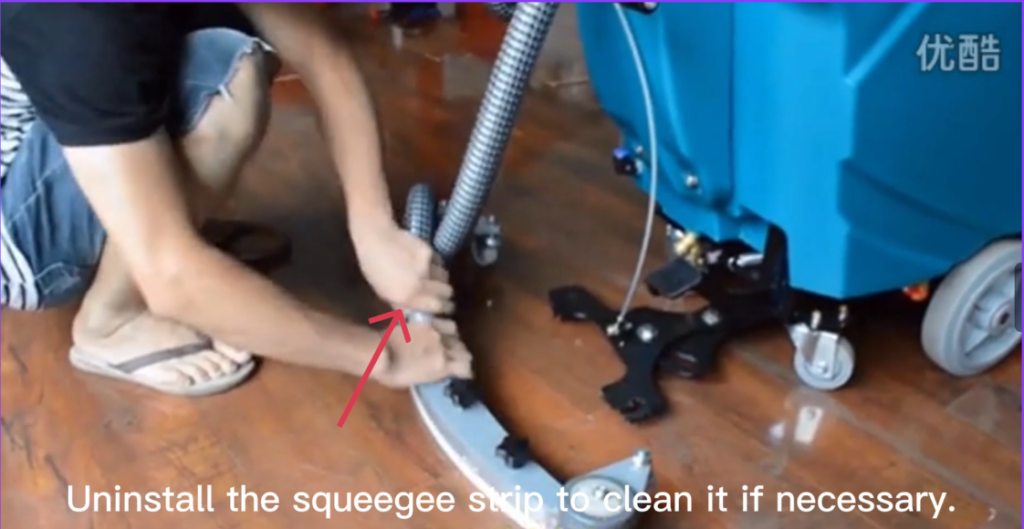
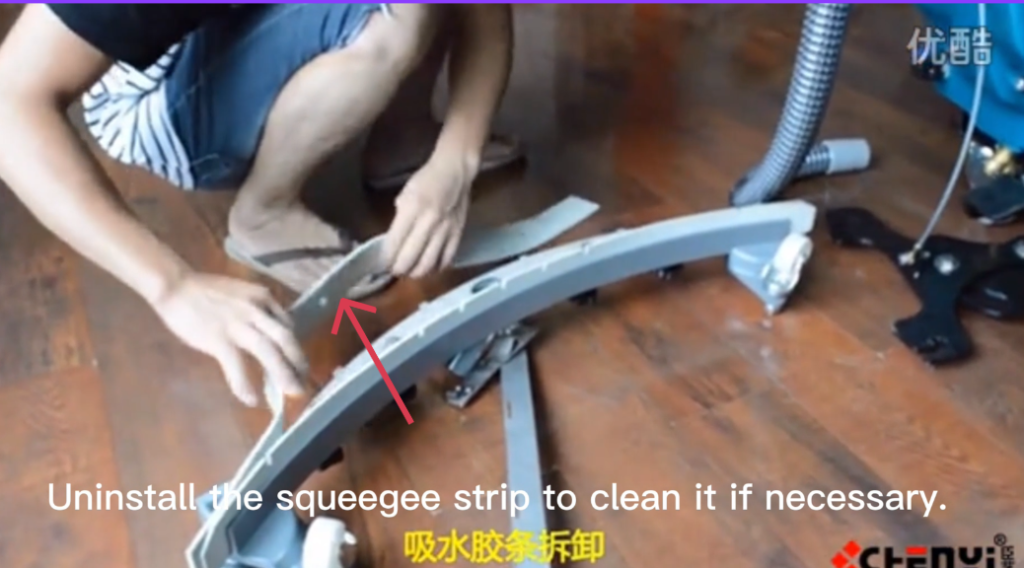
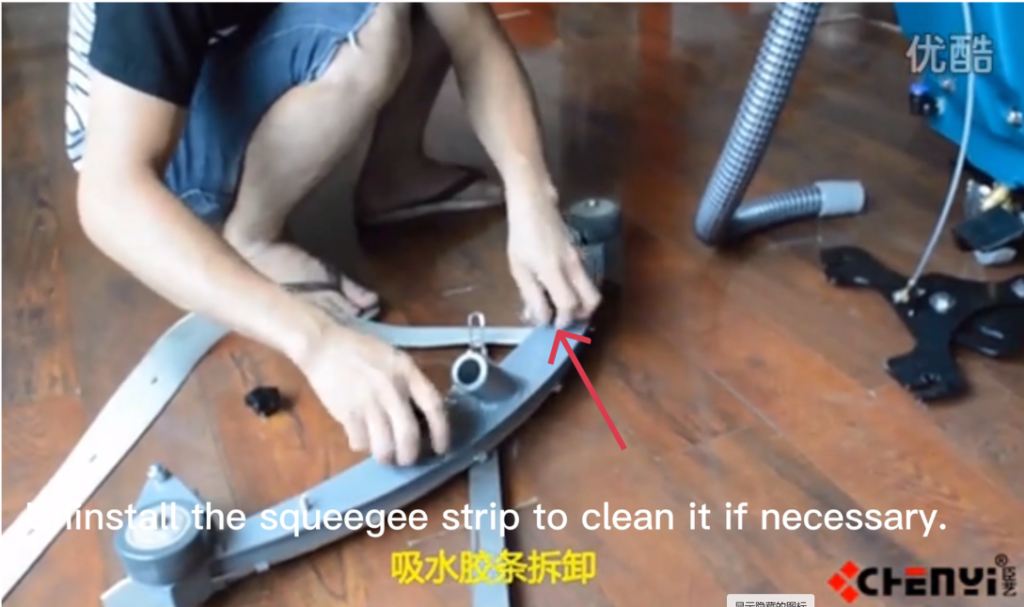
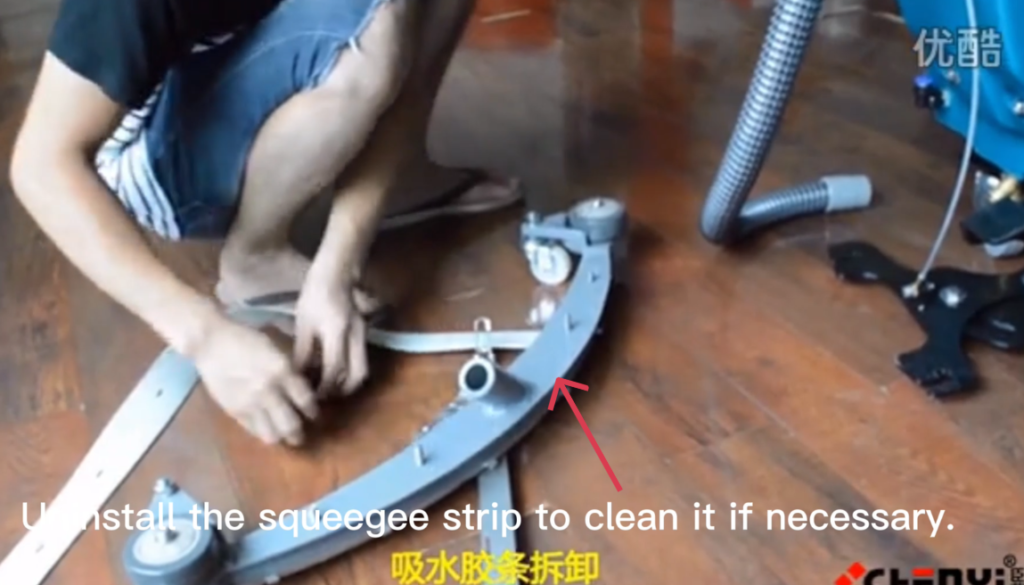
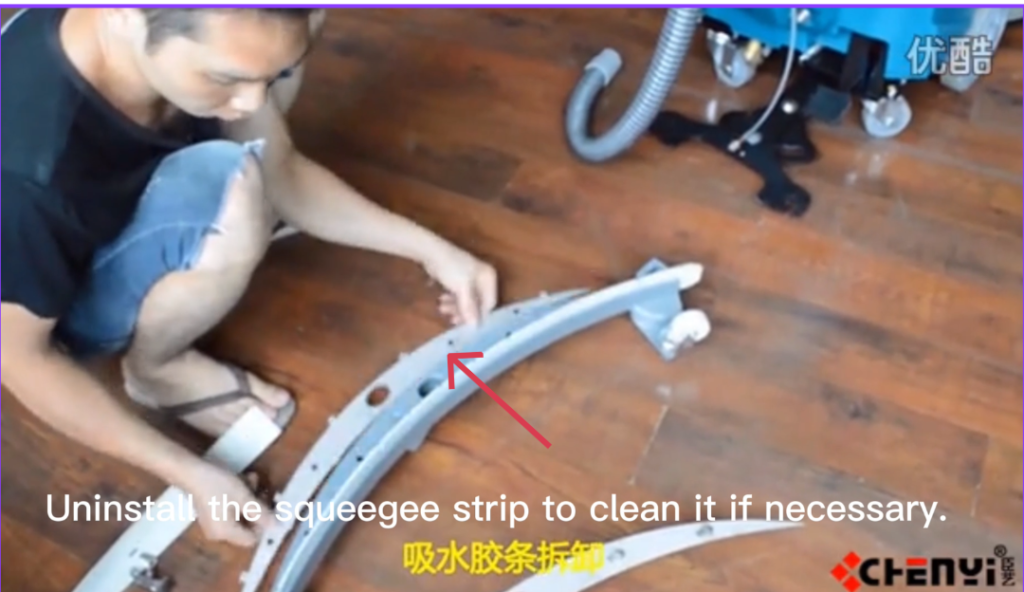
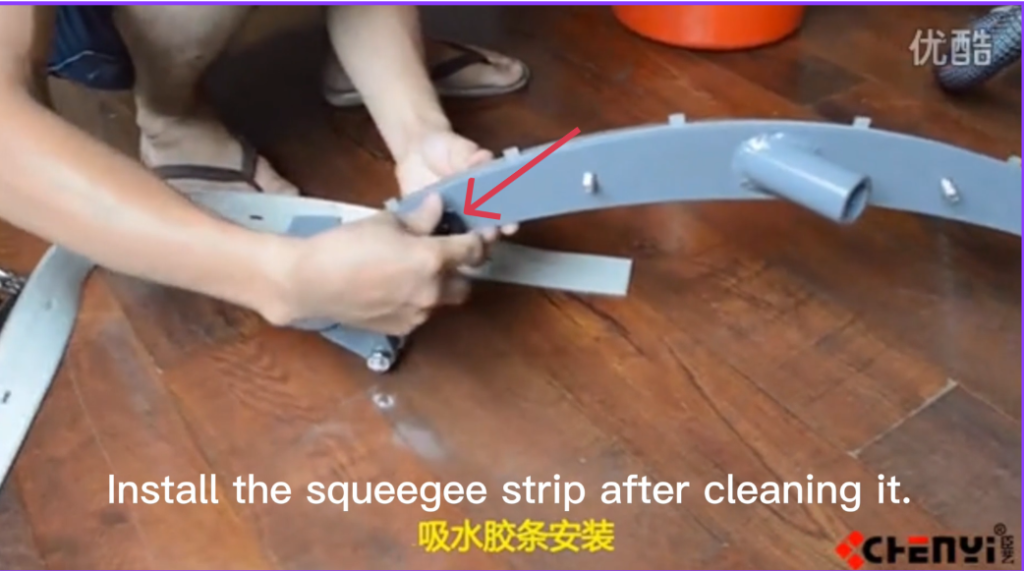
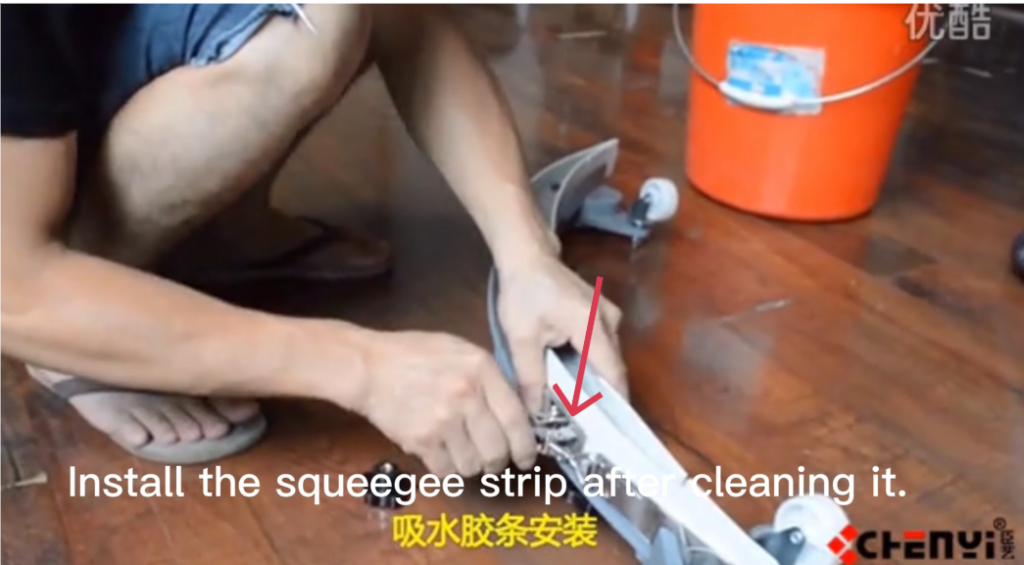
6.2 Removing the Squeegee Blades
- Loosen the hand knobs or fasteners holding the clamps.
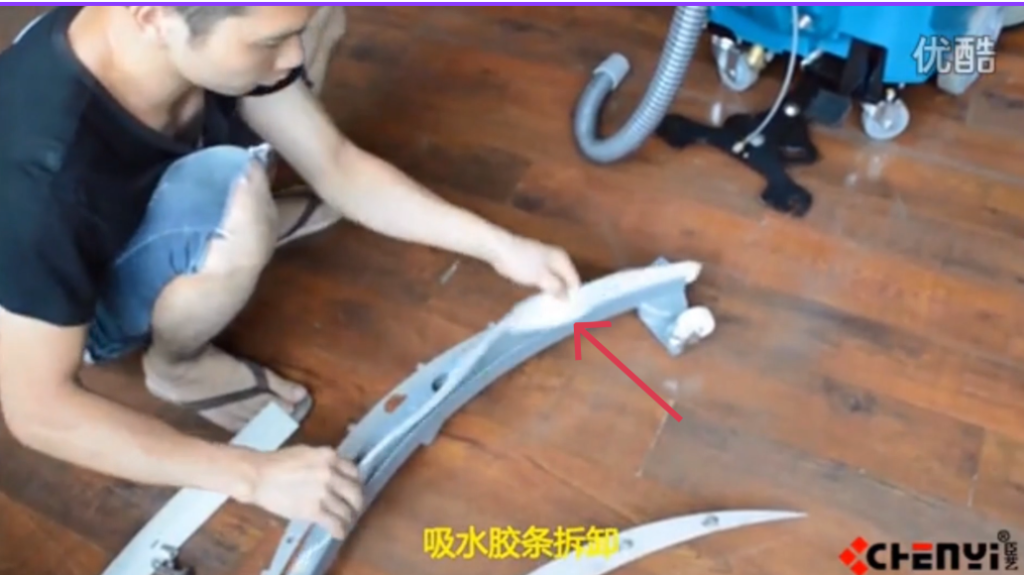
- Slide the rubber squeegee blades out of the blade holder.
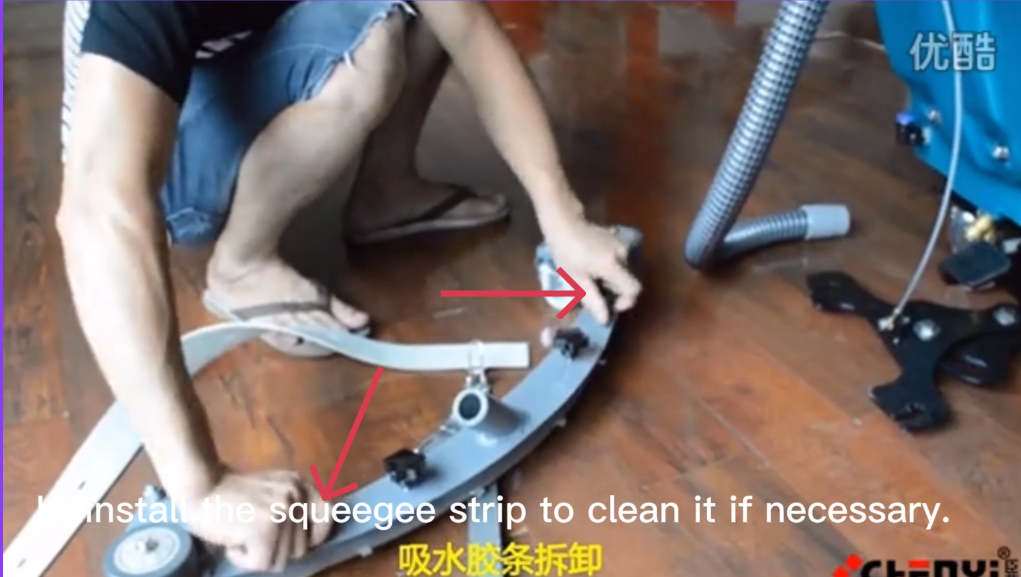
- Locate the blade retaining clamps or brackets.
- Remove the rear clamp, then the front clamp.
- Inspect the blades:
- Replace if worn, torn, or uneven
- Flip if the blade has a usable second edge
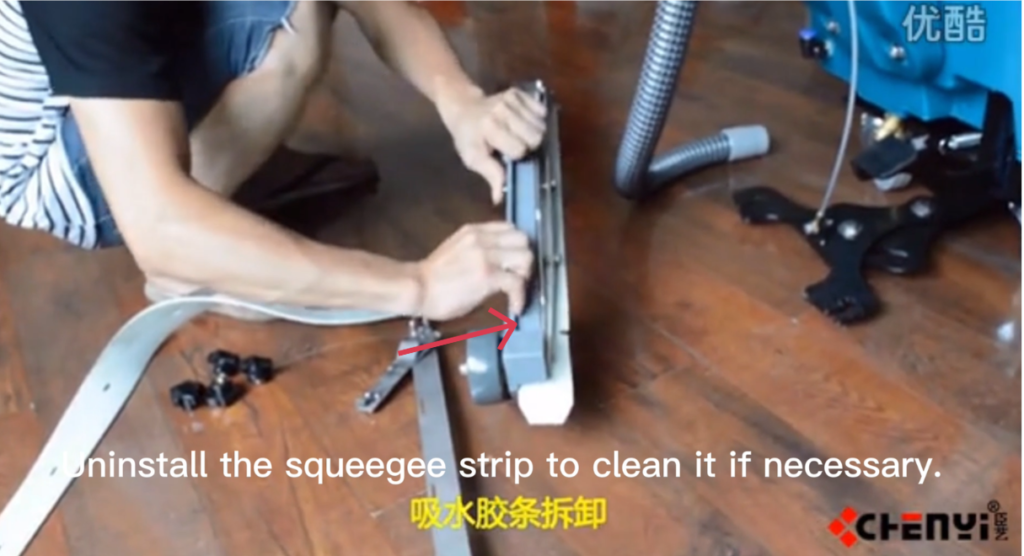
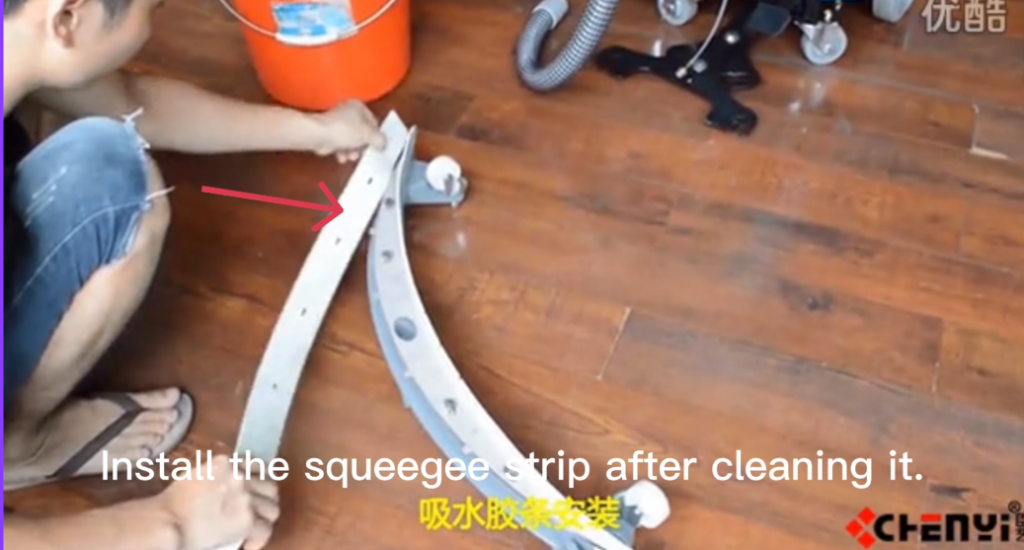
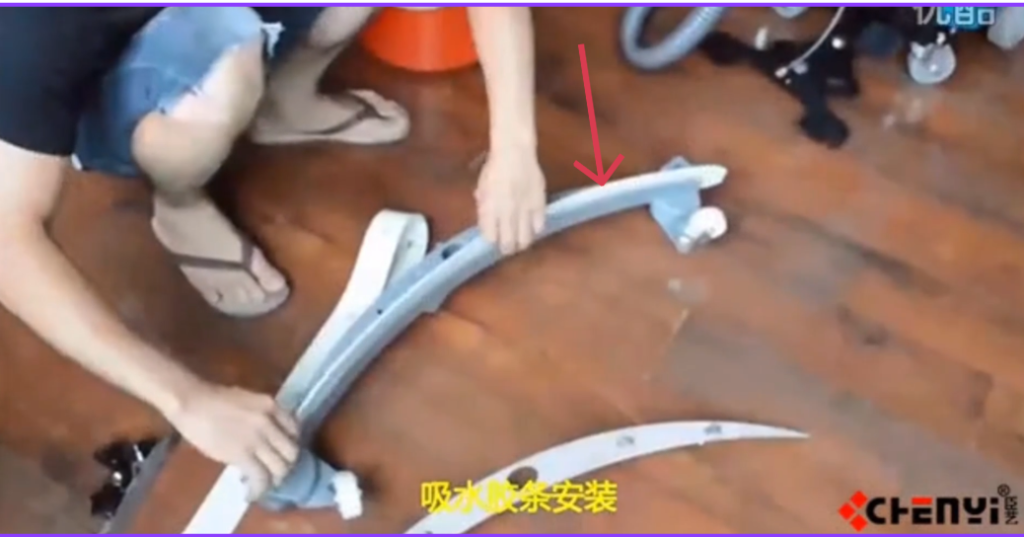
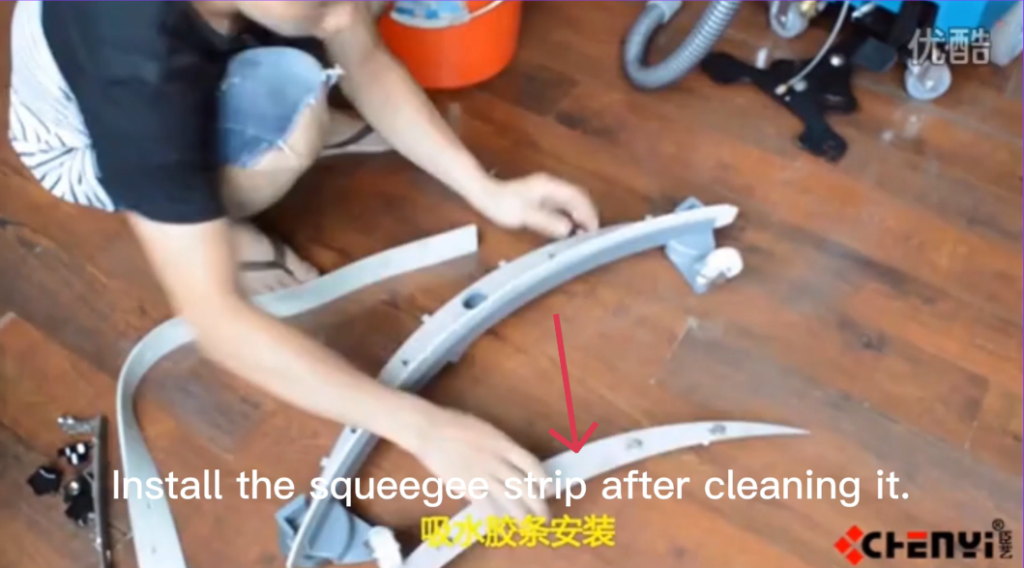
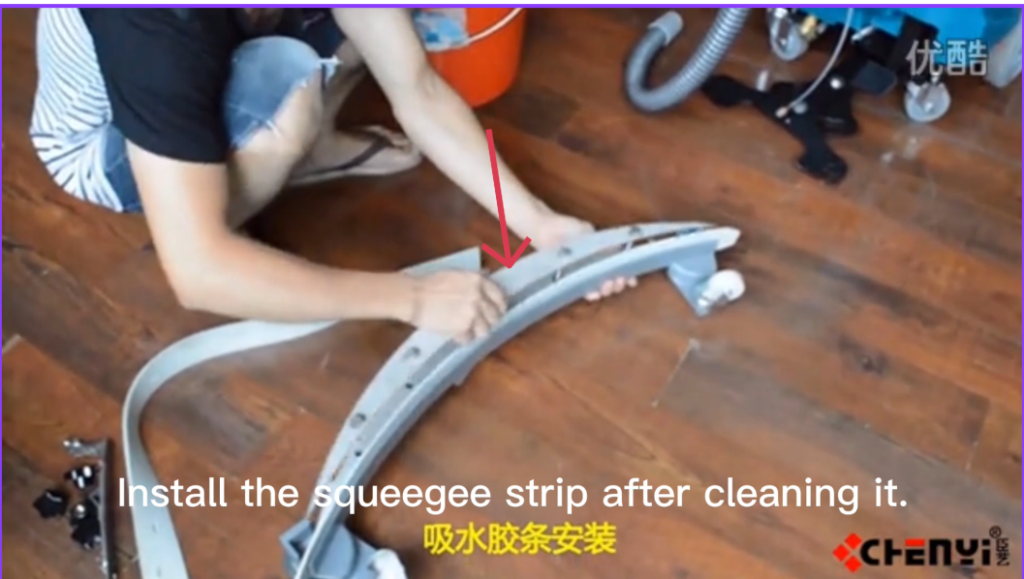
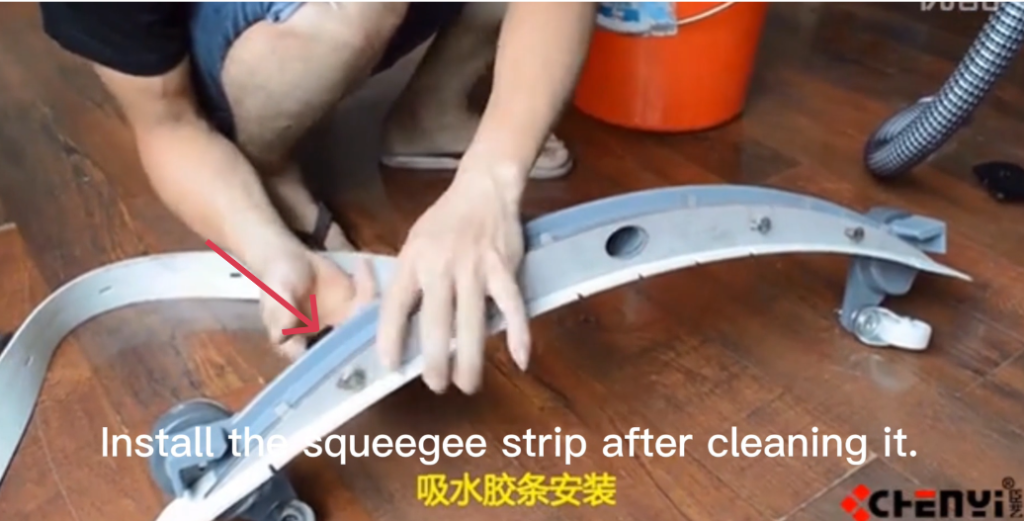
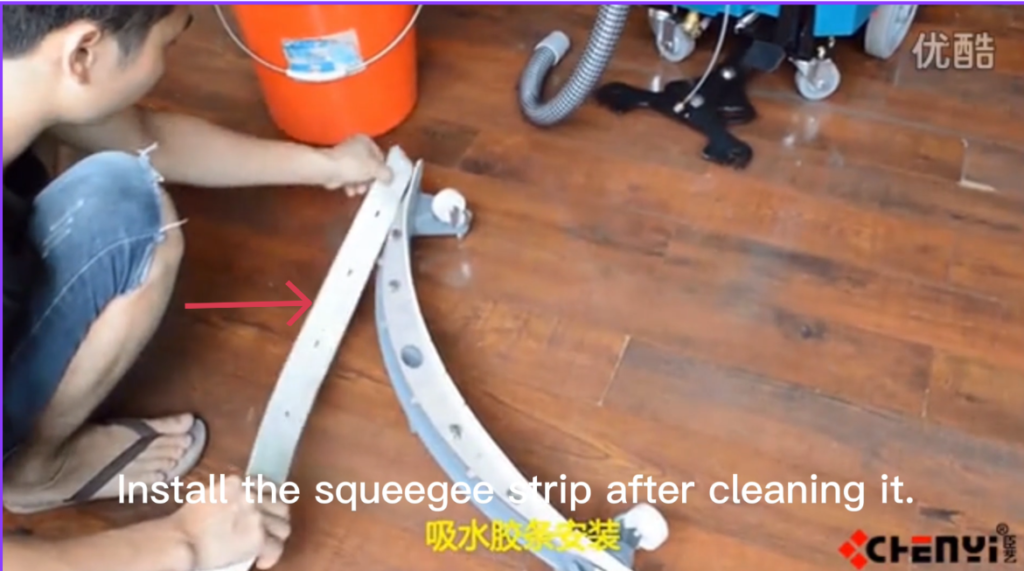
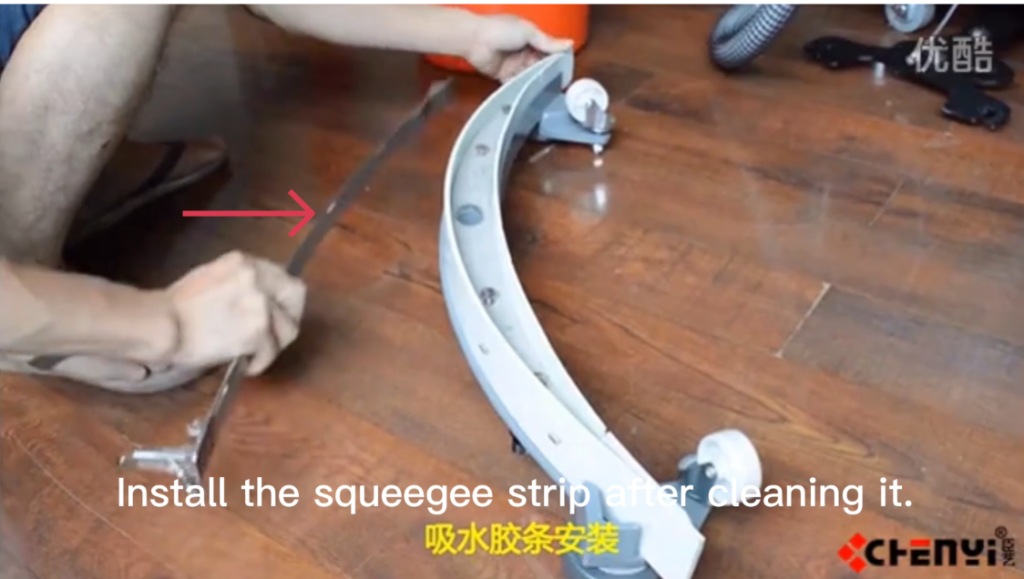
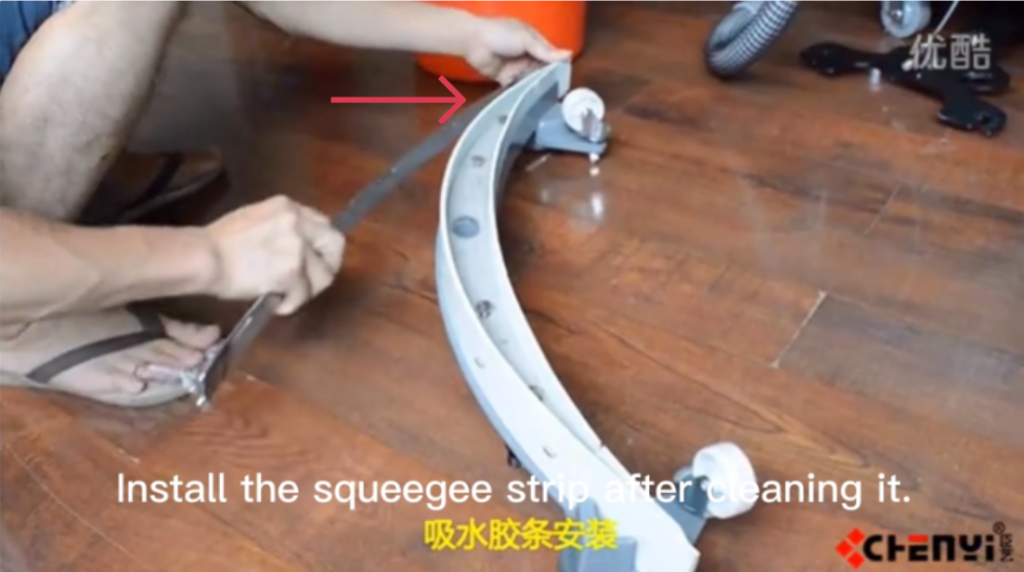
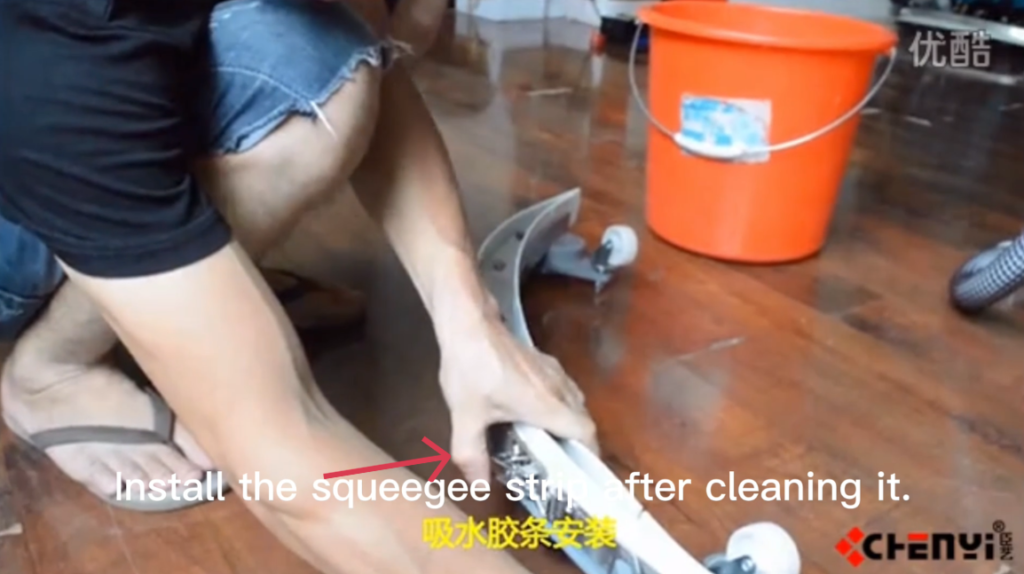
6.2 Installing the Squeegee Blades
- Insert the front blade into the front blade slot.
- Make sure it is centered and straight.
- Install the rear blade in the same way.
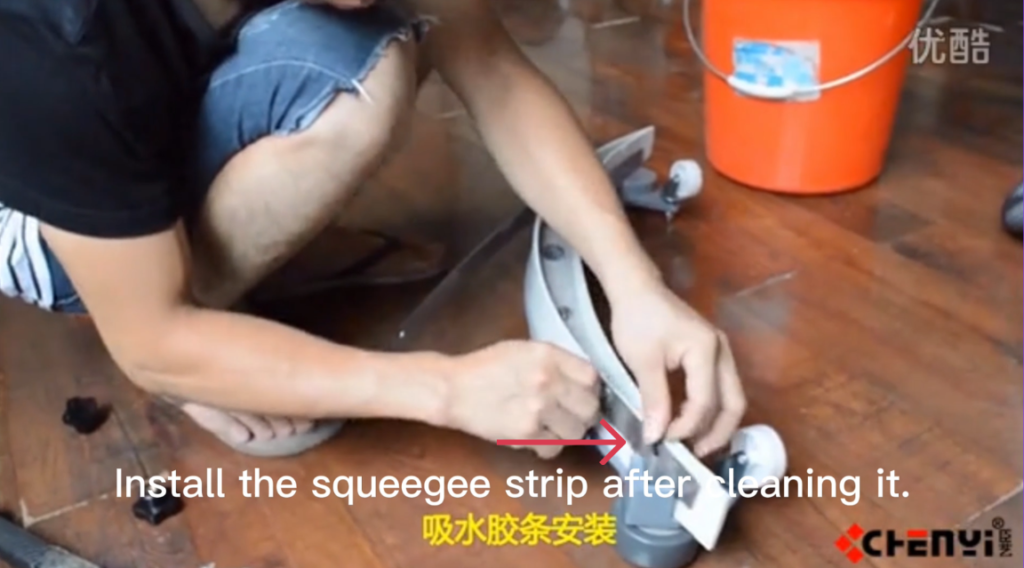
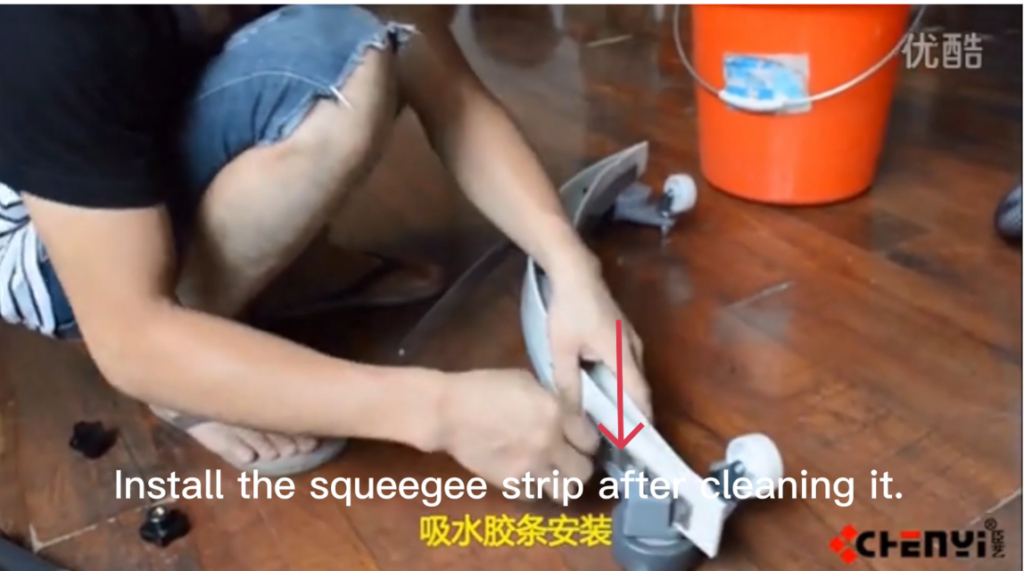
- Reinstall the front and rear clamps.
- Tighten the hand knobs by hand only.
- Do not over-tighten.

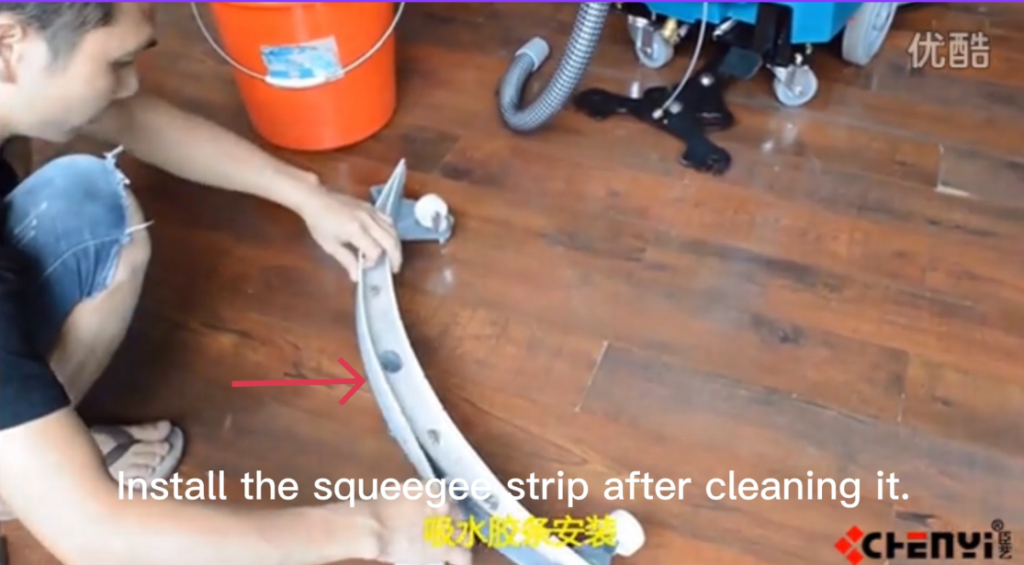
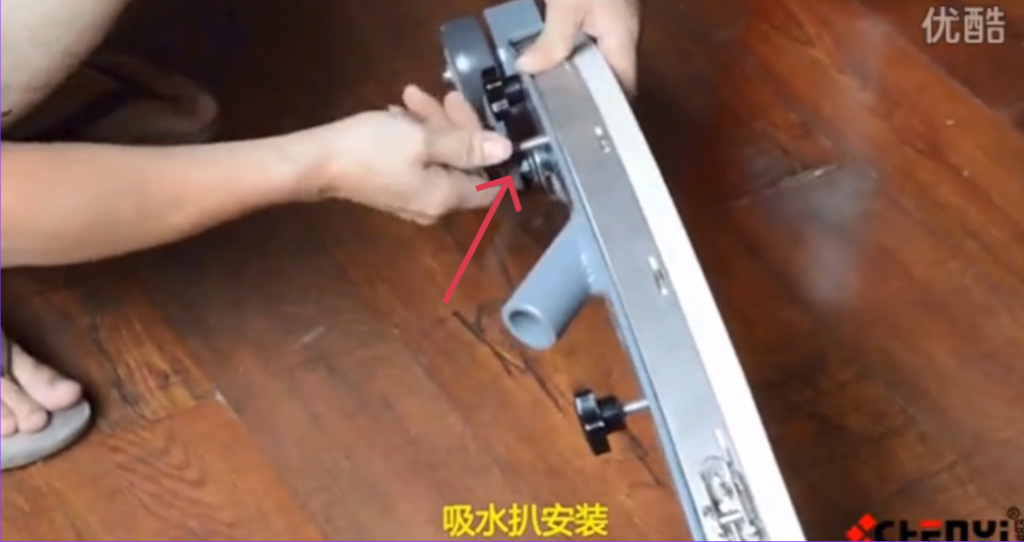
6.3 Installing the Squeegee Assembly
- Lift the squeegee assembly and align it with the mounting bracket.
- Position the assembly evenly between the mounts.
- Tighten both mounting knobs clockwise until secure.
- Reconnect the vacuum hose:
- Push it fully onto the squeegee inlet
- Ensure a tight seal
6.4 Squeegee Adjustment
Proper adjustment is important for good water pickup.
- Lower the squeegee to the floor.
- Check that both blades touch the floor evenly.
- Adjust the angle or height if needed using the adjustment knobs.
- The rear blade should form a smooth, even curve against the floor.
6.5 Final Check
- Turn the machine ON.
- Run the machine for a short test.
- Check for:
- Proper water pickup
- No water streaks
- Secure hose connection
- Re-adjust if necessary.
Notes
- Always replace blades in pairs for best performance.
- Clean the squeegee after each use to extend blade life.
- Improper installation can reduce water recovery.
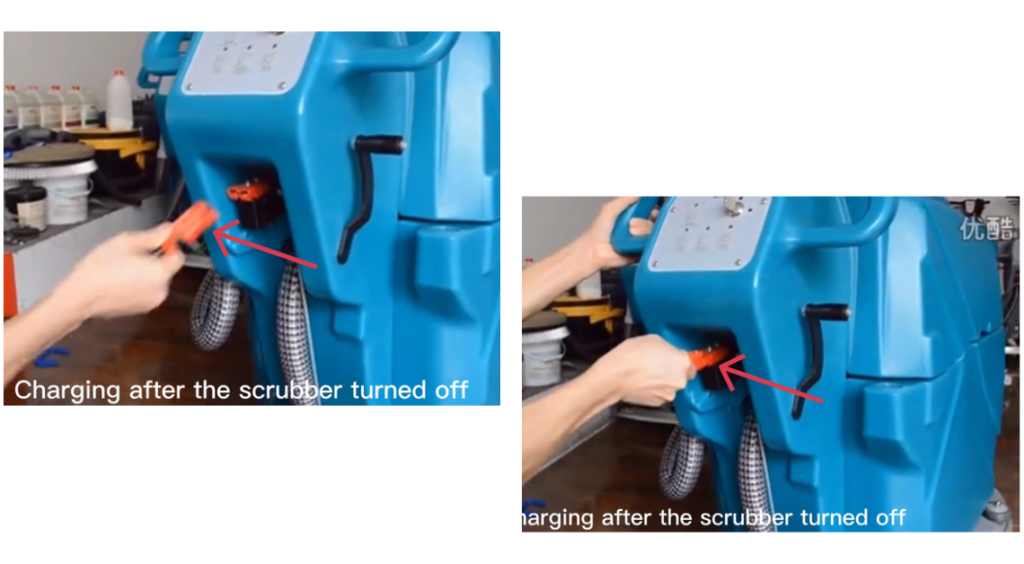
7. Charging the Battery
⚠ WARNING
Always turn the machine OFF before charging.
- Turn the scrubber OFF completely. (Turn the power switch OFF.)
- Connect the charger to the machine charging port.
- Plug the charger into a grounded power outlet.
- Allow the battery to charge fully. When charging is complete, unplug the charger.
- Move the machine to a well-ventilated charging area.
⚠ WARNING
Do not operate the machine while the charger is connected.
11. Daily and Weekly Maintenance
Daily Maintenance
- Drain and clean recovery tank
- Rinse solution tank
- Clean squeegee blades
Weekly Maintenance
- Check scrub brush wear
- Inspect squeegee blade condition
- Check battery connections
Battery Maintenance
This machine is equipped with optional sealed lead-acid batteries featuring maintenance-free operation, no routine servicing, and automatic pressure-relief protection.
General Charging Principles
- Charge after each use. Recharge the battery as soon as the machine finishes operating.
- Do not deep discharge frequently. Avoid running the battery down to its minimum protection voltage.
- Use as you charge, charge as you use. Frequent partial charging is recommended to maximize battery life.
1. What Is a Short Circuit and How Does It Affect Battery Performance?
A short circuit occurs when the positive and negative terminals are directly connected, either externally or internally within the battery, causing a high current flow.
Effects of a Short Circuit:
- During charging, battery voltage rises very slowly and remains at a low level
- Electrolyte temperature increases rapidly and excessively
- Electrolyte density increases slowly or shows little to no change
- During discharge, terminal voltage drops quickly
Short circuits can cause severe damage, overheating, and permanent loss of battery capacity.
2. What Is Over-Discharge and How Does It Affect Battery Performance?
Over-discharge occurs when the battery continues discharging after reaching its minimum operating voltage.
Effects of Over-Discharge:
- Battery voltage drops sharply in a short time
- Internal chemical reactions become unstable
- Repeated over-discharge causes the positive plates to lose activity
- Battery service life is significantly reduced
- Operating time decreases and charging time increases
To protect battery life, avoid repeated deep or over-discharge conditions.
3. How Should the Battery Be Stored After Use?
Batteries are sensitive components. If the machine will not be used for an extended period:
- Remove the battery from the machine
- Store it in a dry, well-ventilated location at room temperature
- Avoid leaving the battery installed, as connected electrical components and circuit boards may cause continuous micro-discharge, even when the machine is powered off
Proper storage helps prevent capacity loss and premature aging.
4. Why Does Battery Life Become Shortened?
Common causes of reduced battery life include:
- Insufficient charging over long periods
- Leaving the battery uncharged for extended periods after discharge
- Frequent over-discharge during operation
- Using a non-standard or non-approved charger, leading to over-charging
- Voltage imbalance between batteries within a battery pack
- Long-term operation under low-voltage conditions
To ensure optimal performance and service life, always use the specified charger and follow the recommended charging and usage practices.
12. Basic Troubleshooting
| Problem | Possible Cause | Solution |
|---|---|---|
| Poor water pickup | Dirty or worn squeegee | Clean or replace blade |
| Machine does not run | Battery low | Recharge battery |
| Water left on floor | Squeegee not lowered | Lower and adjust squeegee |
8. Important Notes
- Follow the correct button sequence during operation.
- Always turn the machine OFF before servicing.
- Replace worn parts promptly.
- Use only manufacturer-approved accessories and parts.
- Always stop water flow before stopping the brush.
- Clean and maintain the machine after each use.
- Proper maintenance ensures best cleaning performance and longer machine life.