This manual provides step-by-step instructions for operating and maintaining the CY Compact Rider Floor Scrubber.
Please read this manual carefully before operating the machine.
Intended Use
The Compact Rider Scrubber is designed for:
- Scrubbing and drying hard floor surfaces (concrete, epoxy, tile, vinyl, stone, terrazzo)
- Operation by trained adults
⚠️ Do NOT use this machine:
- On carpet or soft flooring
- In explosive or flammable environments
- To collect hazardous dust, chemicals, or flammable liquids
Safety Information
General Safety Rules
- Do not operate under the influence of alcohol or drugs
- Never allow unauthorized or untrained persons to use the machine
- Keep hands, feet, and loose clothing away from moving parts
Operating Safety
- Always sit properly on the seat while operating
- Reduce speed on wet floors, ramps, or uneven surfaces
- Do not turn sharply at high speed
- Stop the machine immediately if abnormal noise or vibration occurs
Electrical & Battery Safety (if applicable)
- Charge the batteries only with the supplied or approved charger
- Do not expose batteries to open flame or extreme heat
- Disconnect power before performing maintenance
⚠️ Warning: Failure to follow safety instructions may result in injury or property damage.
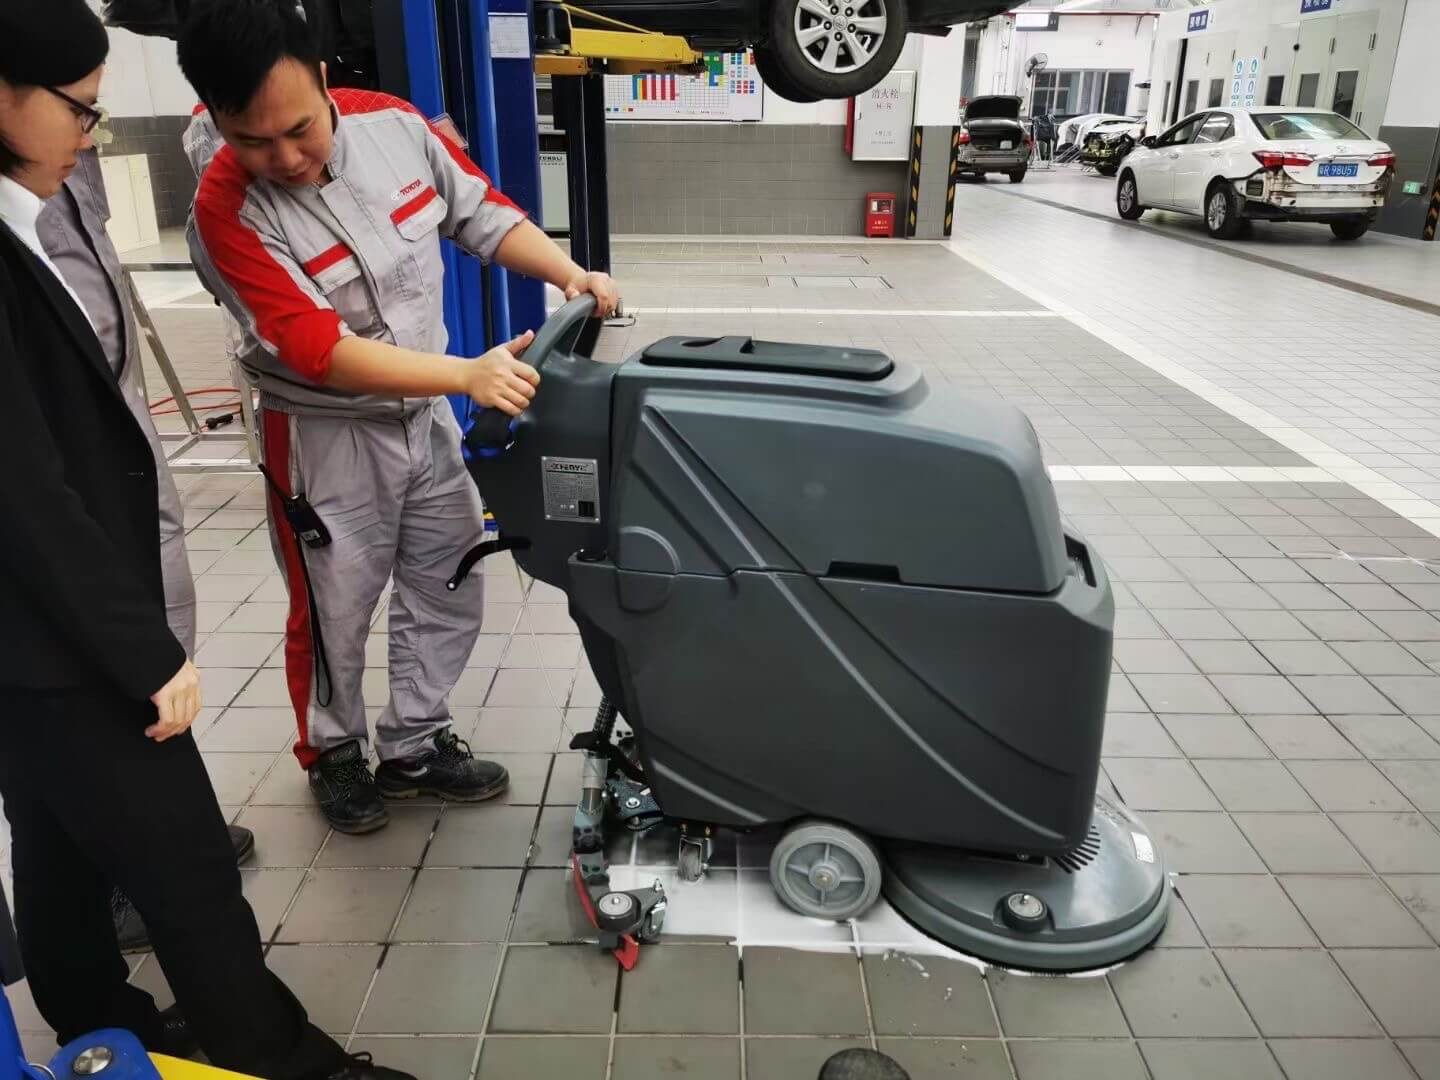
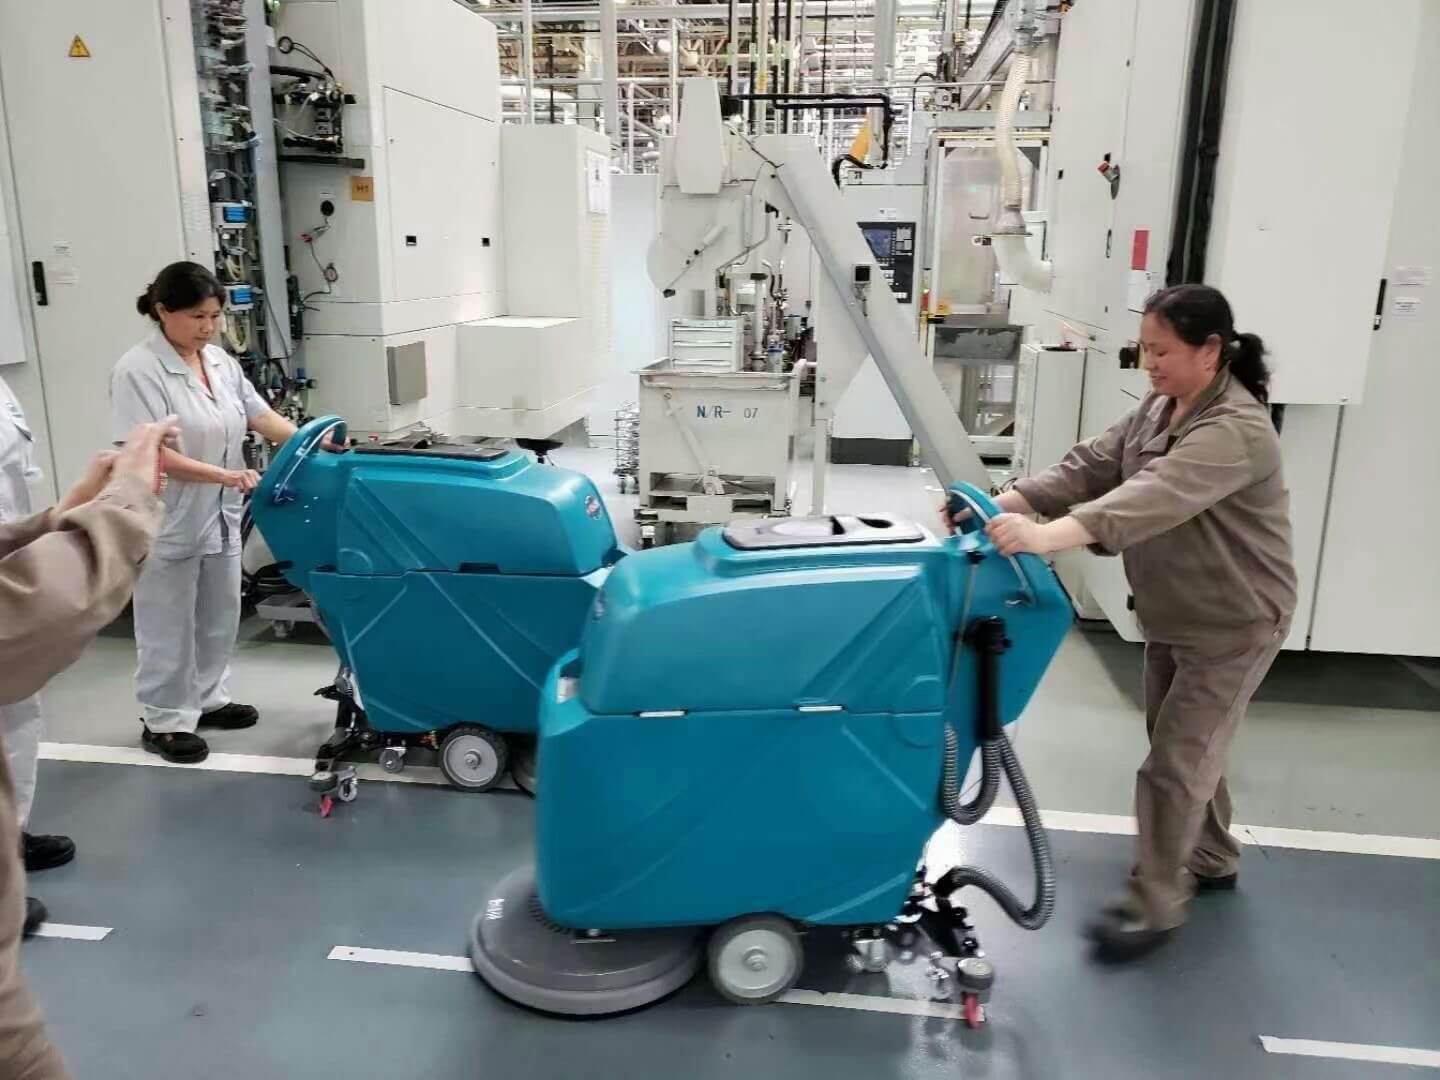
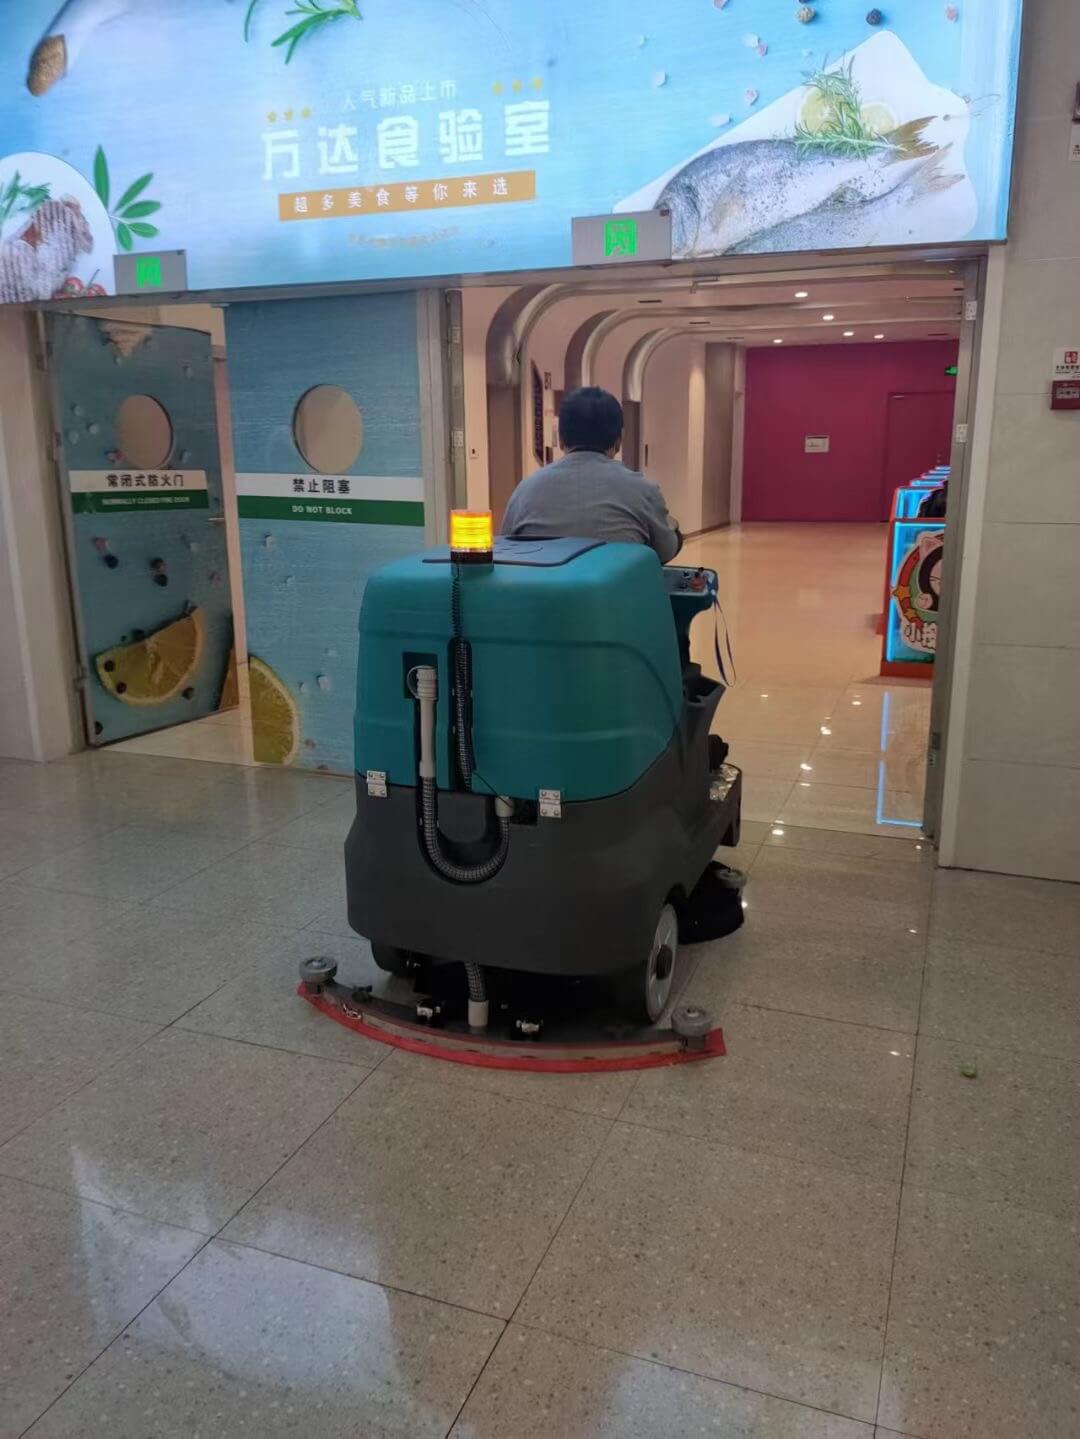
1. Overall Introduction
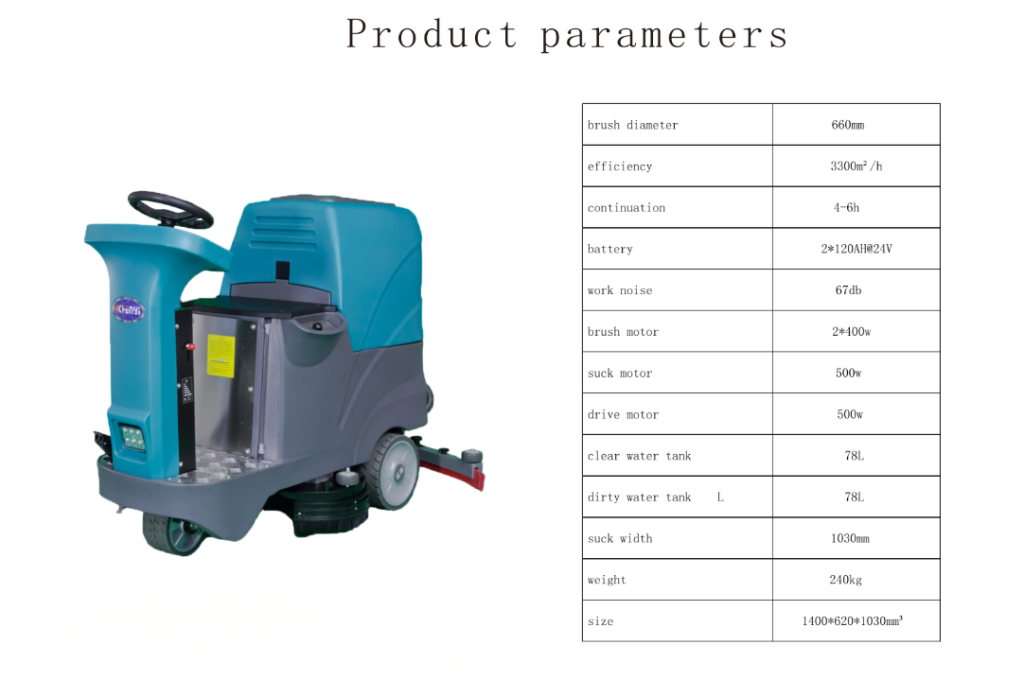
The CY Compact Rider Floor Scrubber is designed for commercial and industrial floor cleaning, combining scrubbing, washing, and water recovery in one operation.
Its compact size allows easy maneuvering in narrow areas while maintaining high cleaning efficiency.
2. Machine Components Overview
2.1 Control and Operation Components
- Smart Control Panel – Displays machine status and allows function selection
- Mechanical Adjustment Lever – Used for mechanical height or position adjustment
- Stepless Accelerator Pedal – Controls machine travel speed smoothly
- Emergency Stop Button – Immediately stops the machine in an emergency
2.2 Water and Tank System
- Clean Water Inlet – Used to fill the solution tank
- Clean Water Level Pipe – Indicates the water level in the solution tank
- Brass Clean Water Valve – Controls clean water flow
- Sewage Tank (Recovery Tank) – Collects dirty water
- Low-Temperature Resistant Sewage Pipe – Used to drain wastewater
2.3 Cleaning Components
- 13-Inch Brush Plate – Provides effective floor scrubbing
- Squeegee Assembly – Recovers dirty water from the floor
3. Prepare Before Use
Before operating the machine, perform the following inspections:
- Check that the recovery tank cover is properly installed and airtight.
- Check that the suction pipe is securely connected.
- Check that the drain pipe is tight, sealed, and fully closed.
- Check that all power wires and electrical connections are firmly connected.
- Check that the battery is fully charged:
- Fully charge batteries before first use
- Follow charger instructions carefully
- Charging time may take 8–10 hours depending on battery type
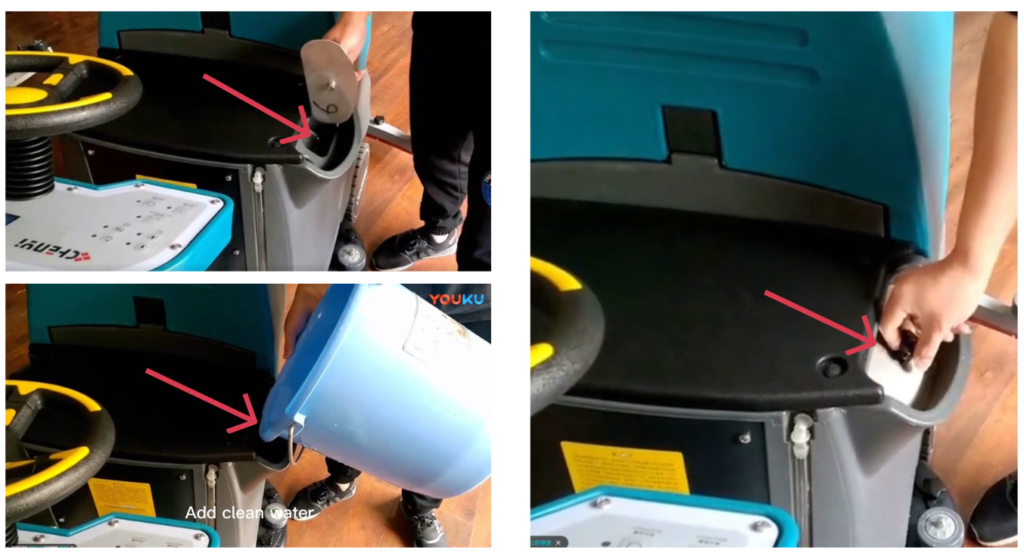
4. Filling the Solution Tank
- Turn off the machine
- Open the solution tank cap
- Add clean water into the solution tank.
- Add approved low‑foam floor detergent according to manufacturer instructions if necessary.
- Observe the clean water level pipe to avoid overfilling.
- Close the clean water inlet securely.
⚠️ Never use high‑foam detergent.
5. Starting the Machine
- Sit on the operator seat
- Insert the key and turn to ON position
- Check battery level and warning indicators
- Select forward or reverse direction
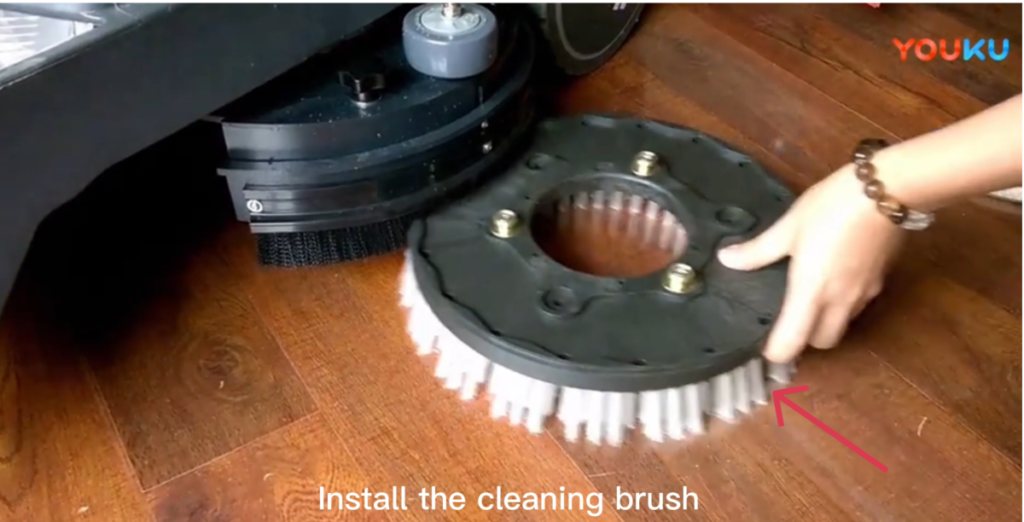
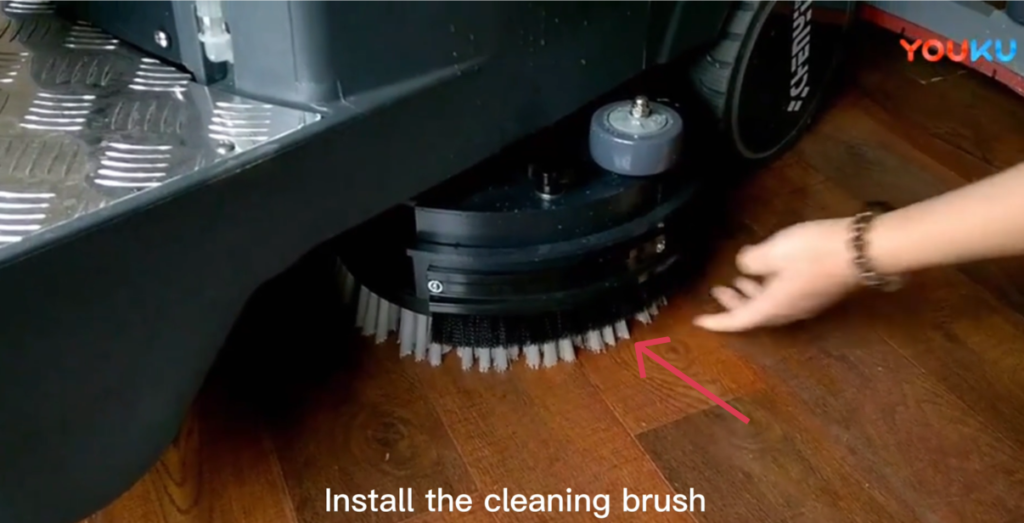
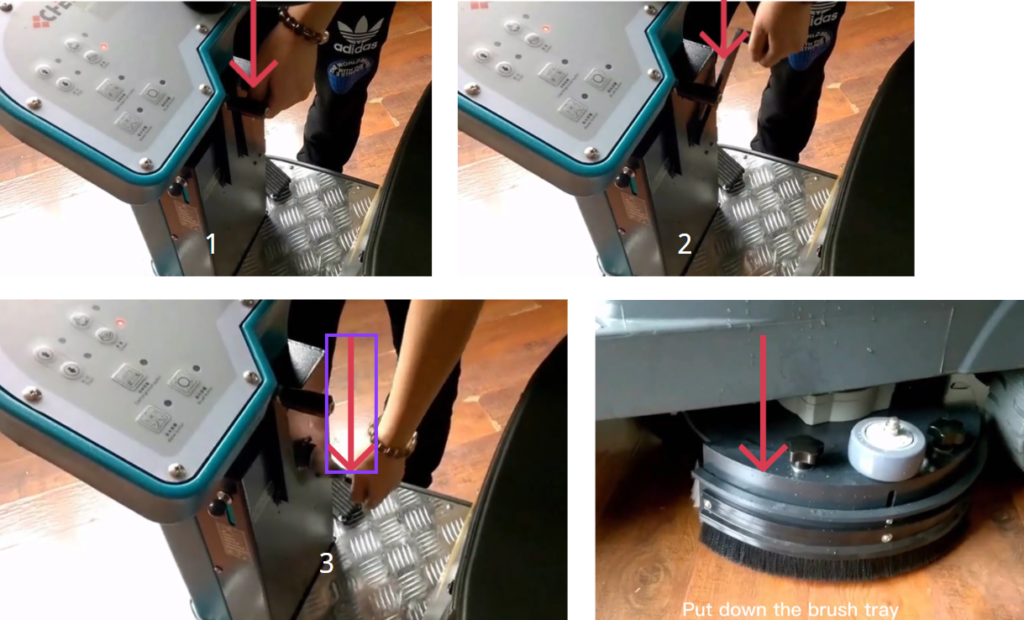
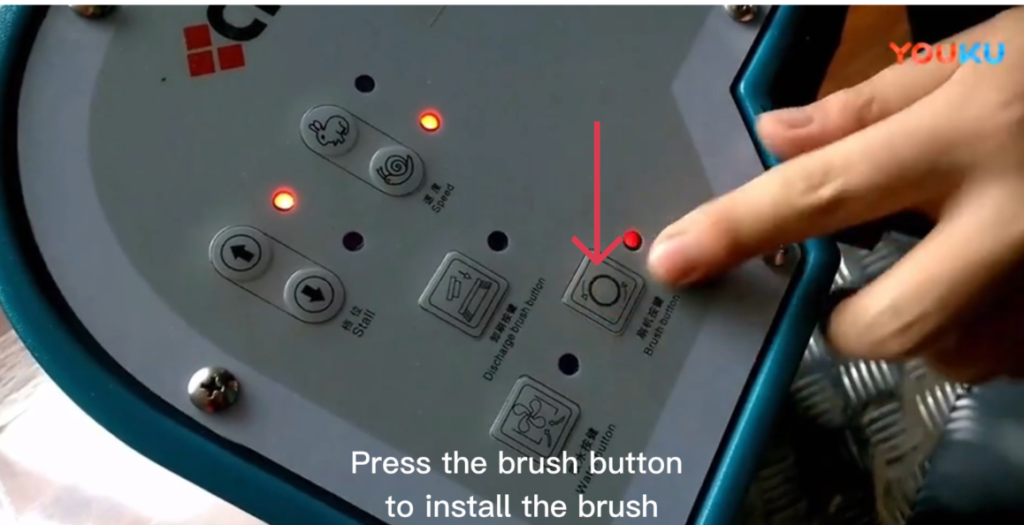
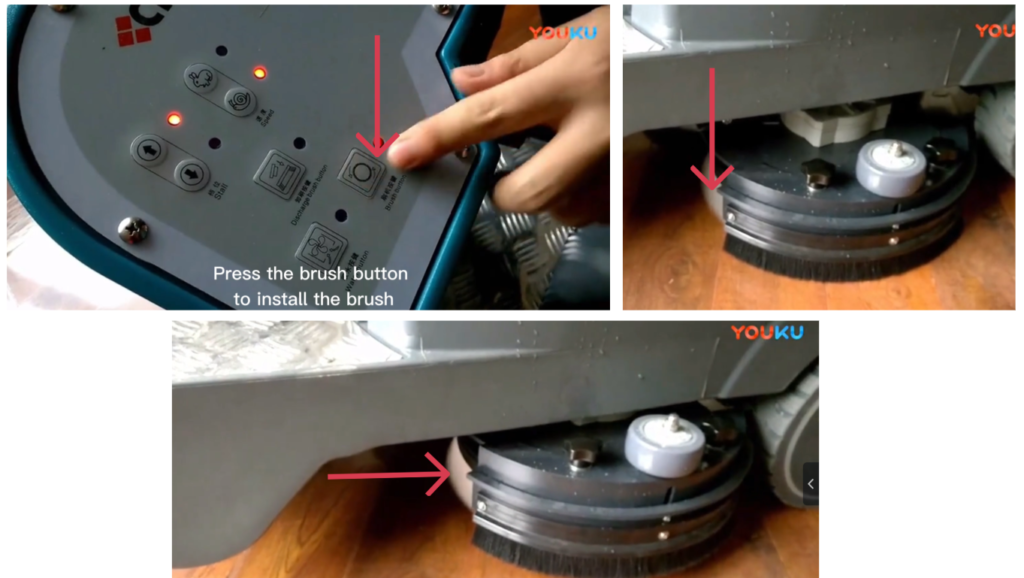
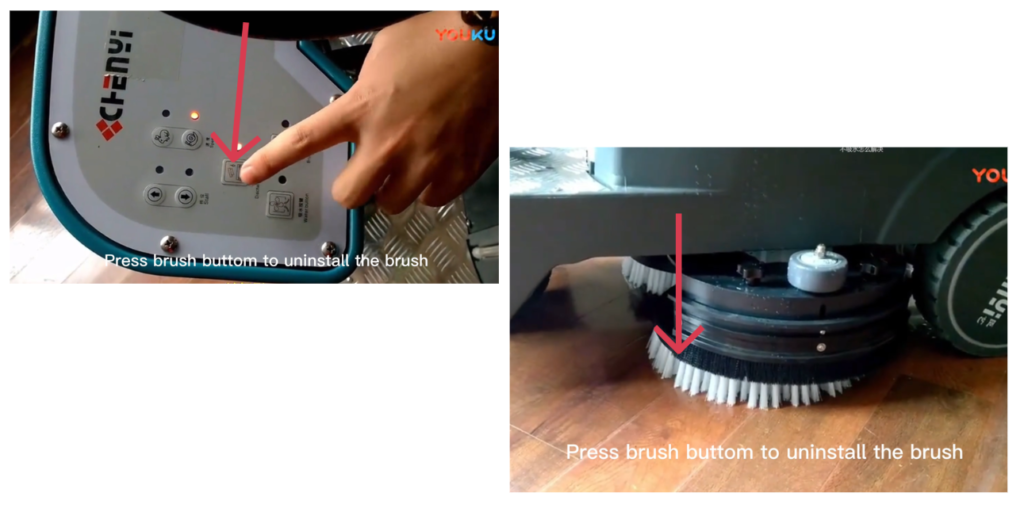
6. Installing the Cleaning Brush
- Ensure the machine is powered ON and in a safe position.
- Align the cleaning brush with the brush plate.
- Lower the brush tray.
- Press the brush button.
- The brush will rotate and automatically install.
- Confirm that the brush is securely installed.
- The system will indicate that the brush has been installed.
7. Operation Guides
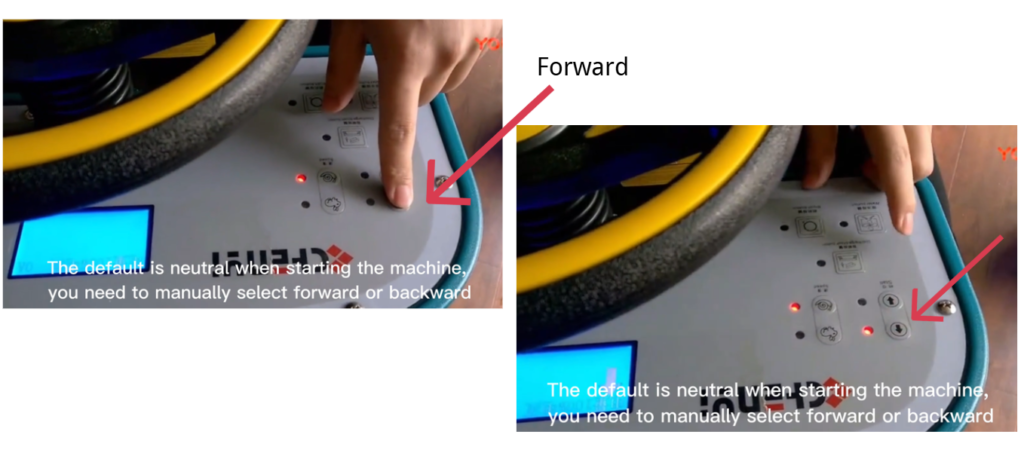
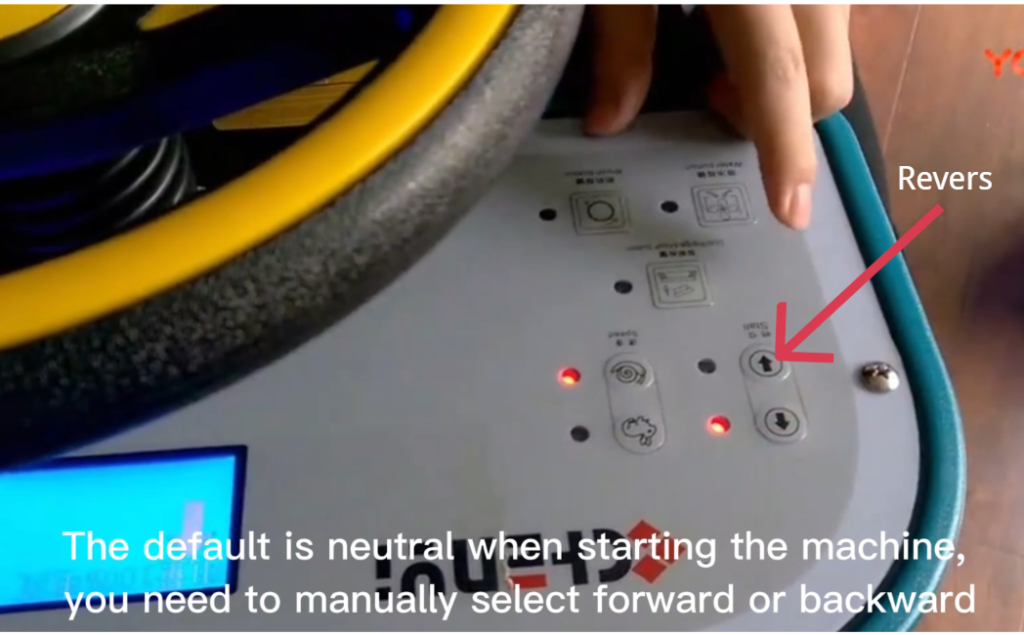
7.1 Driving Direction Selection
- When the machine is powered ON, the default gear is Neutral.
- Use the control panel to manually select:
- Forward, or
- Reverse
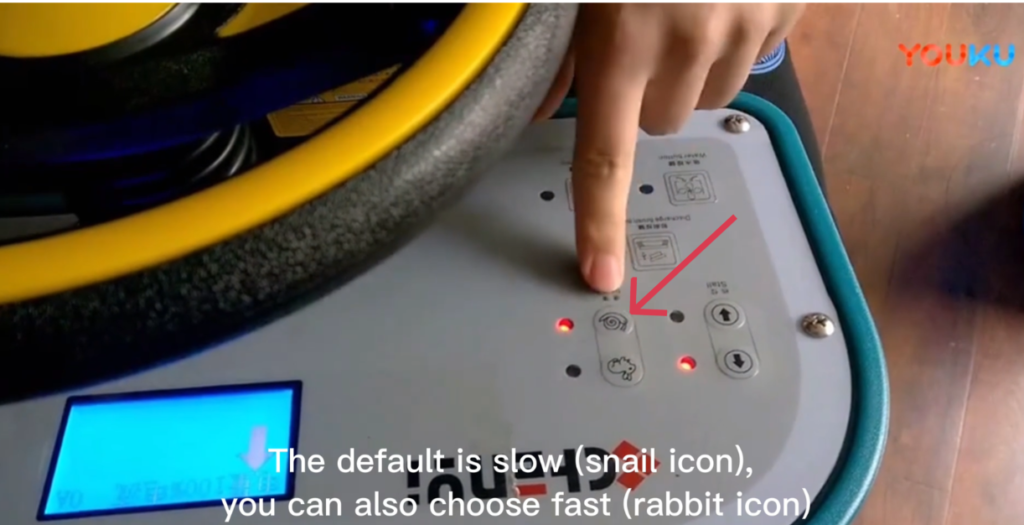
7.2 Speed Selection
- The default speed is Slow Mode (snail icon).
- You may select Fast Mode (rabbit icon) if required.
⚠ NOTICE
Use slow speed in narrow areas or when operating for the first time.
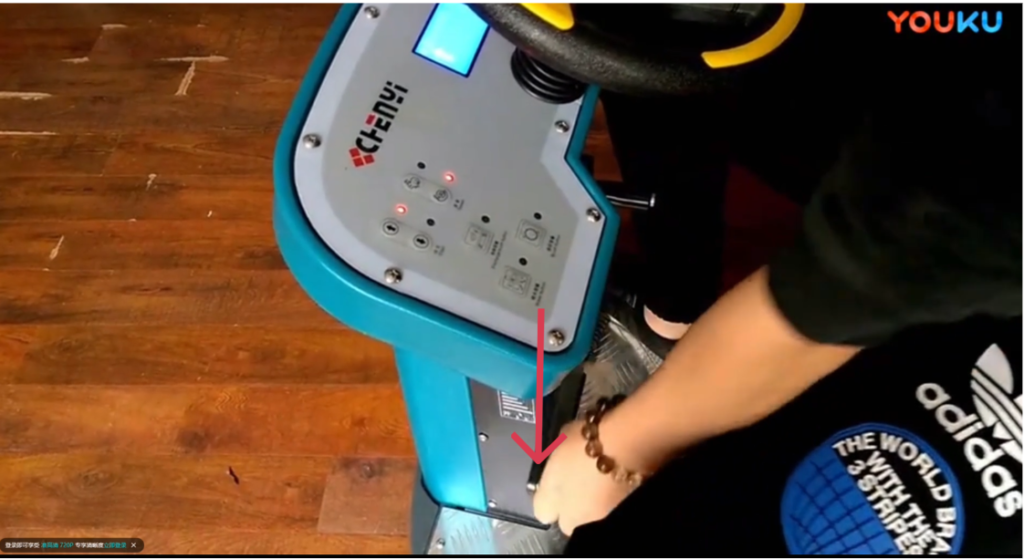
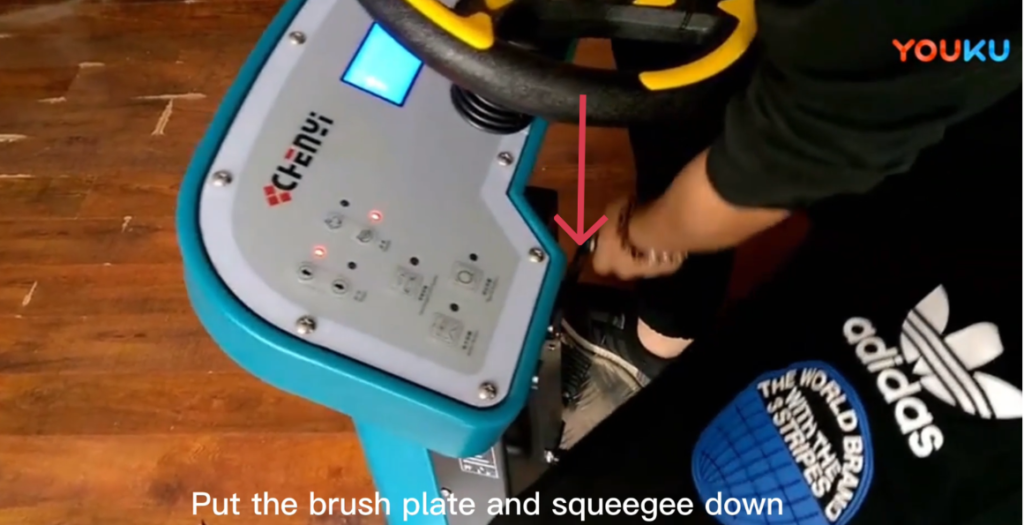
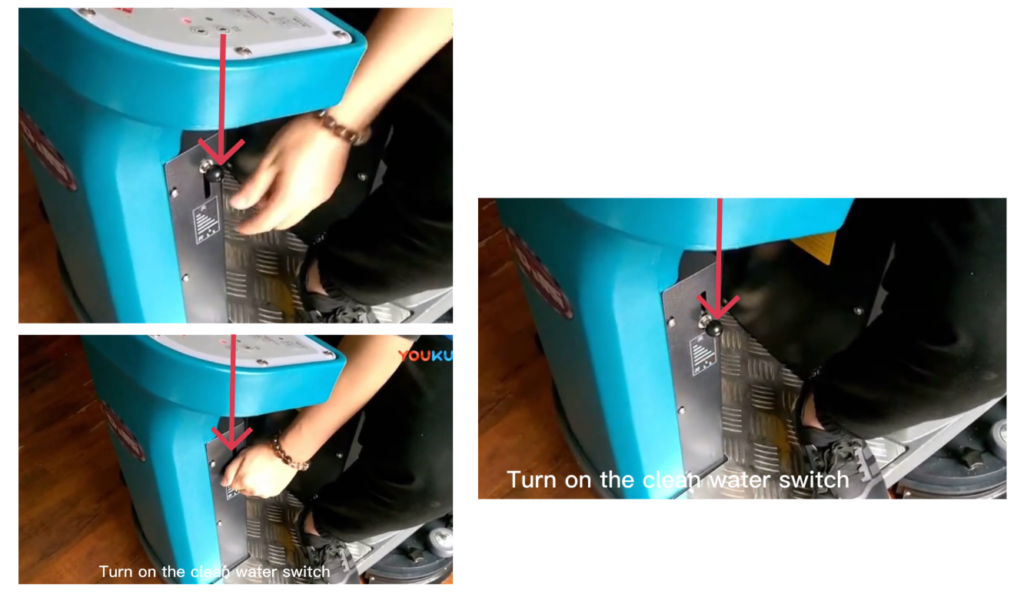
7.3 Preparing for Cleaning
- Lower the brush plate.
- Lower the squeegee assembly.
- Turn ON the clean water switch.
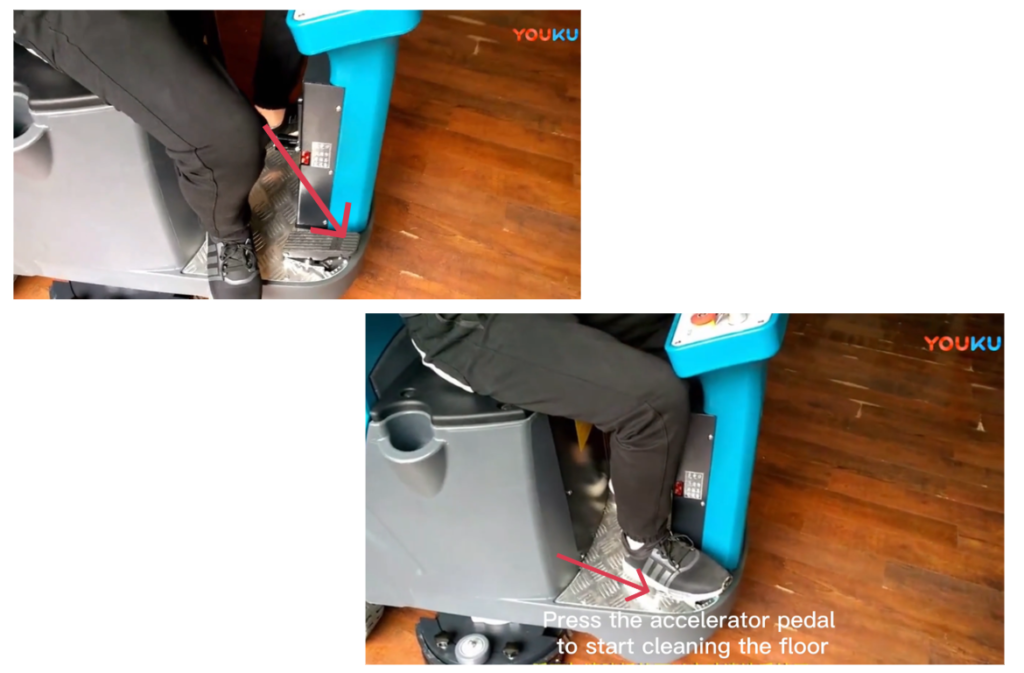
7.4 Starting Floor Cleaning
- Gently press the accelerator pedal.
- The machine will begin moving and cleaning the floor.
- Maintain steady pedal pressure for smooth operation.
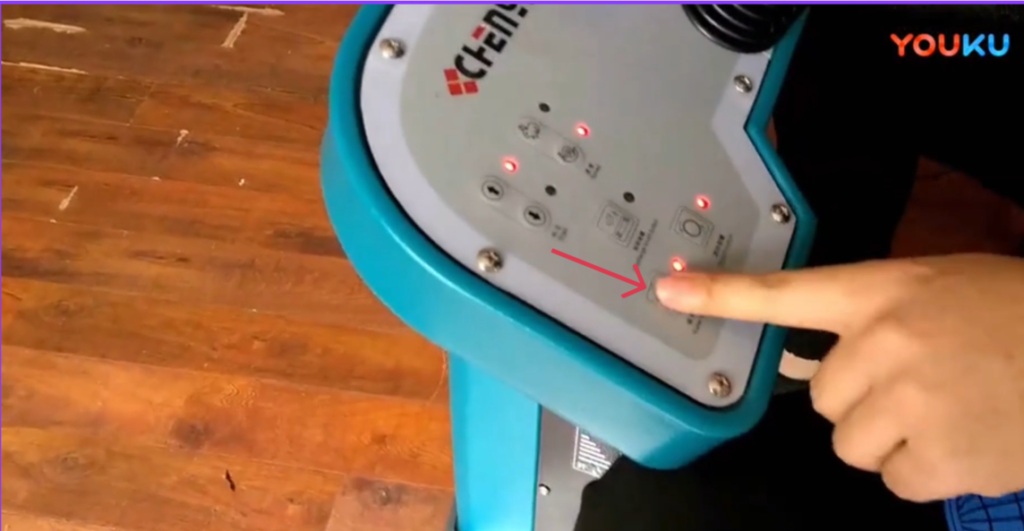
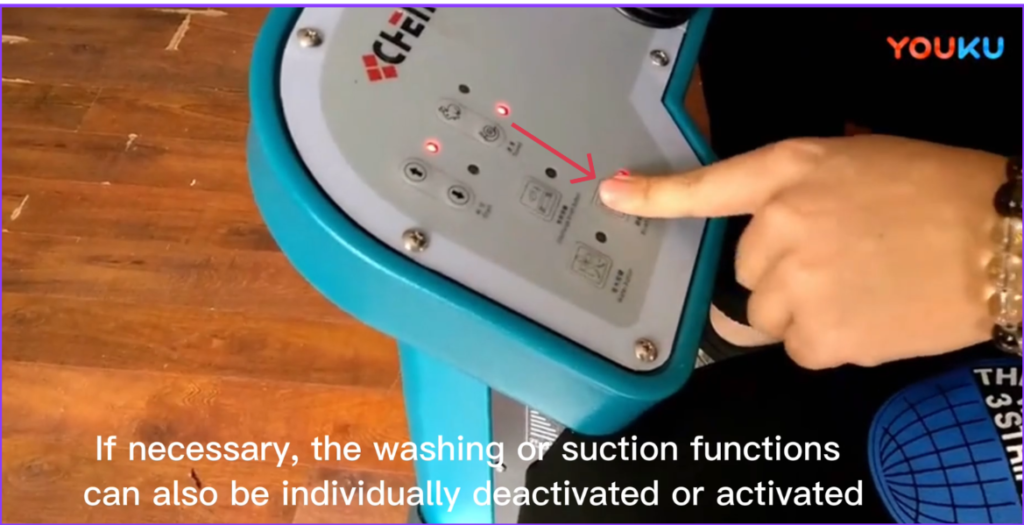
7.5 Function Control During Operation
- The scrubbing function and suction function can be:
- Activated independently, or
- Deactivated independently, as needed.
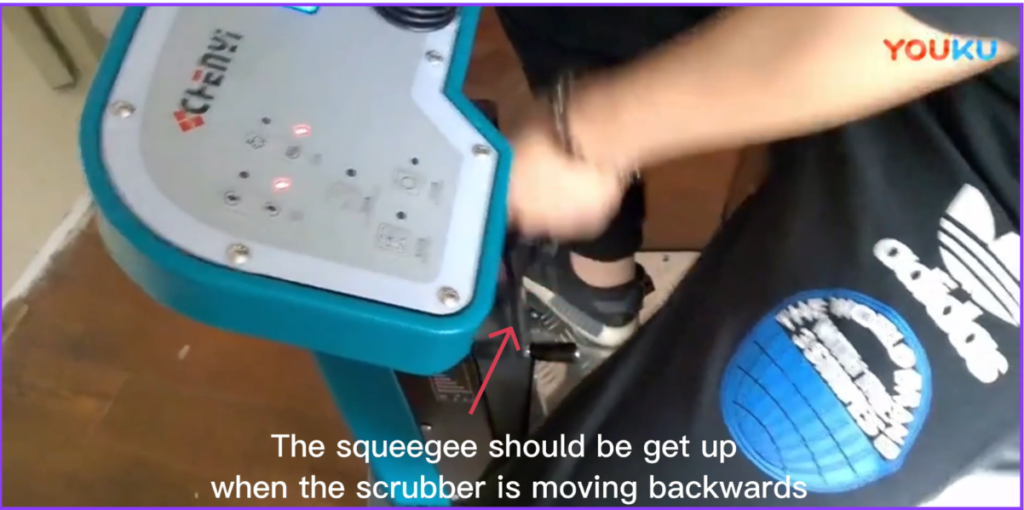
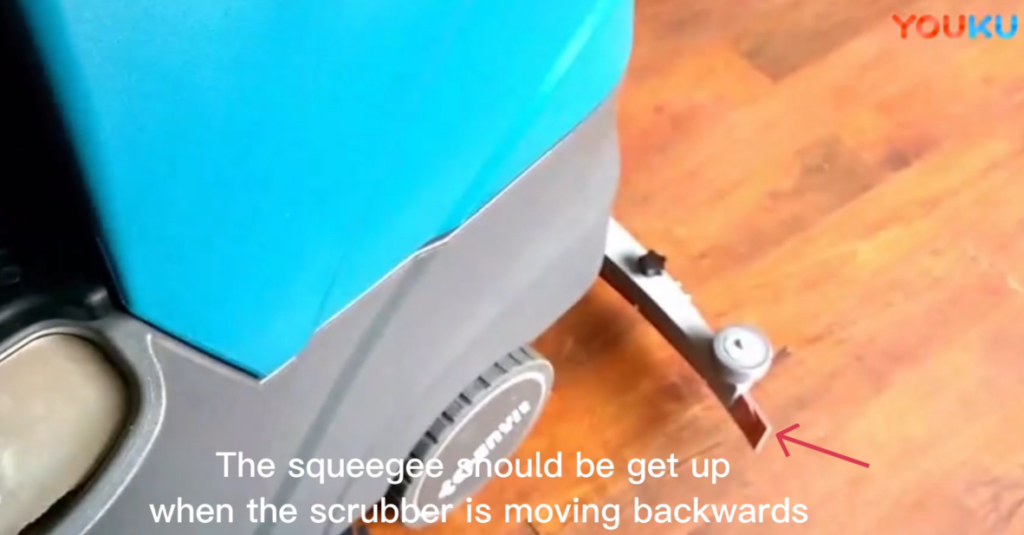
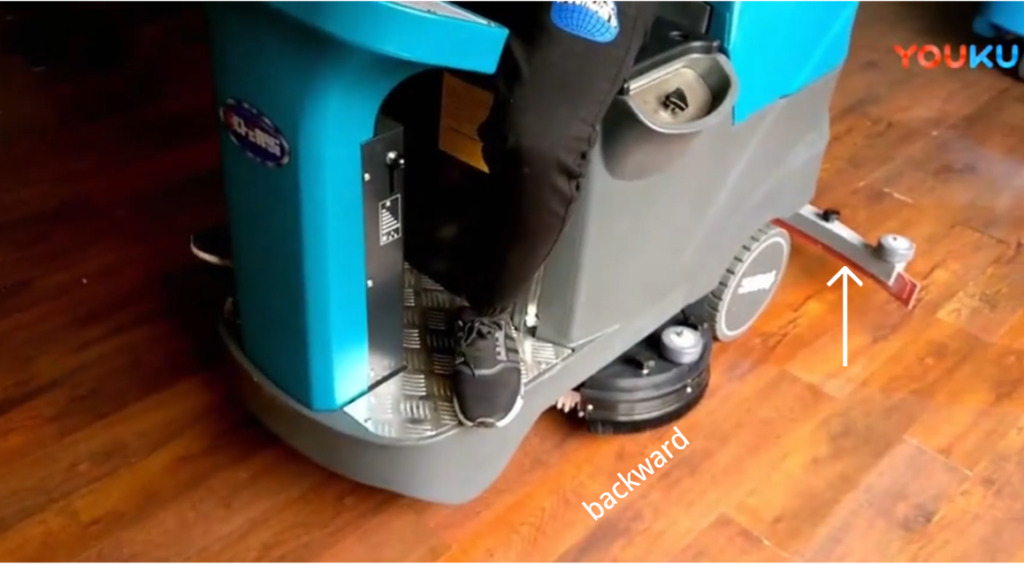
7.6 Reverse Operation
⚠ IMPORTANT
- When the machine is moving backward, the squeegee must be raised.
- This prevents damage to the squeegee and ensures safe operation.
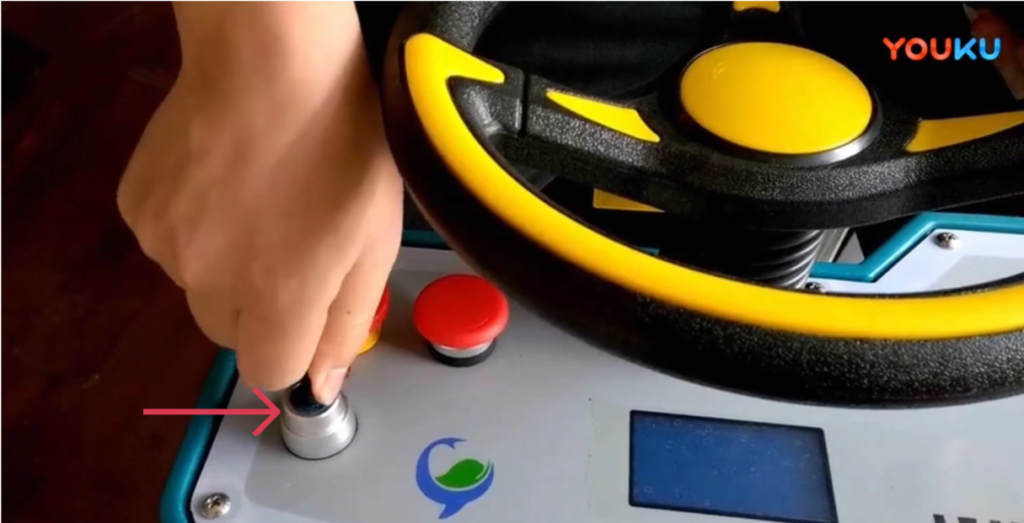
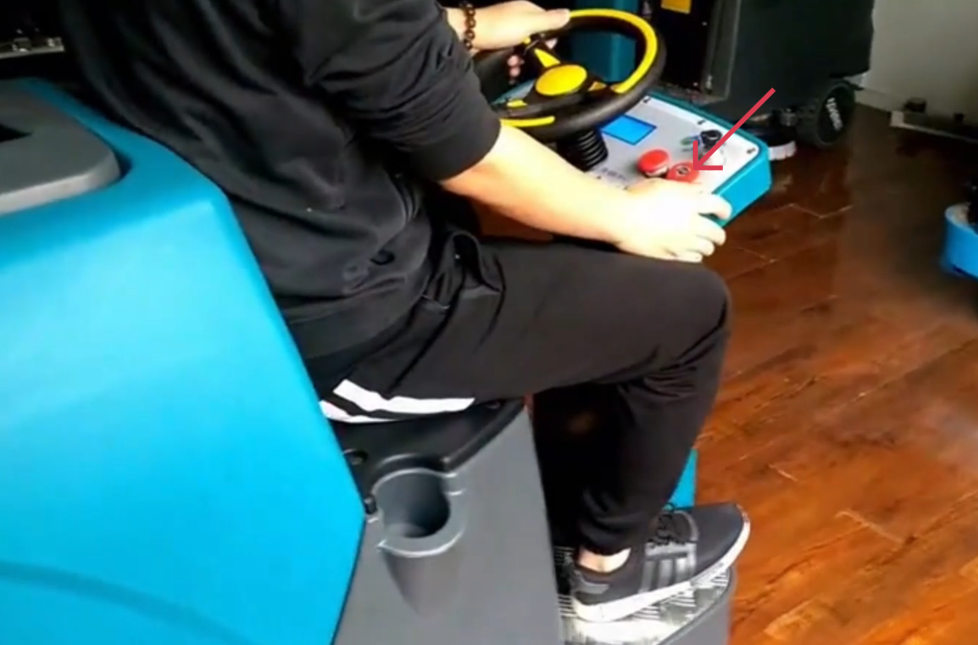
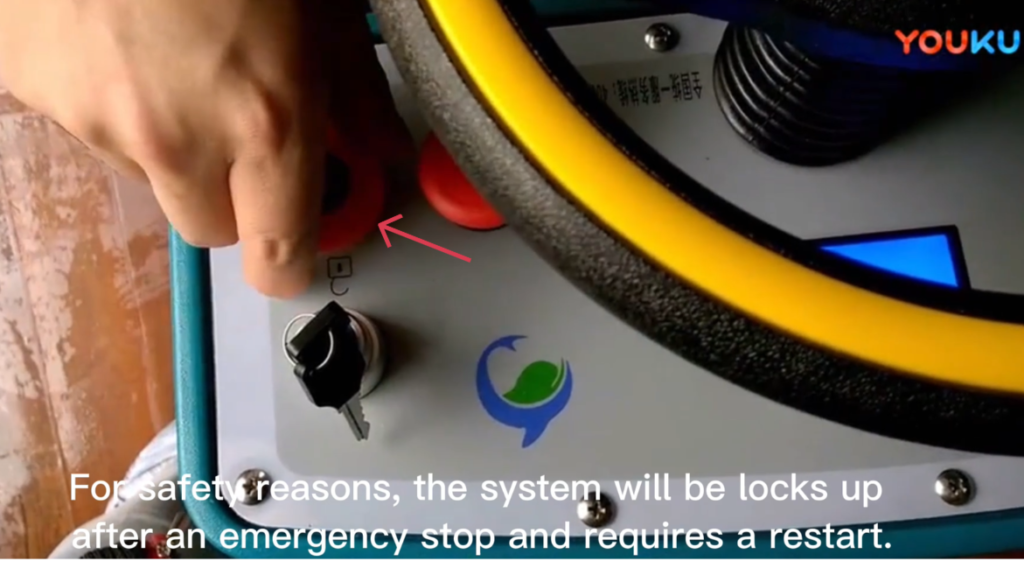
8. Emergency Stop Function
8.1 Emergency Stop Operation
- In an emergency, press the Emergency Stop Button immediately.
- The machine will stop all movement and functions.
This design prevents accidental acceleration during emergencies.
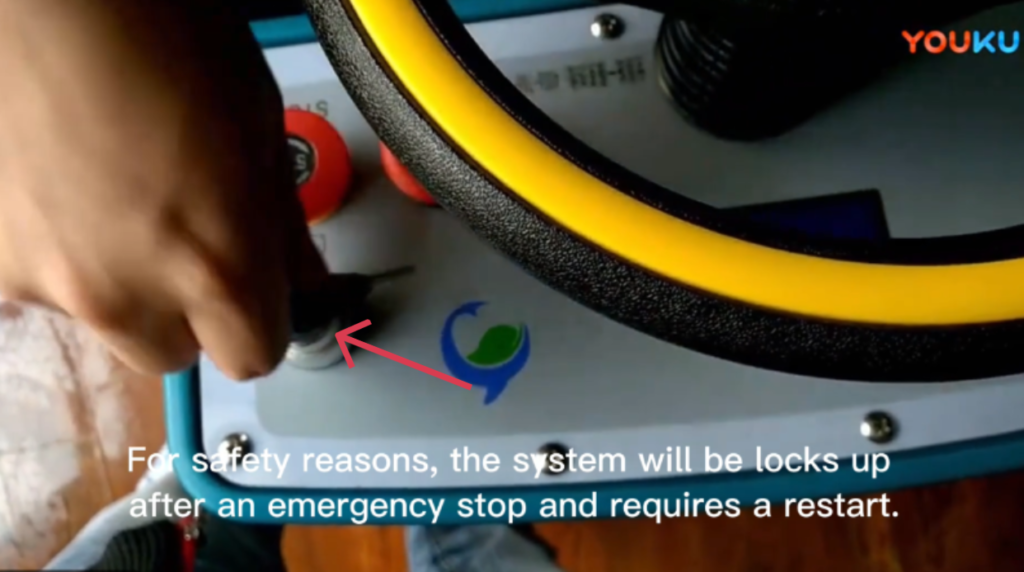
8.2 System Lock After Emergency Stop
⚠ WARNING
- After an emergency stop, the system will be locked for safety reasons.
- The machine must be restarted before operation can resume.
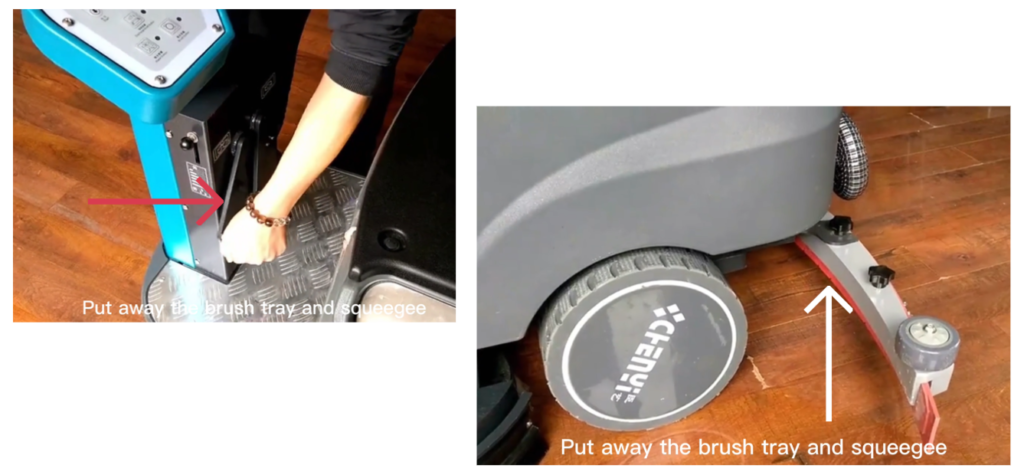
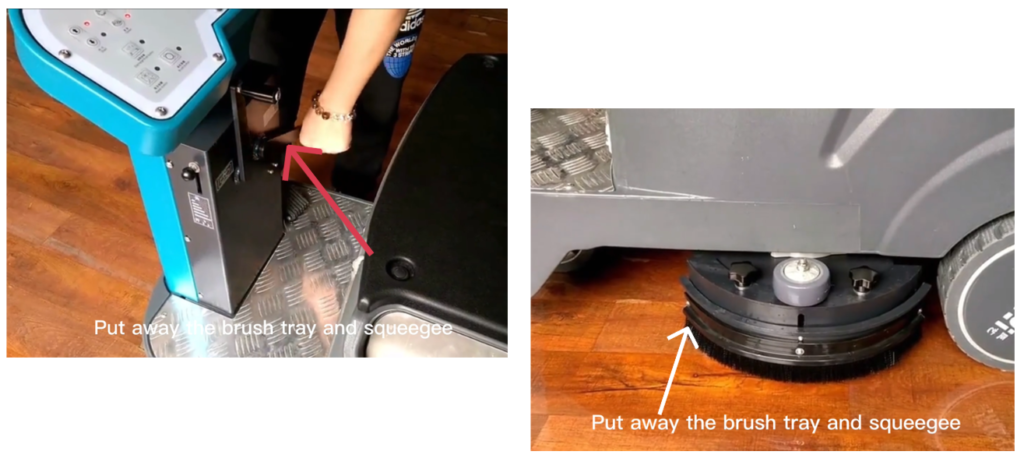
9. Ending Operation
9.1 Raising Cleaning Components
- Raise the brush tray.
- Raise the squeegee assembly.
9.2 Uninstalling the Brush
- Press the brush button again.
- The brush will automatically uninstall.
- Confirm the brush has been released.
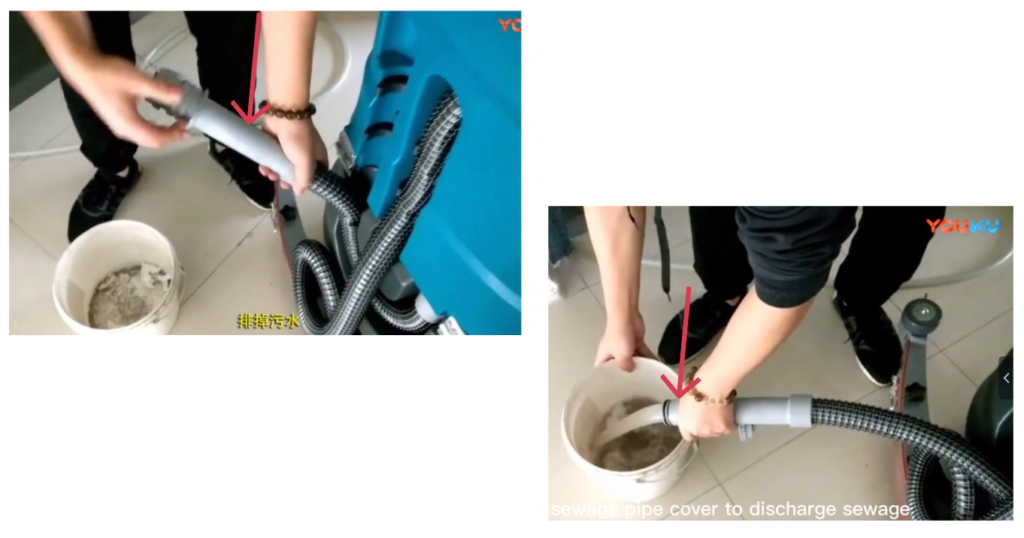
10. Draining and Cleaning After Use
10.1 Draining the Sewage Tank
- Turn the machine OFF.
- Open the sewage pipe cover.
- Drain all wastewater completely.
10.2 Flushing the Sewage Tank
- Flush the waste tank with clean water.
- Remove any remaining dirt or debris.

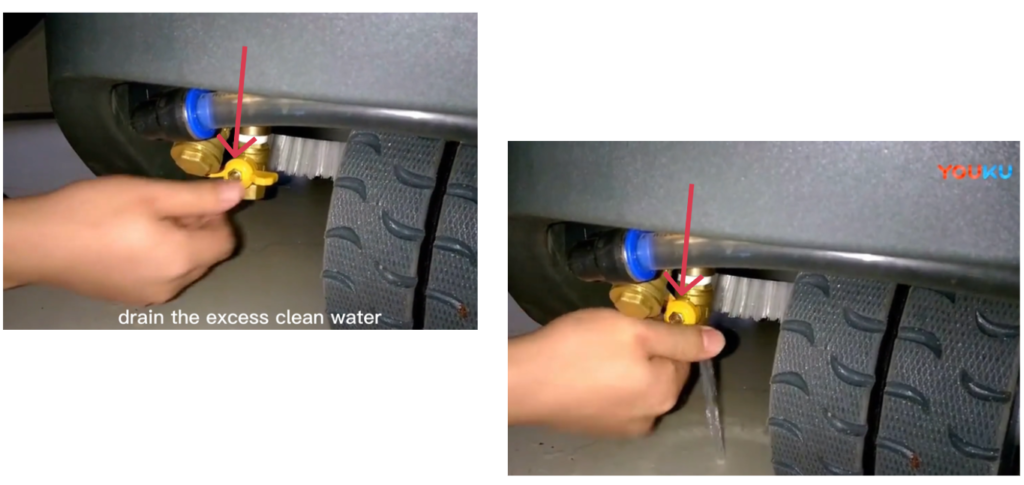
10.3 Draining Excess Clean Water
- Open the clean water valve.
- Drain any remaining clean water from the system.
- Close the valve securely.
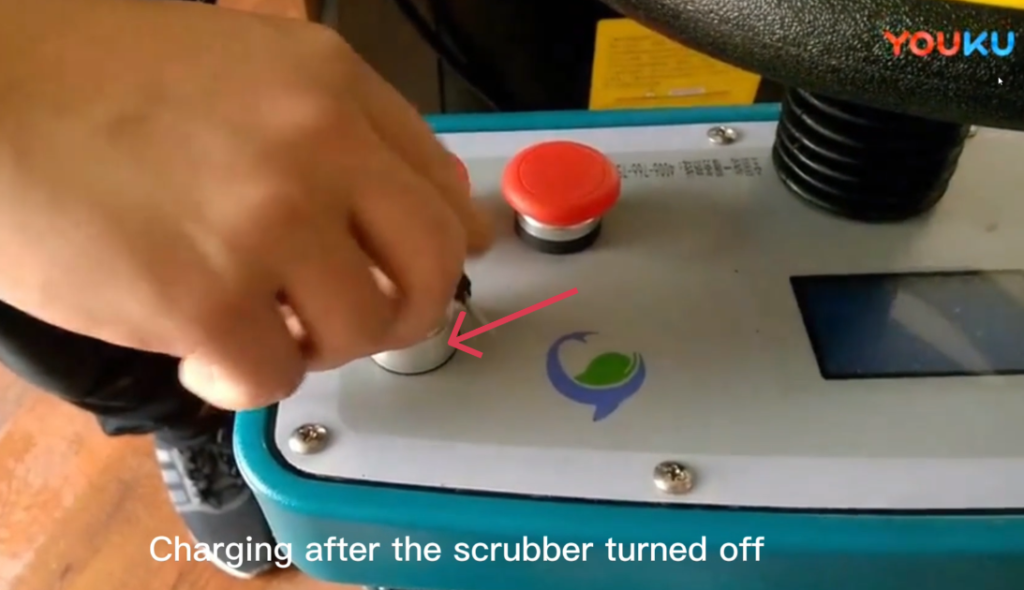
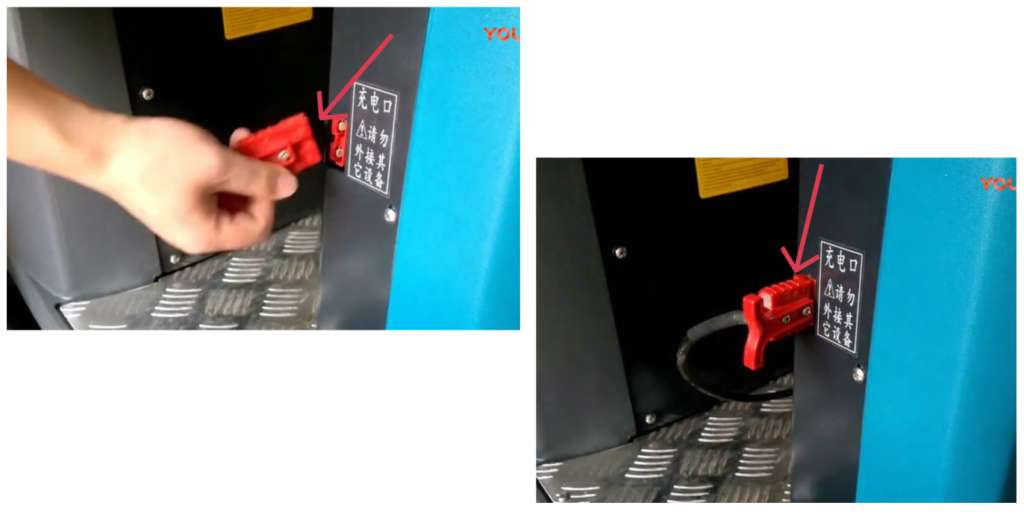
11. Charging the Machine
⚠ WARNING
Always turn the machine OFF before charging.
- Turn the scrubber completely OFF.
- Connect the charger to the charging port.
- Plug the charger into a grounded power outlet.
- Allow the battery to charge fully.
- Disconnect the charger before the next use.
12. Maintenance Guidelines
12.1 Daily Maintenance
- Empty and rinse recovery tank
- Clean brushes and squeegee
- Check machine for leaks or damage
12.2 Weekly Maintenance
- Inspect squeegee blades for wear
- Clean solution filter
- Check tire condition
⚠️ Always turn off the machine before maintenance.
12.3 Battery Maintenance
- Recharge batteries after each shift
- Do not allow batteries to fully discharge regularly
- Keep battery terminals clean and dry
This machine is equipped with optional sealed lead-acid batteries featuring maintenance-free operation, no routine servicing, and automatic pressure-relief protection.
General Charging Principles
- Charge after each use. Recharge the battery as soon as the machine finishes operating.
- Do not deep discharge frequently. Avoid running the battery down to its minimum protection voltage.
- Use as you charge, charge as you use. Frequent partial charging is recommended to maximize battery life.
1. What Is a Short Circuit and How Does It Affect Battery Performance?
A short circuit occurs when the positive and negative terminals are directly connected, either externally or internally within the battery, causing a high current flow.
Effects of a Short Circuit:
- During charging, battery voltage rises very slowly and remains at a low level
- Electrolyte temperature increases rapidly and excessively
- Electrolyte density increases slowly or shows little to no change
- During discharge, terminal voltage drops quickly
Short circuits can cause severe damage, overheating, and permanent loss of battery capacity.
2. What Is Over-Discharge and How Does It Affect Battery Performance?
Over-discharge occurs when the battery continues discharging after reaching its minimum operating voltage.
Effects of Over-Discharge:
- Battery voltage drops sharply in a short time
- Internal chemical reactions become unstable
- Repeated over-discharge causes the positive plates to lose activity
- Battery service life is significantly reduced
- Operating time decreases and charging time increases
To protect battery life, avoid repeated deep or over-discharge conditions.
3. How Should the Battery Be Stored After Use?
Batteries are sensitive components. If the machine will not be used for an extended period:
- Remove the battery from the machine
- Store it in a dry, well-ventilated location at room temperature
- Avoid leaving the battery installed, as connected electrical components and circuit boards may cause continuous micro-discharge, even when the machine is powered off
Proper storage helps prevent capacity loss and premature aging.
4. Why Does Battery Life Become Shortened?
Common causes of reduced battery life include:
- Insufficient charging over long periods
- Leaving the battery uncharged for extended periods after discharge
- Frequent over-discharge during operation
- Using a non-standard or non-approved charger, leading to over-charging
- Voltage imbalance between batteries within a battery pack
- Long-term operation under low-voltage conditions
To ensure optimal performance and service life, always use the specified charger and follow the recommended charging and usage practices.
12.4 Squeegee Maintenance – Disassembling the Squeegee (Replacing Blades)
12.4.1 Removing the Squeegee Assembly from the Machine
- Locate the squeegee assembly at the rear of the machine.
- Find the vacuum hose connected to the top or center of the squeegee.
- Hold the hose firmly and pull it straight off the squeegee inlet.
- Do not twist excessively.
- Locate the two mounting knobs / hand knobs on the left and right sides.
- Turn both knobs counterclockwise until they are fully loosened.
- Carefully lower and remove the squeegee assembly from the mounting bracket.
- Place the squeegee on a clean work surface.
12.4.2 Removing the Squeegee Blades
- Loosen the hand knobs or fasteners holding the clamps.
- Slide the rubber squeegee blades out of the blade holder.
- Locate the blade retaining clamps or brackets.
- Remove the rear clamp, then the front clamp.
- Inspect the blades:
- Replace if worn, torn, or uneven
- Flip if the blade has a usable second edge
12.4.3 Installing the Squeegee Blades
- Insert the front blade into the front blade slot.
- Make sure it is centered and straight.
- Install the rear blade in the same way.
- Reinstall the front and rear clamps.
- Tighten the hand knobs by hand only.
- Do not over-tighten.
12.4.4 Installing the Squeegee Assembly
- Lift the squeegee assembly and align it with the mounting bracket.
- Position the assembly evenly between the mounts.
- Tighten both mounting knobs clockwise until secure.
- Reconnect the vacuum hose:
- Push it fully onto the squeegee inlet
- Ensure a tight seal
12.4.5 Squeegee Adjustment
Proper adjustment is important for good water pickup.
- Lower the squeegee to the floor.
- Check that both blades touch the floor evenly.
- Adjust the angle or height if needed using the adjustment knobs.
- The rear blade should form a smooth, even curve against the floor.
12.4.6 Final Check
- Turn the machine ON.
- Run the machine for a short test.
- Check for:
- Proper water pickup
- No water streaks
- Secure hose connection
- Re-adjust if necessary.
Notes
- Always replace blades in pairs for best performance.
- Clean the squeegee after each use to extend blade life.
- Improper installation can reduce water recovery.
12.5 Cleaning Brush Maintenance
Daily Maintenance (After Each Use)
- Power off the machine and remove the brush
- Remove hair, string, and debris from bristles
- Rinse with clean water only (no hot water or corrosive chemicals)
- Air dry in a well-ventilated area; do not expose to direct sunlight
Routine Inspection (Weekly / Monthly)
- Check bristle wear and deformation
- Ensure brush is securely mounted
- Inspect drive hub for abnormal wear
- Rotate brush position if applicable to ensure even wear
Replacement Criteria
Replace the brush when:
- Bristle length is worn to approx. 50% of original
- Bristles are severely bent, flattened, or broken
- Cleaning performance is noticeably reduced
- Abnormal vibration or noise occurs (after excluding other causes)
Proper Use Guidelines
- Use the correct brush type for the floor surface
- Do not over-apply brush pressure
- Avoid prolonged use on uneven or sharp surfaces
- Do not operate with excessively worn brushes
13. Troubleshooting
| Problem | Possible Cause | Solution |
|---|---|---|
| Machine does not start | Battery discharged | Recharge batteries |
| Poor cleaning results | Worn brushes | Replace brushes |
| Water left on floor | Worn squeegee | Adjust or replace blades |
| No water flow | Clogged filter | Clean filter |
14. Storage
- Store the machine indoors
- Empty all water tanks before storage
- Charge batteries before long‑term storage
- Park on a flat surface with parking brake engaged
15. Important Safety and Maintenance Notes
- Always raise the squeegee when reversing.
- Never bypass the emergency stop function.
- Perform cleaning and drainage after each use.
- Proper maintenance ensures best performance and longer machine life.